User Schema Attributes
- 22 Sep 2024
- 1 Minute to read
- Print
- DarkLight
- PDF
User Schema Attributes
- Updated on 22 Sep 2024
- 1 Minute to read
- Print
- DarkLight
- PDF
Article summary
Did you find this summary helpful?
Thank you for your feedback
Add user schema attributes to uniquely identify and manage user accounts. These attributes define the user's identity, such as their name, email address, phone number, job title, department, location, and so on.
CI supports the capability to expand identity object attribute schema as per the requirement.
Add a user attribute:
Navigate to Advanced from the menu.

Click Add Attribute. The Add New Attribute window will appear.
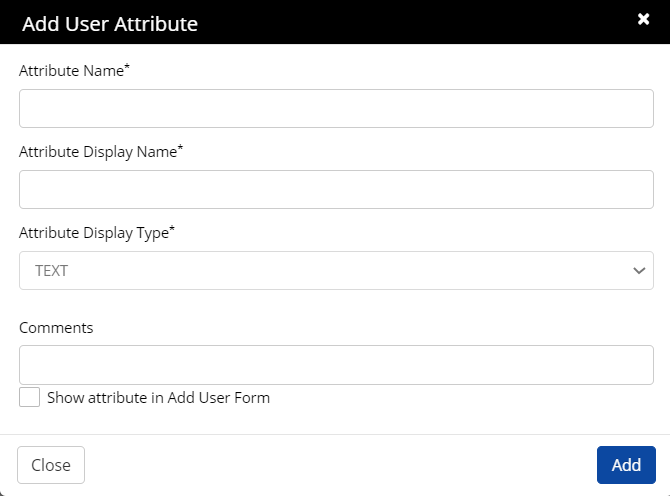
Complete these fields:
Attribute Name: Enter the attribute name.
Attribute Display Name: Enter a user-friendly display name.
Attribute Display Type: Select display type from the drop-down list.
Text: Select this attribute to accept the input as text. You can add comments related to the attribute in the form of instructions, notes, etc. Example: We create an attribute called Work Location. In the comments: you can mention Enter any of these BLR, GUR, or MUM.
Password: Select this attribute to accept the input as a text password.
Drop-down: Select this attribute to accept the input as a drop-down list.
Checkbox: Select this attribute to accept as a multiple checkbox selection.
Radio: Select this attribute to accept the input as a single selection radio button.
List: Select this attribute to accept the input as a list.
Text area: Select this attribute to accept the input as descriptive text.
Date: Select this attribute to accept the input as a date.
Email: Select this attribute to accept the input as an email id.
Click Add.


Edit User Schema Attributes
Select the attribute you want to edit.
Click the View/Edit Attribute tab. The View/Edit User Attribute window appears as shown below.
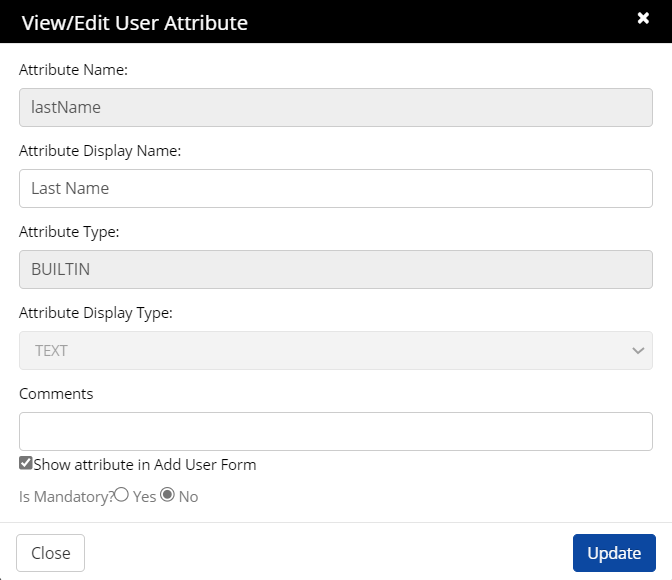
Attribute Display Name is the only editable field. All other fields are disabled.
Information:
You cannot enter the word 'manager' in the Attribute Display Name field. If you do and click Update, an error message stating that 'manager' is not allowed will be displayed.
Click Update. An "Attribute updated successfully' confirmation message is displayed.
Click Close.

Delete an attribute
Select an attribute you want to delete.
Click Delete Attribute. A message is displayed to confirm the step.
Click Delete.
Was this article helpful?
.png)