User Menu Setup
- 18 Feb 2025
- 1 Minute to read
- Print
- DarkLight
- PDF
User Menu Setup
- Updated on 18 Feb 2025
- 1 Minute to read
- Print
- DarkLight
- PDF
Article summary
Did you find this summary helpful?
Thank you for your feedback
Within the User Menu, you have the ability to customize several options, including
selecting the attribute value that will be displayed to identify a user upon login to the end-user portal. For instance, you can display the user's first name, full name, or employee ID.
set the default landing page for the end-user portal. Additionally, you can specify which attributes the user can edit in the "My Profile" section of the end-user portal.
Information:
Select the Allow end user to view stored SSO credentials to allow the end-user to view their saved credentials in 'Manage Credentials' of the end-user portal.
Configure User Identification Attribute
Navigate to User License > User Menu.
From the Display user's drop-down menu, select the attribute you want to be displayed in the top right-hand corner of the end user portal.
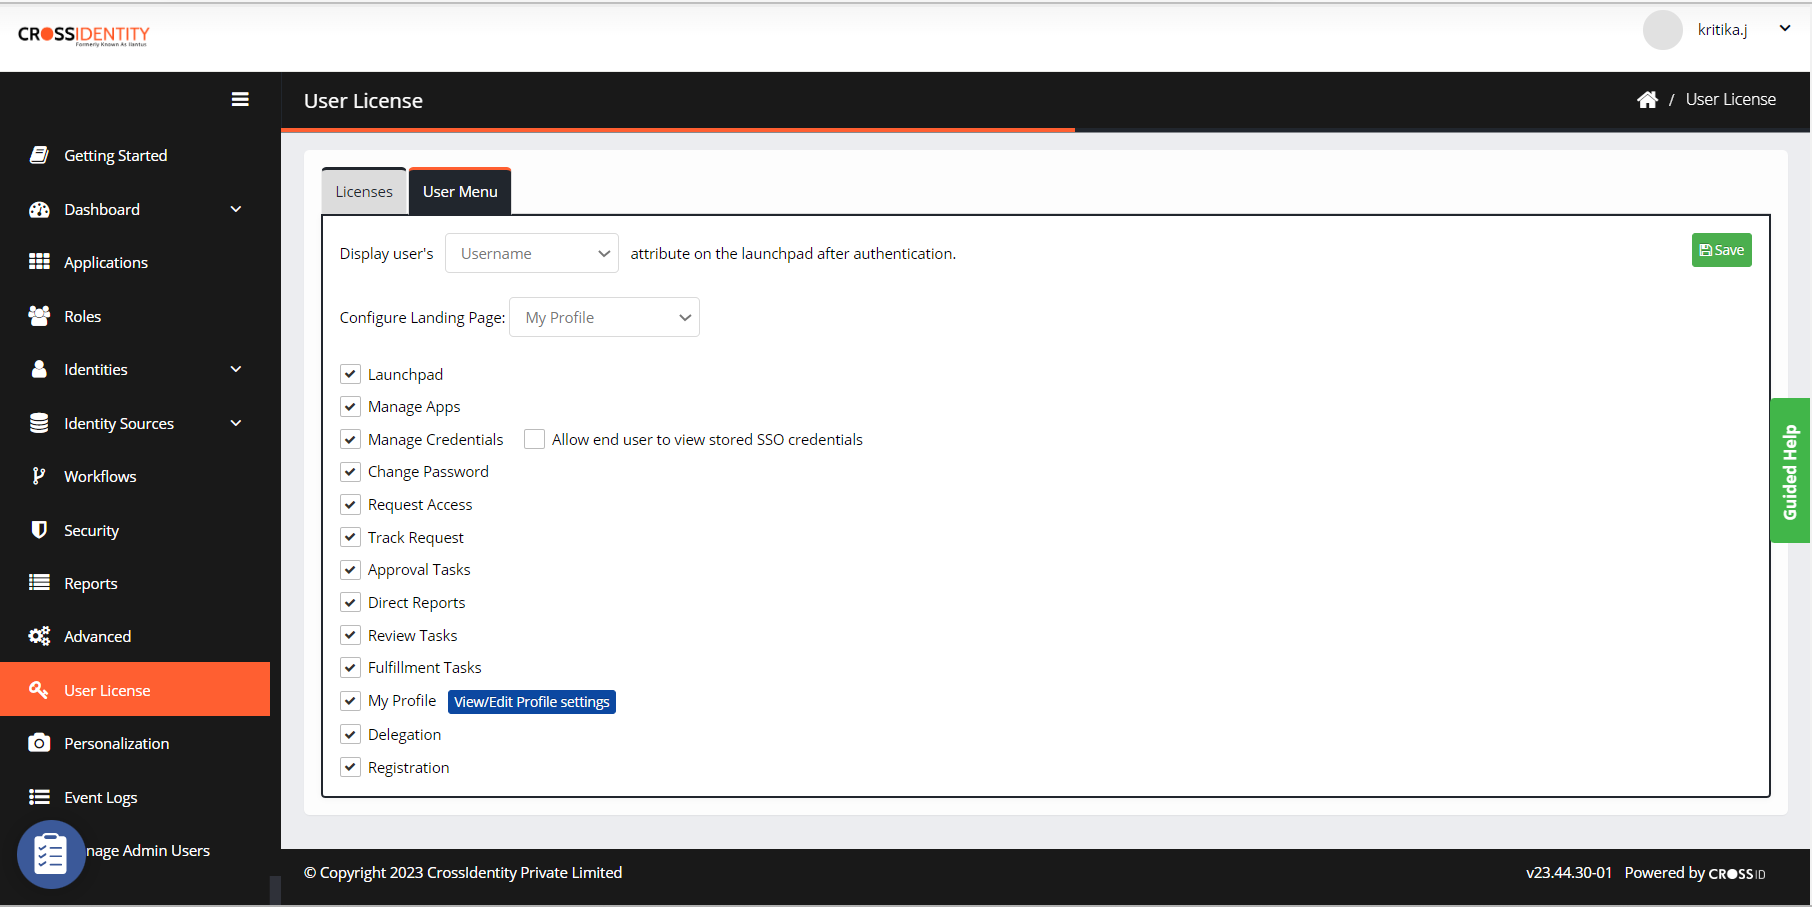
Click Save to incorporate all changes.
The End User application, as shown below, will now display the selected option (My Profile) as the default landing screen.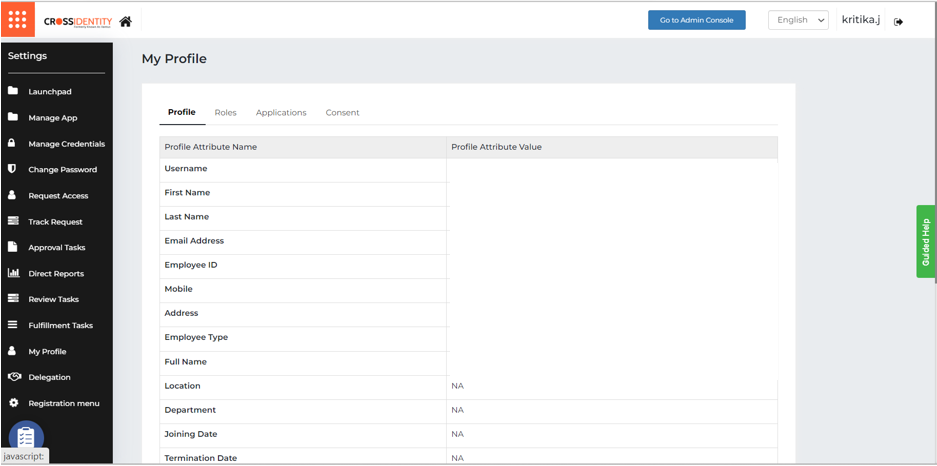


Information:
If a particular menu item is not assigned to the user (for example, 'My Requests') in an admin role-based menu, the user will be directed to the following Launchpad by default.
If the Launchpad is not assigned to a particular role, the user will be directed to the Welcome to Cross Identity screen by default.
Configure User Landing Page
From the Configure Landing Page drop-down menu, choose the option you want as the default landing page in the end user portal. This landing page should appear either when you log in or when you click on the Home Page icon.

Select against the menu list to enable it for an end user.
Click Save to incorporate all the changes.

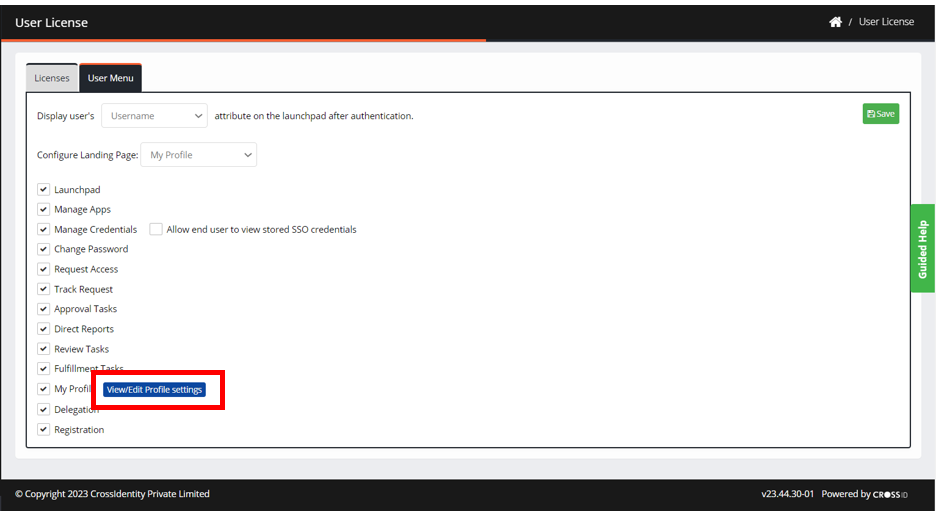
Configure Editable Attributes
From the User Menu, click View/Edit Profile settings.
Select the required attributes which should be shown in My Profile and are editable.
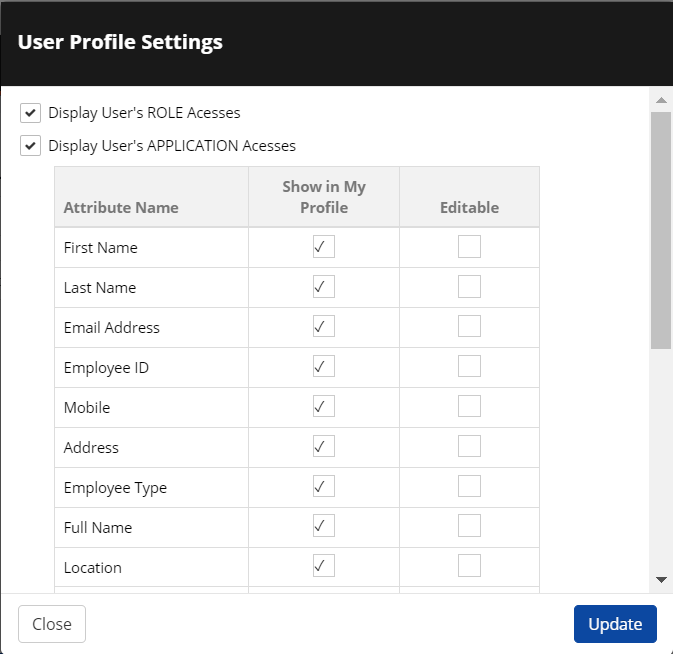
Click Update and Save.


Was this article helpful?
.png)