Troubleshooting Guide
- 19 Feb 2025
- 3 Minutes to read
- Print
- DarkLight
- PDF
Troubleshooting Guide
- Updated on 19 Feb 2025
- 3 Minutes to read
- Print
- DarkLight
- PDF
Article summary
Did you find this summary helpful?
Thank you for your feedback
If you encounter any of the issues or errors listed below, Cross Identity suggests following the provided guidance to address the error before contacting Cross Identity Support.
Once CSV import is completed, the user is not created in CI.
Resolution: Open the CSV file in Notepad and check whether any field is kept blank, and the number of columns is equal to the number of values, the username should be present mandatorily.
After CSV file import, the manager is not assigned to the user created in CI.
Resolution: While mapping attributes, choose the manager name attribute value from the CSV and map it with the username attribute of CI, which is the mandatory attribute in the CSV file.
How do we enable the 636 SSL certificate on the agent server?
Resolution: Follow the below steps to enable the certificate:
Place the certificate in the agent folder.
Open the bin path using the below command.
C:\Windows\system32>cd C:\<CIDagent>\jre\binNow run the given command (certificate name 1: provide new certificate name, certificate name 2: Provide the existing certificate name placed in the Cross Identity folder).
C:\Cross Identity\<CIDagent>\jre\bin>keytool -importcert -alias "certificate name 1" -keystore "C:\Cross Identity\<CIDagent>\jre\lib\security\cacerts" -storepass changeit -file "C:\Cross Identity\certificate name 2"
User does not receive OTP to the registered mobile number for the password reset and account unlock procedure.
Resolution: You need to check the SMS credit balance in Cross Identity. Follow the below path to check the SMS credit balance:
CI.Admin > Advanced > SMS Configuration > Credits
User does not receive a first-time login password to the registered mobile number.
Resolution: Check the SMS Notifications in Cross Identity if it is enabled.
CI.admin > Advanced > SMS Configuration > SMS Notification > Enable user creation notification.
How to create a "userid" for any attribute while adding a user through “Add User Form”, “API”, and “CSV”.
Resolution:
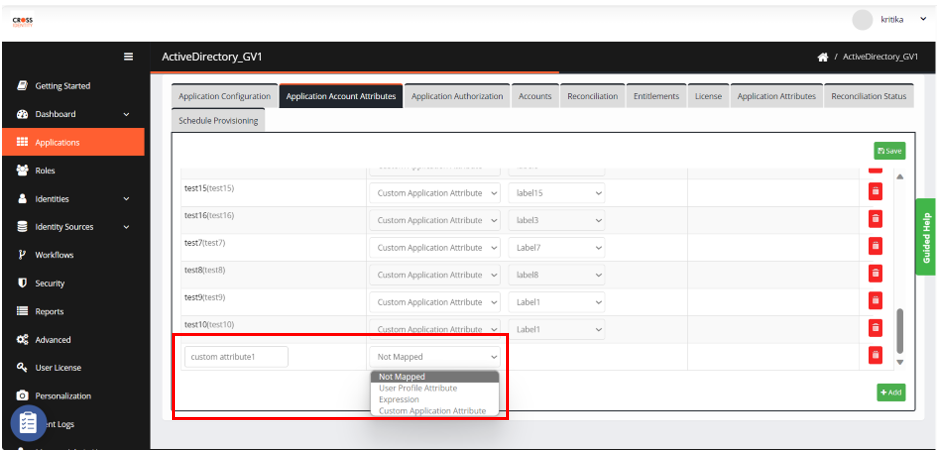
How to add custom attributes?
Resolution: Below are the steps to add custom attributes:
Open any IGA application, and navigate to Application Account Attributes.
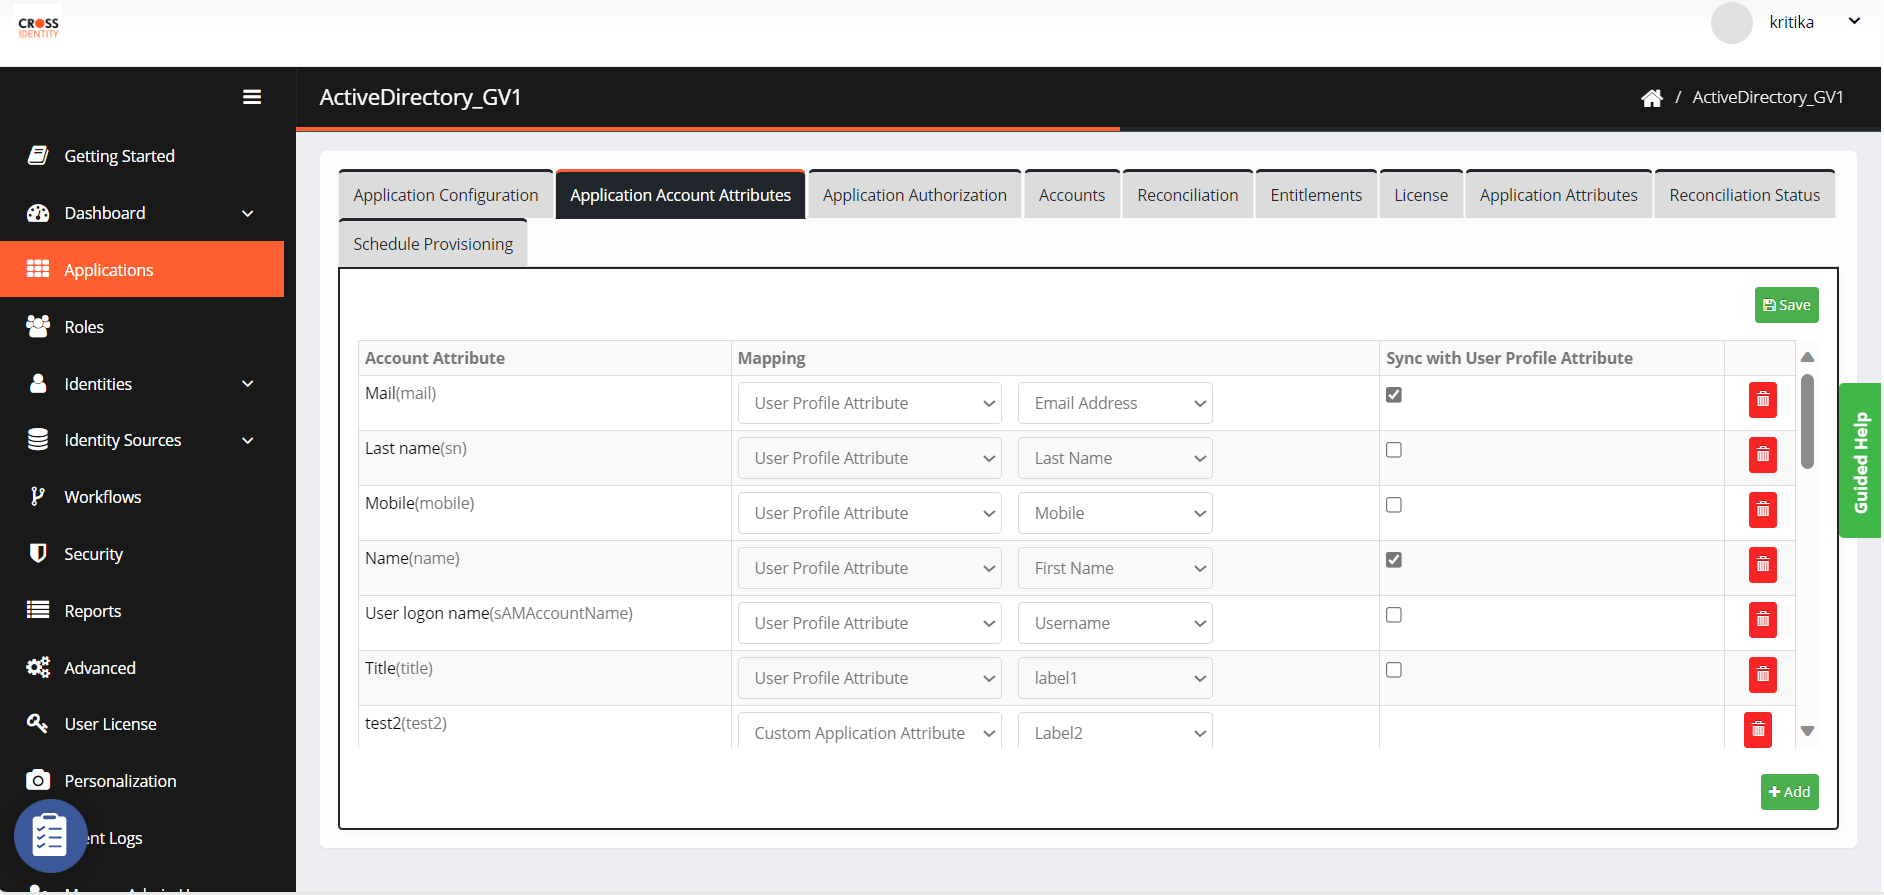
Click Add. Check the box as highlighted, enter the count of custom attributes needed and click Add.

Provide the name for a custom attribute and map it accordingly. Click Save.


Unable to delete a workflow.
Resolution: The workflow must be in progress hence preventing deletion. There are a few scenarios wherein deletion of workflow will not work:
For Access Request Workflow: the user has requested workflow, but the approver didn't act.
For Access Certification Workflow:
For Immediate Fulfillment: the workflow has been started and the reviewer has taken actions for only a few users.
For Delayed Fulfillment: the workflow has been started, and the reviewer has also taken action. However, as it is delayed fulfilment, the certification process cannot be completed until the scheduler stops, preventing the workflow from being deleted.
Clear entitlement does not remove all the entitlements within the IGA application. Only a subset of entitlements is deleted, while the remainder persists even after resetting the account.
Resolution: Go to the IGA application -> Entitlements-> Clear Entitlements -> select the required option, i.e., only entitlements must be removed or both definitions and entitlement have to be cleared.
Note:
For the entitlements that are not being cleared:
Navigate to the Workflows and inspect all workflows in the target section to verify if the uncleared entitlements are associated. If they are present, remove the entitlements and then try to clear entitlements. Please note that if the workflow is in progress, removing the target is impossible.
Change templates of email and SMS OTP.
Resolution: Navigate to Advanced > SMTP Configuration to make modifications for email and opt for SMS Configurations to modify the SMS Template. SMTP Configuration
Click User Notifications.
Select the Template Type where modification must be done. Provide the HTML content as required and click Save.
 For Reference:
 For Reference:
 <p>Dear <b>IDAAS_USERNAME,</b><br><br>
“Message to be displayed” <b> IDAAS_CRED</b><br><br>
Regards, <br>
“Team name”</p>
SMS Notifications
Click SMS Configuration > SMS Notifications.
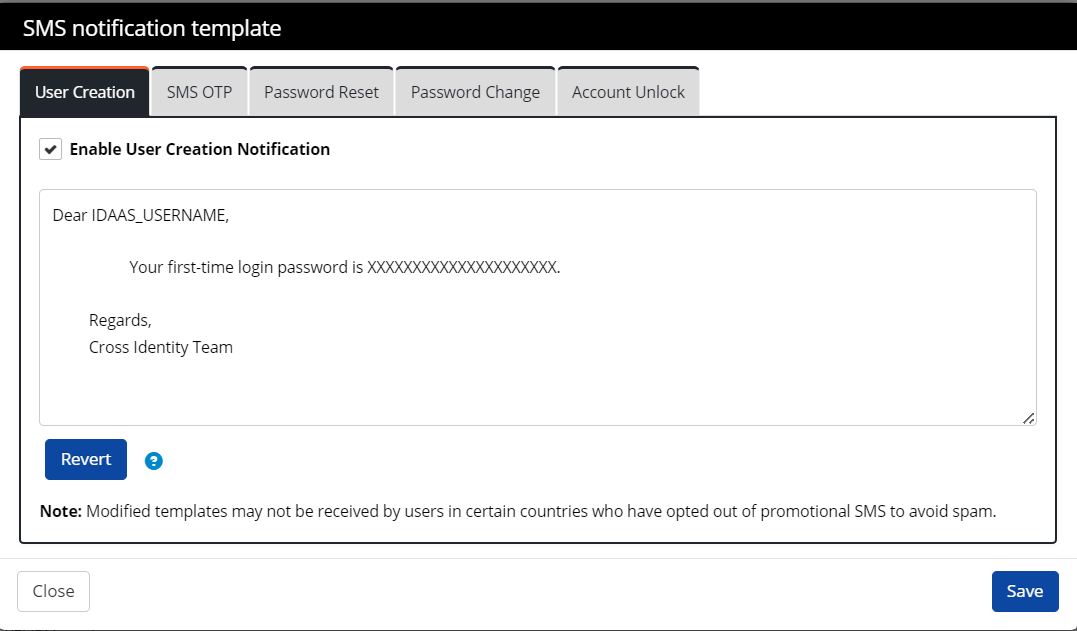
Select the template type and modify it as needed. Click Save.

Where can we find the issuer and subject used for Device Certification rules?
Double-click the certificate you have, and go to the "Details" tab. You will find the issuer and subject listed there. Please refer to the picture for better understanding.

How to change the client name from xx to yy?
Resolution: To update the client name in the fluidiam_client table, use the following query:
UPDATE fluidiam_client SET client_name = '<client_name>'WHERE client_id = <client_id>;This query changes the client_name for the specified client_id. Replace <client_name> with the desired new client name and <client_id> with the respective client’s ID.
Was this article helpful?
.png)