- 30 Jul 2024
- 1 Minute to read
- Print
- DarkLight
- PDF
SMTP Configuration
- Updated on 30 Jul 2024
- 1 Minute to read
- Print
- DarkLight
- PDF
Cross Identity offers both SMTP and API options for sending email notifications. While SMTP is a traditional method, the system has been enhanced to support API as a more secure alternative and it is an in-built API. Users have the flexibility to choose either option based on their needs.
Configure SMTP settings
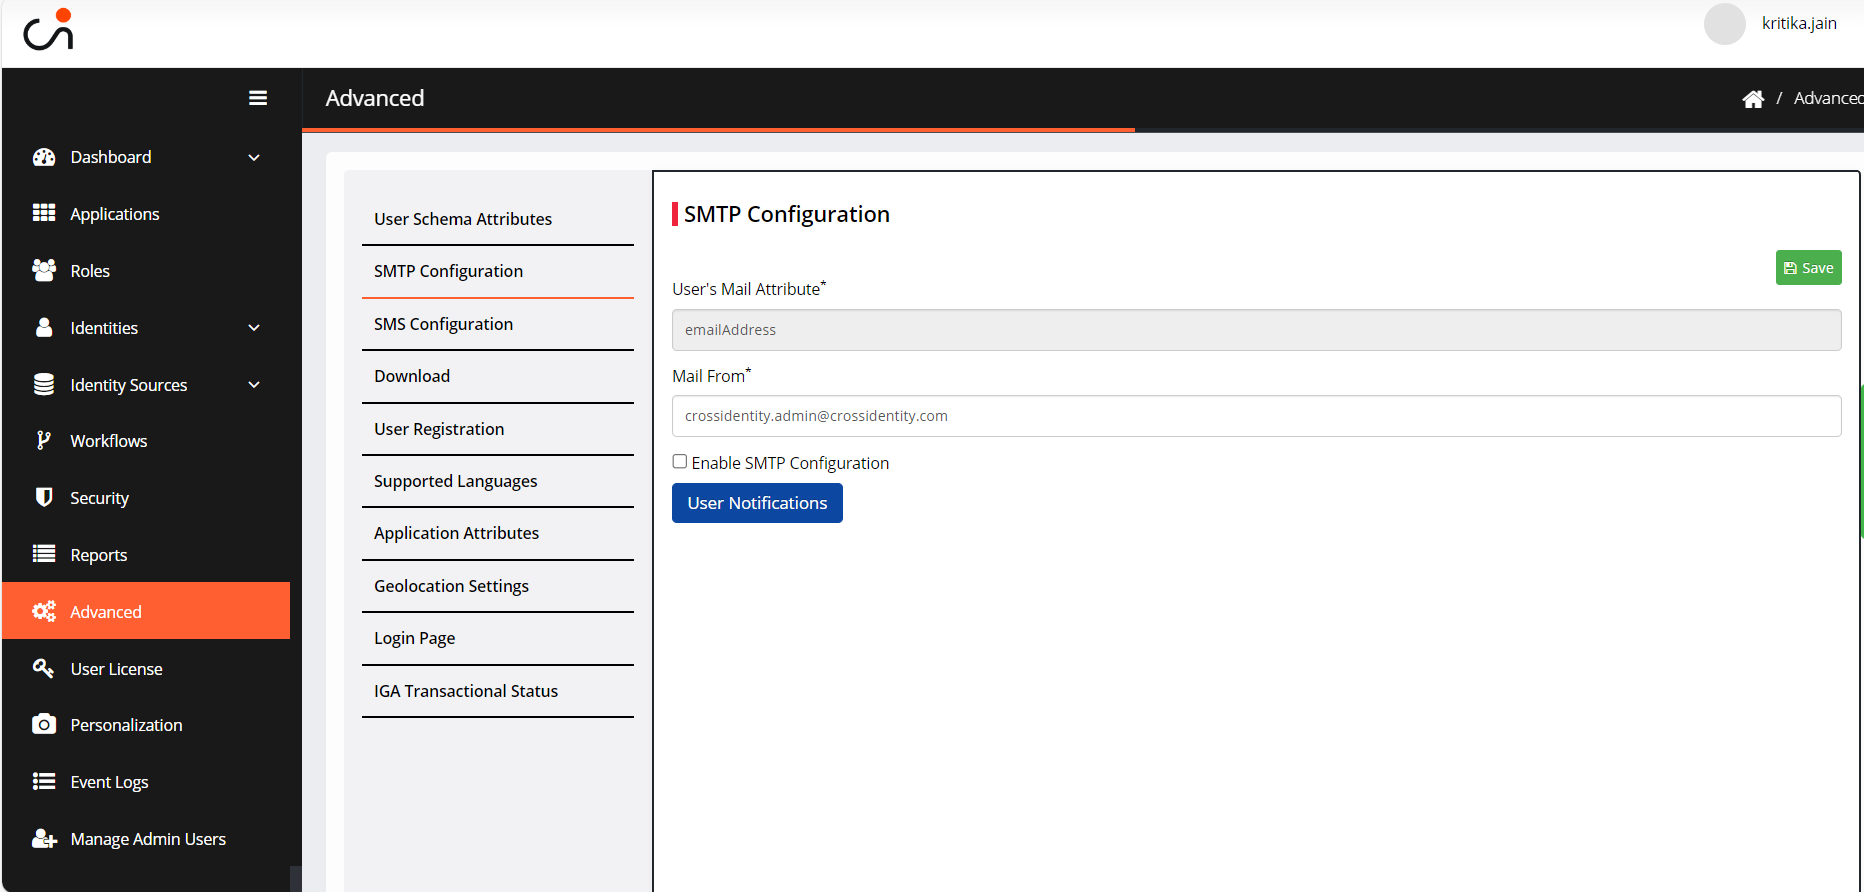
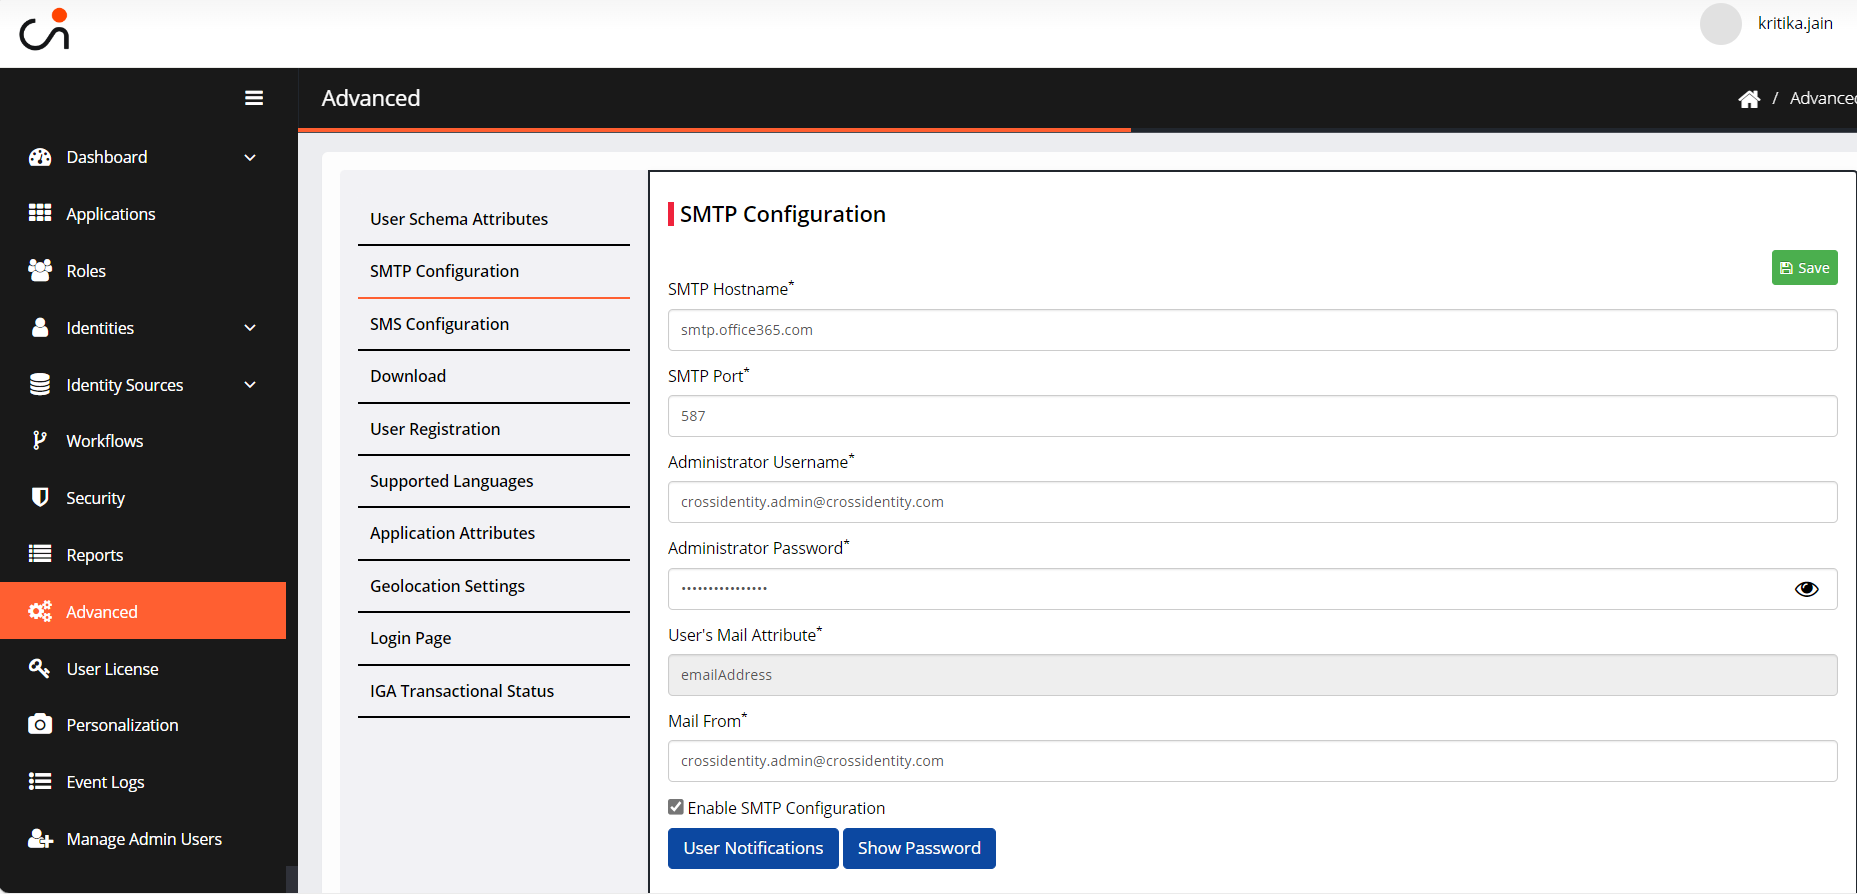
Click SMTP Configuration. The SMTP Configuration screen appears.

By default (if it is unchecked), email notifications are sent by API.
To enable SMTP configuration, click Enable SMTP Configuration (a more secure way and upgraded technology) and fill in the required details:

SMTP Hostname is the outgoing mail server name. The administrator must provide the SMTP application server's hostname/IP address, and the customer should give these particulars.
SMTP Port defines the communication endpoints of a computer linked to a network. In the SMTP port, mention the port number on which the application runs.
Administrator Username: In this field, enter your SMTP user email address. This user should have the privilege to send the mail notifications. Example: crossidentityqa.admin@crossidentity.com.
Administrator Password: Provide the password for the SMTP Administrator account.
User's email attribute: By default, it is email address.
Mail from: This is a user-friendly field. You can specify any email address from which the user should receive emails. Example: If you provide no-reply@crossidentity.com in the field. Once the user gets an email notification, the sender mail ID will be shown as no-reply@crossidentity.com.
Note:
We are using Brevo email service provider to invoke API to send the email notifications. It is an integrated API.
Click Save.
Configure User Notifications
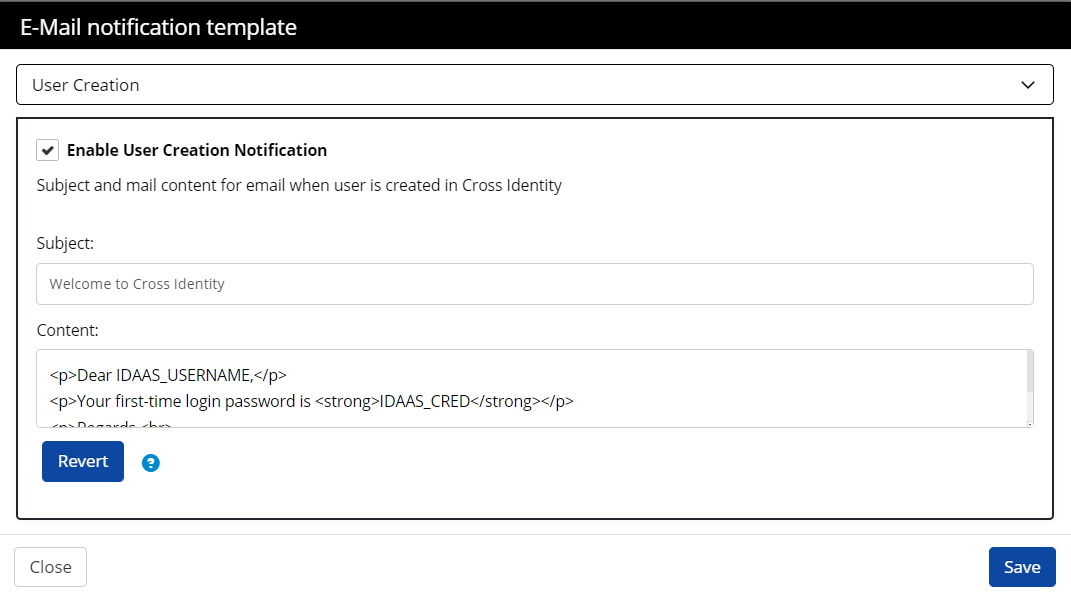
Cross Identity provides email notification templates that can be edited and customized as per your preference. To configure user notifications:
Click SMTP Configuration. The SMTP Configuration screen appears.
Click User Notifications. The Email Notification Template window appears.

In the content of the email, you can opt to include User Schema Attributes as part of CI standard attributes, instead of limiting it solely to the Username attribute.
Each attribute should be prefixed with IDAAS_ when used in the template. Also, the attributes in the email template should be separated by a space. Example: <p> Dear IDAAS_firstName IDAAS_lastName,</p> <p>Your first-time login password is <strong>IDAAS_CRED</strong></p> <p>Regards,<br> <strong>Cross Identity Team</strong></p>

Click Save. A "Successfully updated email notifications" confirmation message is displayed.
Click Close.
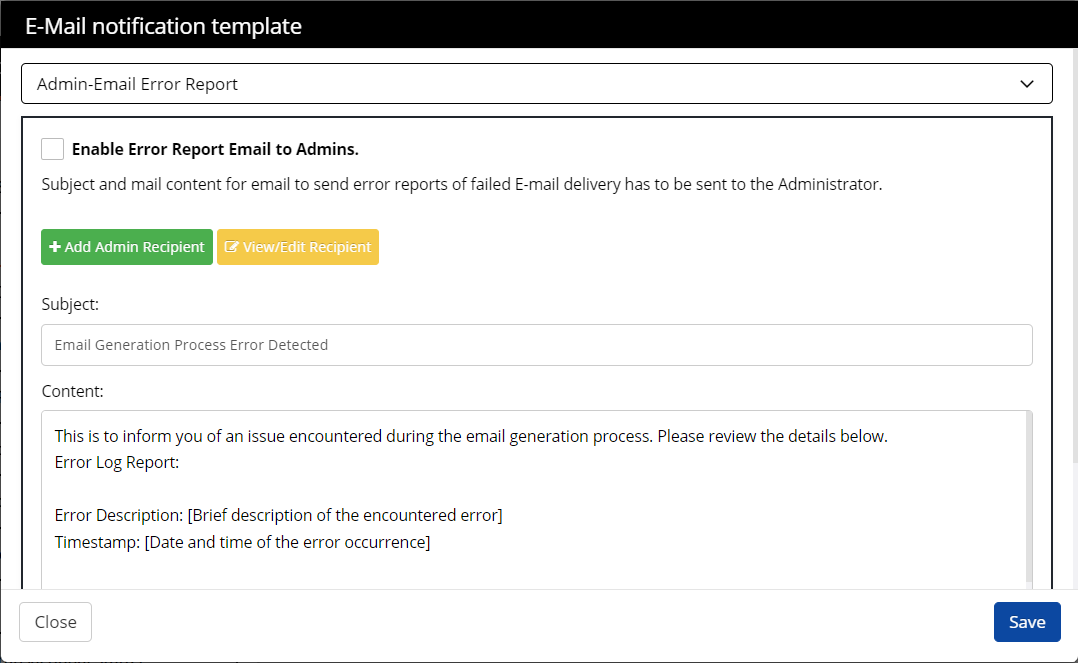
Admin Email Error Report
Select this notification report to Alert the admin of any issues encountered during the email generation process.

Click +Add Admin Recipient to add other recipients.
.png)


.png)