Pre-requisites to Setup Mobile App
- 19 Feb 2025
- 1 Minute to read
- Print
- DarkLight
- PDF
Pre-requisites to Setup Mobile App
- Updated on 19 Feb 2025
- 1 Minute to read
- Print
- DarkLight
- PDF
Article summary
Did you find this summary helpful?
Thank you for your feedback
There are two pre-requisites:
You need to make code-level changes in your application. An SDK(Software Development Kit) will be provided by Cross Identity.
While installing the application on your mobile, give the required permission.
Follow the steps to make the modifications to your mobile application:
Add libraries
Download the <.arr> SDK file and copy it to your project.
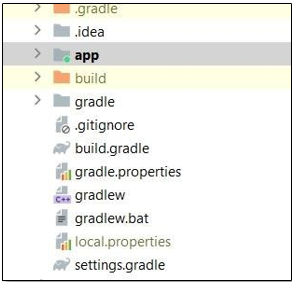
Open the build.gradle file.
Add the below dependencies:
implementation files('path/*.aar') implementation
"androidx.security:security-crypto:1.1.0-alpha06" implementation
'com.google.code.gson:gson:2.9.0'// gson implementation
'com.squareup.retrofit2:converter-gson:2.9.0'// Retrofit implementation
'com.squareup.okhttp3:logging-interceptor:4.9.3'//http implementation
'com.squareup.okhttp3:okhttp:4.9.3'Open the existing local.properties located in /gradle and add the following values for these parameters as shown:
CLIENT_ID: Enter the Client Identifier from the application configuration tab while onboarding the Native App SSO
Example: CLIENT_ID="gunRLrIjIu3Le8yeUhQV"
REDIRECTION_URL: Enter com.first.sample:/callback as the value, which is what you defined as the Sign-in redirect URI in the Native app application configuration tab.
Example: REDIRECTION_URL="crossidentity\://callback"
GRANT_TYPE: "authorization_code": The Authorization Code grant type is used by confidential and public clients to exchange an authorization code for an access token
Example: GRANT_TYPE="authorization_code"
BASE_URL: Enter your Cross Identity base url.
Example: BASE_URL="https\://mss-poc.crossidentity.com/"
SCOPE: scopes provide a way to limit the amount of access that is granted to an access token for Native Application SSO.
Example: SCOPE="openid email device_sso"
STATE: The state parameter is used to protect against XSRF. Your application generates a random string and sends it to the authorization server using the state parameter.
STATE=""After all the changes then sync the project.
Run the application, LibraryCheckActivity will show the following options:
Authenticate: For authentication, we pass the param as “4”, which will start the authentication process. btn_authenticate.setOnClickListener { startActivityForResult( Intent(this, LibMainActivity::class.java).putExtra("for", 4),103
) }
Logout: For Logout, we pass the param as “2”, which will start the Logout process. btn_logout.setOnClickListener { startActivityForResult(Intent(this, LibDashboard::class.java).putExtra("for", 2),
103
)
}
Exchange Token: For Exchange Token, we pass the param as “3”, which will start Exchange
Token process.
btn_exchange.setOnClickListener { startActivityForResult(Intent(this, LibDashboard::class.java).putExtra("for", 3),
103
) }
Introspect: For Introspect, we pass the param as “1”, which will start Introspect process. btn_introspect.setOnClickListener { startActivityForResult(Intent(this, LibDashboard::class.java).putExtra("for", 1),
103
) }
To handle the response Onactivity Result, the following response request combinations are used.

Result | Number |
Logout Success | 100 |
Failed | 111 |
Exchange Success | 101 |
Failed | 112 |
Introspect Success | 102 |
Failed | 113 |
Authentication Success | 103 |
Failed | 114 |
Was this article helpful?
.png)