- 23 May 2024
- 8 Minutes to read
- Print
- DarkLight
- PDF
PIAM Installation
- Updated on 23 May 2024
- 8 Minutes to read
- Print
- DarkLight
- PDF
Install CIPAM Server
Log in to the Compute Instance over SSH or Lish.
Install all required dependencies. For Debian users, replace libjpeg-turbo8-dev with libjpeg62-turbo-dev.
Required dependencies
To build a CPAM server, you will need Cairo, libjpeg (or libjpeg-turbo), libpng, and libuuid (or the OSSP UUID library). These libraries are strictly required in all cases.

Download the Guacamole source code.
Extract the file and navigate to its directory.
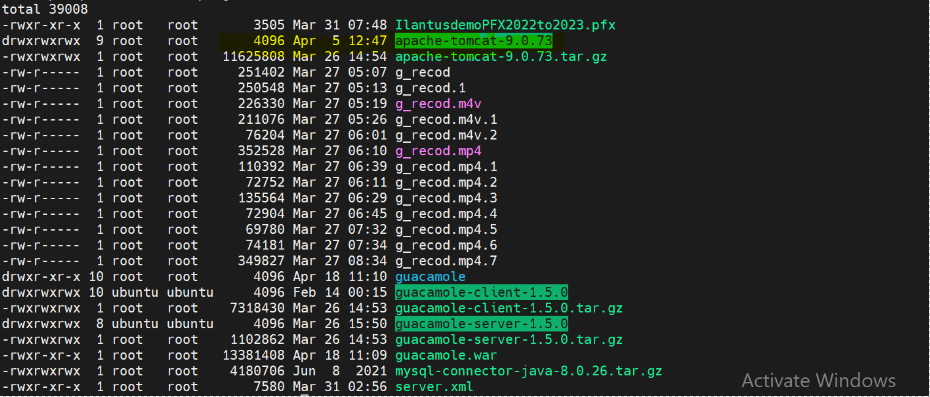
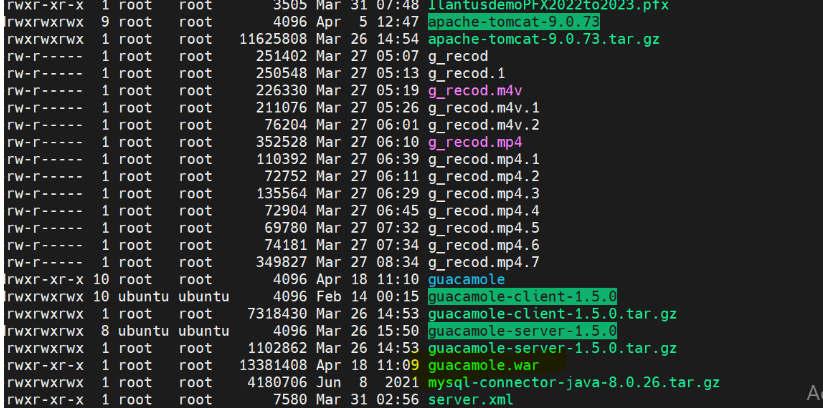
tar -xvf guacamole-client-1.5.0.tar.gz
tar -xvf guacamole-server-1.5.0.tar.gz

Build the CPAM Server using the downloaded source files(CIPAM Guacamole server directory).
sudo ./configure --with-init-dir=/etc/init.d --enable-allow-freerdp-snapshots
sudo make
sudo make install
Update the installed library cache and reload the system
sudo ldconfig
sudo systemctl daemon-reload
Start guacd
sudo systemctl start guacd
sudo systemctl enable guacd

Create a directory to store CPAM configuration files and extensions. These directories are used in later steps.
sudo mkdir -p /etc/guacamole/{extensions,lib}
Install CIPAM Web App
Install Apache Tomcat.

Download the CPAM Client
https://archive.apache.org/dist/guacamole/1.5.0/binary/guacamole-1.5.0.war

Move the client to the Tomcat web directory.
sudo mv guacamole-1.3.0.war /var/lib/tomcat9/webapps/guacamole.war
Restart both Apache Tomcat and Guacd.
sudo systemctl restart tomcat9 guacd


Setting up Database Authentication
While CPAM does support basic user authentication via a user-mapping.xml file, it should only be used for testing. For this guide, we will use production-ready database authentication through MySQL/MariaDB.
Install either MySQL or MariaDB on your system.
sudo apt install mariadb-server
Run the following command to perform the initial security configuration:
sudo mysql_secure_installation
Before populating the database, install the MySQL Connector/J library and Guacamole JDBC authenticator plugin.
Download the MySQL Connector/J (Java Connector). For this guide, download the platform-independent archived file.
wget https://dev.mysql.com/get/Downloads/Connector-J/mysql-connector-java-8.0.26.tar.gz
Extract the tar file and copy it to /etc/guacamole/lib/.
tar -xf mysql-connector-java-8.0.26.tar.gz
sudo cp mysql-connector-java-8.0.26/mysql-connector-java-8.0.26.jar /etc/guacamole/lib/
Download the JDBC auth plugin for Apache Guacamole. This file can be found at http://guacamole.apache.org/releases/ by selecting the release version and then locating the “jdbc” file.
Extract the tar file and copy it to /etc/guacamole/extensions/.t
tar -xf guacamole-auth-jdbc-1.3.0.tar.gz
sudo mv guacamole-auth-jdbc-1.3.0/mysql/guacamole-auth-jdbc-mysql-1.3.0.jar /etc/guacamole/extensions/
Log in to mysql as the root user.
mysql -u root -p
The prompt should change again to MySQL>.
While in the mysql prompt, change the root password, create a database, and create a new user for that database. When running the below commands, replace any instance of password with a secure password string for the mysql root user and the new user for your database, respectively.
ALTER USER 'root'@'localhost' IDENTIFIED BY 'password';
CREATE DATABASE guacamole_db;
CREATE USER 'guacamole_user'@'localhost' IDENTIFIED BY 'password';
GRANT SELECT,INSERT,UPDATE,DELETE ON guacamole_db.* TO 'guacamole_user'@'localhost';
FLUSH PRIVILEGES;
Exit the MySQL prompt by typing quit.
Locate the scheme files in the extracted directory for the JDBC plugin.
cd guacamole-auth-jdbc-1.3.0/mysql/schema
Import those sql schema files into the MySQL database.
cat *.sql | mysql -u root -p guacamole_db
Create the properties file for CPAM.
sudo nano /etc/guacamole/guacamole.properties


Extension Directory

Lib Directory

Restart all related services.
sudo systemctl restart tomcat9 guacd mysql
Access CIPAM in a Browser
CPAM should now be accessible through a web browser. Open your preferred web browser on your local computer.
Navigate to the URL: [ip]:8080/guacamole, replacing *[ip] with the IP address of your Linode. This will display the login prompt.
With SSL

Create a new Admin user.
Note:
Before continuing with configuring CPAM, it’s recommended that you create a new admin account and delete the original.
Click the guacadmin user dropdown menu on the top right and select Settings.
Navigate to the Users tab and click the New User button.
Under the Edit User section, enter your preferred username and a secure password.
Under the Permissions section, check all the permissions.
Click Save to create a new user.
Log out of the current user and log in as the newly created user.
Click your username on the top left and select Settings from the dropdown menu.
Navigate to the Users tab and click the guacadmin user.
At the bottom of the Edit User screen, click Delete to remove the default user.
Create an SSH Connection
To test CPAM, create a new connection in CPAM that opens up an SSH connection to the server.
After logging in to CPAM, click your username on the top left and select Settings from the dropdown menu.
Navigate to the Connections tab and click New Connection.
Under Edit Connection, enter a name for your new connection (such as “Guacamole SSH”) and select SSH as the Protocol.


If you do not wish to build Apache Guacamole entirely from the source, pre-built versions of the web application (.war) and all extensions are provided in binary form for convenience. Please note that the guacamole server must still be built and installed from the source.


Enabling SAML
SAML is a widely implemented and used Single Sign On (SSO) provider that allows applications and services to authenticate in a standard way and brokers those authentication requests to one or more back-end authentication providers. The SAML authentication extension allows CPAM to redirect to a SAML Identity Provider (IdP) for authentication and user services. This module does not provide any capability for storing or retrieving connections and must be layered with other authentication extensions that provide connection management.
Download the SAML authentication extension
CPAM’s SSO extensions are available separately from the main guacamole.war. The SSO extensions are packaged together in .tar.gz file containing one extension for each supported SSO method:
SSO Method | Extension |
|---|---|
CAS | cas/guacamole-auth-sso-cas-1.5.1.jar |
Open ID Connect | openid/guacamole-auth-sso-openid-1.5.1.jar |
SAML | saml/guacamole-auth-sso-saml-1.5.1.jar |
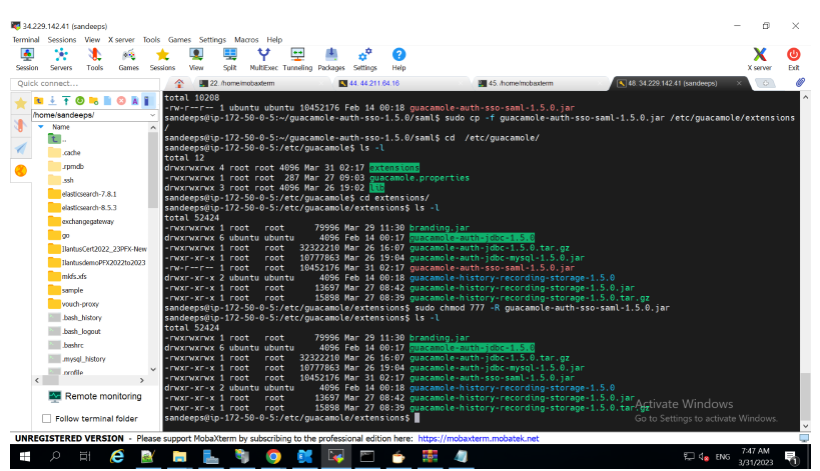
The extension for the desired SSO method, in this case, guacamole-auth-sso-saml-1.5.1.jar from within the saml/ subdirectory, must ultimately be placed in GUACAMOLE_HOME/extensions.
Installing SAML authentication
Guacamole extensions are self-contained .jar files located within the GUACAMOLE_HOME/extensions directory. If you are unsure where GUACAMOLE_HOME is located on your system, please consult Configuring Guacamole before proceeding.
To install the SAML authentication extension, you must:
Create the GUACAMOLE_HOME/extensions directory, if it does not already exist.
Copy guacamole-auth-sso-saml-1.5.1.jar within GUACAMOLE_HOME/extensions.
Configure Guacamole to use SAML authentication, as described below.
Configuring CPAM for SAML Authentication
The SAML authentication extension provides several configuration properties to set it up to talk to the IdP. The SAML IdP also must be configured with CPAM as a Service Provider (SP).
saml-idp-metadata-url
The URI of the XML metadata file from the SAML Identity Provider contains all of the information the SAML extension needs to know how to authenticate with the IdP. This URI can either be a remote server (e.g. https://) or a local file on the filesystem (e.g. file://). Often the metadata file contains most of the required properties for SAML authentication and the other parameters are not required.
saml-idp-url
The base URL of the SAML IdP. This URL SAML authentication extension will be used to redirect when requesting SAML authentication. If the saml-idp-metadata-url property is provided, this parameter will be ignored. If the metadata file is not provided this property is required.
saml-entity-id
The entity ID of the Guacamole SAML client, which is generally the URL of the Guacamole server, is not required to be so. This property is required if either the saml-idp-metadata-url property is not specified, or if the provided metadata file does not contain the SAML SP Entity ID for Guacamole Client.
saml-callback-url
The URL that the IdP will use once authentication has succeeded to return to the CPAM web application and provide the authentication details to the SAML extension. The SAML extension currently only supports callback as a POST operation to this callback URL. This property is required.
saml-strict
Require strict security checks during SAML logins. This will ensure that valid certificates are present for all interactions with SAML servers and fail SAML authentication if security restrictions are violated. This property is optional and will default to true, requiring strict security checks. This property should only be set to false in non-production environments during testing of SAML authentication.
saml-debug
Enable additional logging within the supporting SAML library that can assist in tracking down issues during SAML logins. This property is optional and will default to false (no debugging).
saml-compress-request
Enable compression of the HTTP requests sent to the SAML IdP. This property is optional and will default to true (compression enabled).
saml-compress-response
Request that the SAML response returned by the IdP be compressed. This property is optional and will default to true (compression will be requested).
saml-group-attribute
The name of the attribute provided by the SAML IdP contains the user’s group membership. These groups will be parsed and used to map the group membership of the user logging in, which can be used for permissions management within Guacamole Client, particularly when layered with other authentication modules. This property is optional, and defaults to “groups”.
Controlling login behaviour
CPAM loads authentication extensions in order of priority and evaluates authentication attempts in the same order.
If the SSO extension has priority:
Users who are not yet authenticated will be immediately redirected to the configured identity provider. They will not see a Guacamole login screen.
If a non-SSO extension has priority:
Users who are not yet authenticated will be presented with a Guacamole login screen. Additionally, links to the configured identity provider(s) will be available for users who wish to log in using SSO.
The default priority of extensions is dictated by their filenames, with extensions that sort earlier alphabetically having higher priority than others. This can be overridden by setting the extension-priority property within guacamole.properties.
Automatically redirecting all unauthenticated users
To ensure users are redirected to the SAML identity provider immediately (without a CPAM login screen), ensure the SAML extension has priority over all others:
extension-priority:*,saml
Presenting unauthenticated users with a login screen
To ensure users are given a normal Guacamole login screen and have the option to log in with traditional credentials or with SAML, ensure the SAML extension does not have priority:
extension-priority: *,saml
Installing the Recording storage extension
Guacamole extensions are self-contained .jar files located within the GUACAMOLE_HOME/extensions directory. To install the recording storage extension, you must:
Create the GUACAMOLE_HOME/extensions directory if it does not already exist.
Copy guacamole-history-recording-storage-1.5.1.jar within GUACAMOLE_HOME/extensions.
Configure your connections to store their recordings within the path searched by the recording storage extension, as described below.

Preparing a directory for recording storage
By default, the recording storage extension will search within /var/lib/guacamole/recordings for the recordings associated with a connection. Unless you or a third-party installation tool have created this directory, this directory will not exist, and you will need to create it manually:
mkdir -p /var/lib/guacamole/recordings
You can also use another directory of your choice if you override the default location using the recording-search-path property.
sudo apt install build-essential libcairo2-dev libjpeg-turbo8-dev \
libpng-dev libtool-bin libossp-uuid-dev libvncserver-dev \
freerdp2-dev libssh2-1-dev libtelnet-dev libwebsockets-dev \
libpulse-dev libvorbis-dev libwebp-dev libssl-dev \
libpango1.0-dev libswscale-dev libavcodec-dev libavutil-dev \
libavformat-dev
.png)


.png)