- 11 Nov 2024
- 3 Minutes to read
- Print
- DarkLight
- PDF
Onboard PIAM Asset
- Updated on 11 Nov 2024
- 3 Minutes to read
- Print
- DarkLight
- PDF
Follow the steps to onboard and configure the PIAM asset:
Navigate to Assets from the main menu.
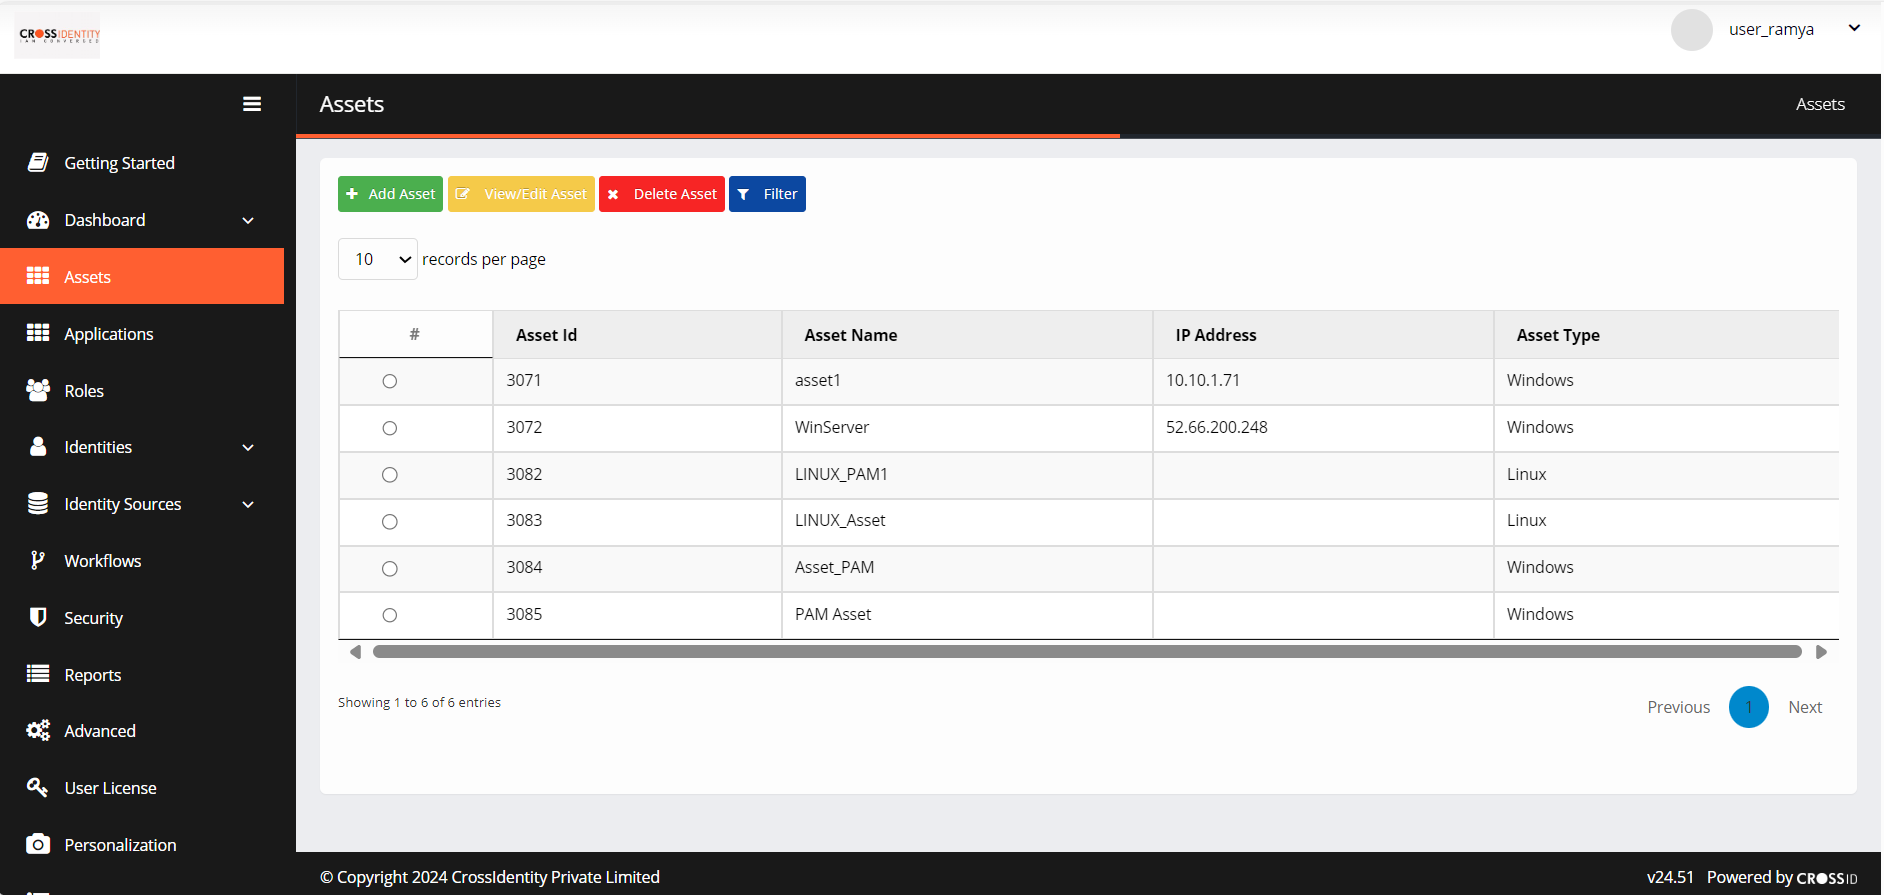
Click + Add Assets. It opens the Assets App Store.
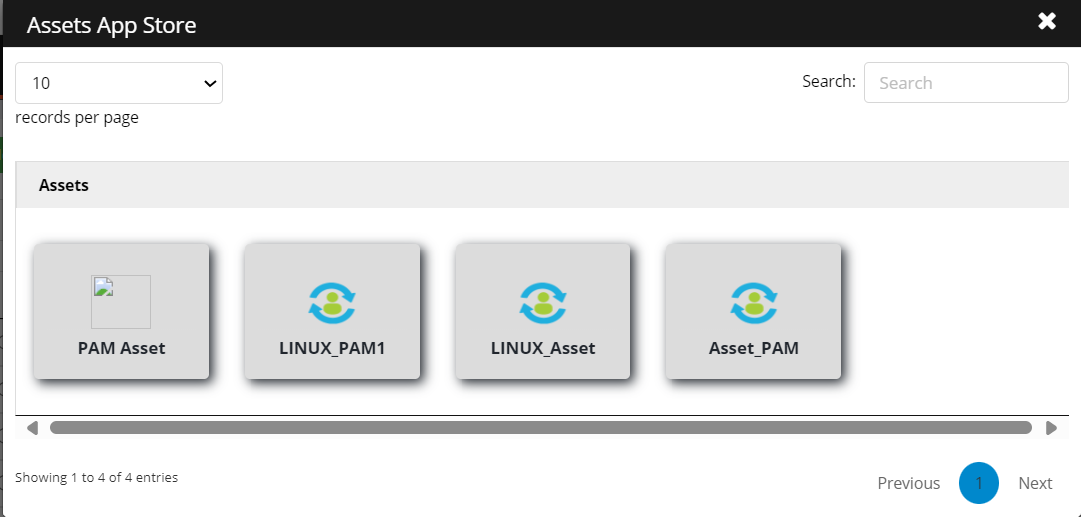
Click on the asset you wish to add and configure an asset.
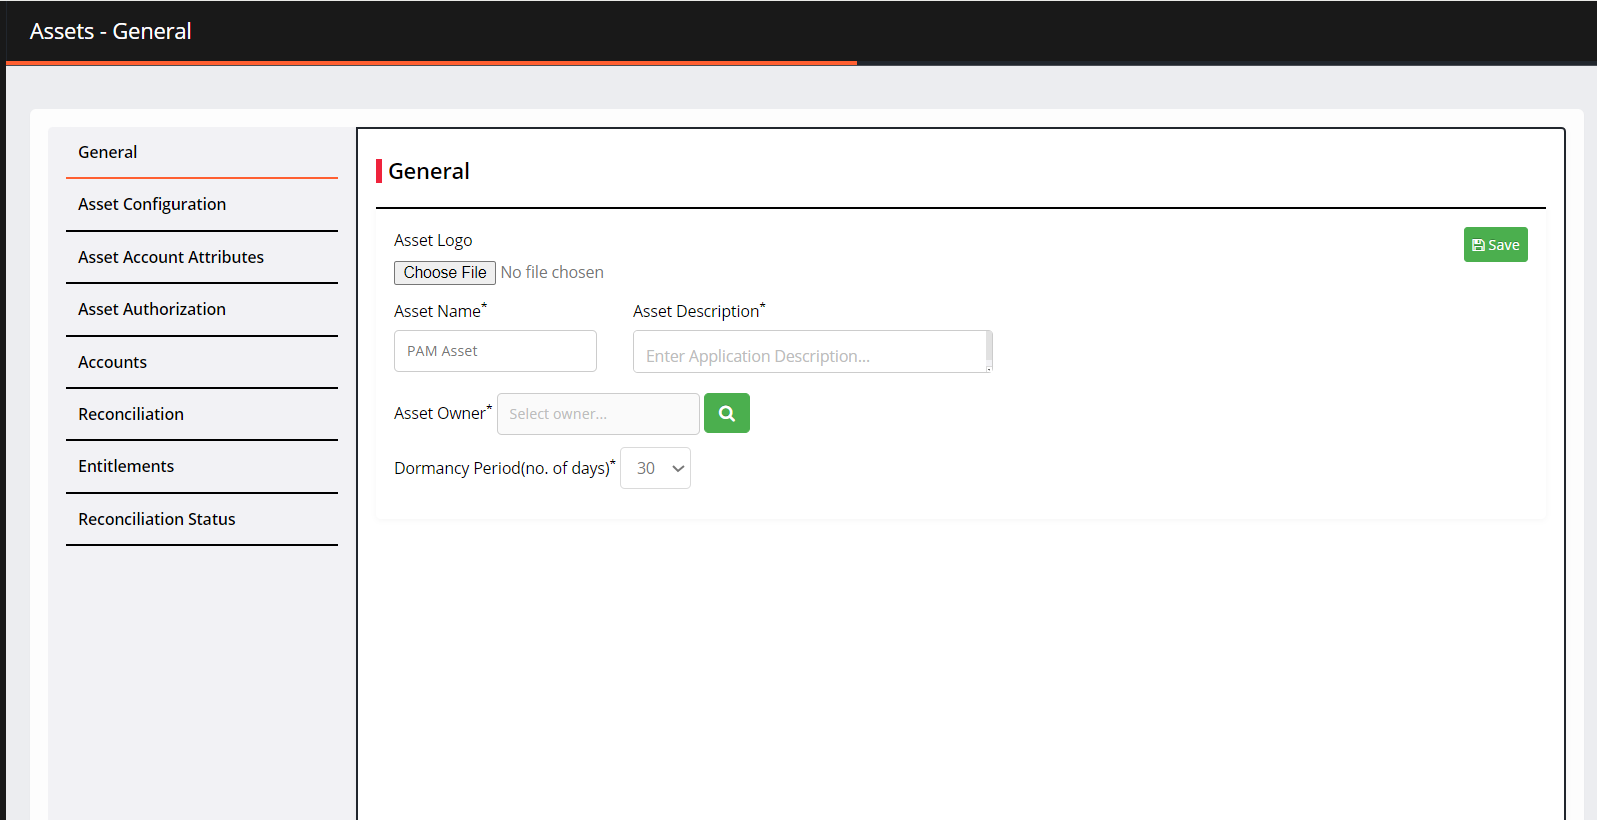
General tab
Fill in the following information:
Asset Logo: Upload a logo for the asset or select the default logo available on the user's system.
Asset Name: It is a pre-filled text field. The name can be edited as per requirement.
Asset Description: You can specify the asset details, including its purpose and other relevant information.
Asset Owner: Provide the name of the asset owner.
Dormancy Period(no. of days)*: Provide the number of days for the dormant policy.
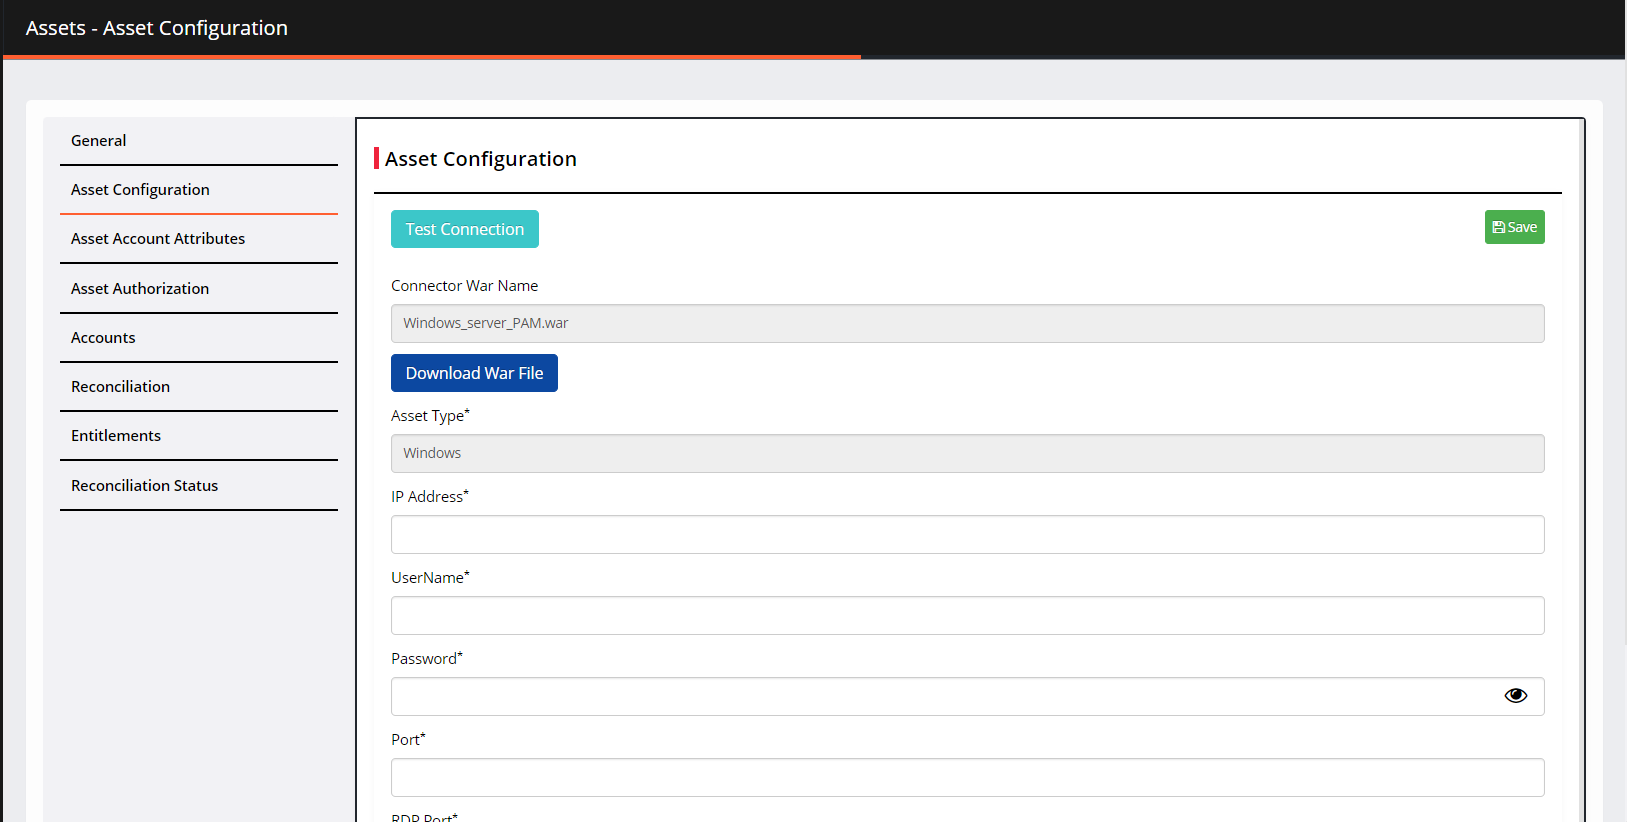
Asset Configuration
Provide the information in the following fields:
Test Connection: You can test the connectivity between the PIAM asset and the target application/system.
Connector War name: Specify the war file name.
Download Warfile: It downloads the connecter file on your system.
Asset Type: It is pr-defined.
IP address: Provide the IP address.
Username: Provide the username.
Password: Enter the password.
Port: Enter the port number.
RDP Port: Enter the RDP port number.
Public Key: Enter the public key for authentication.
Asset Account Attributes
Go to Application Account Attributes.
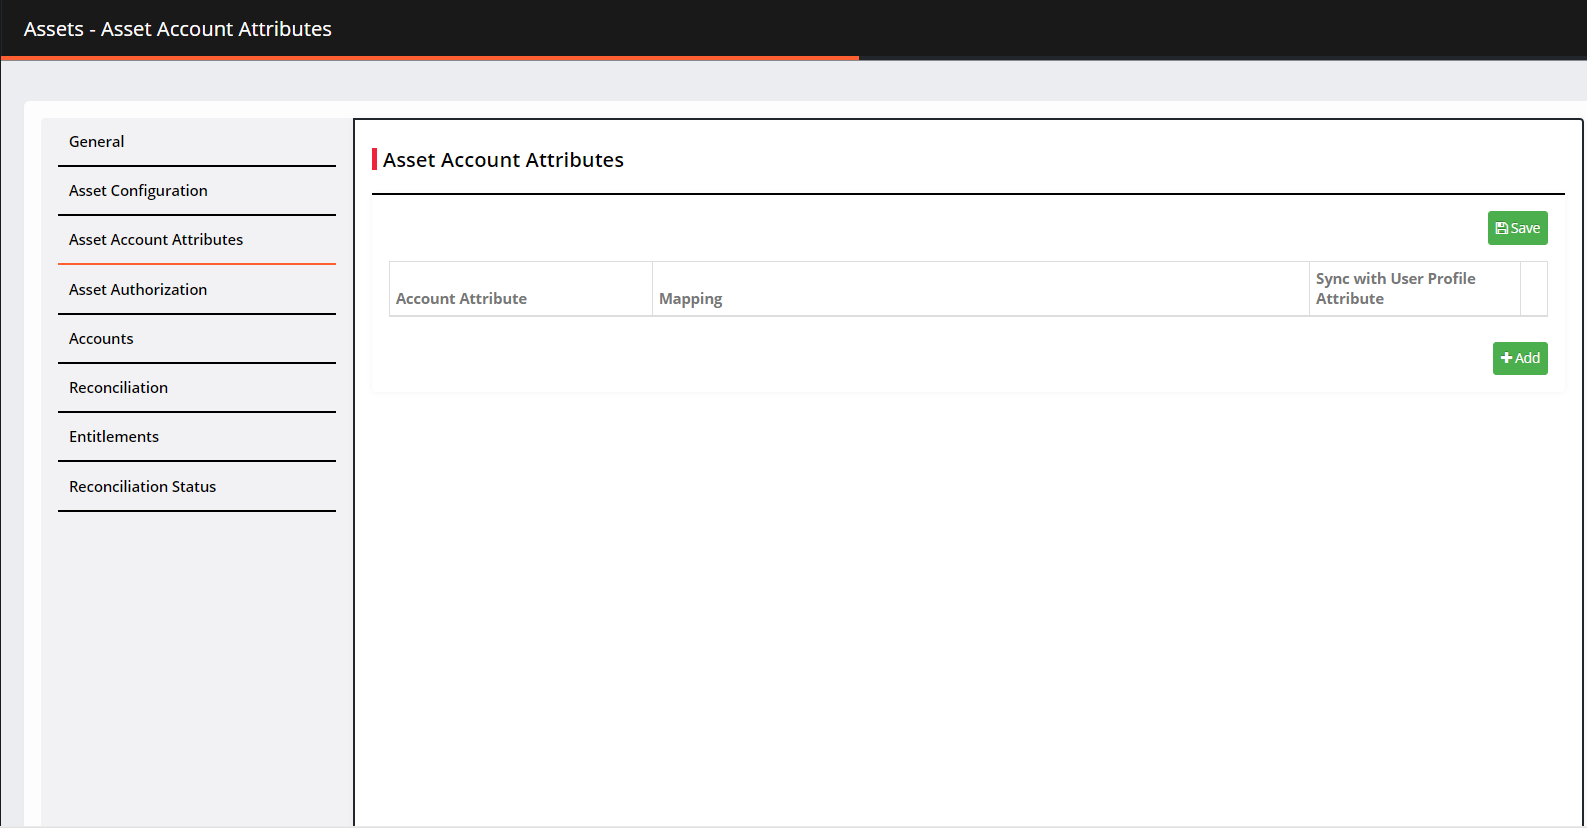
Click +Add. Select the asset attributes you want to map and then click ADD.
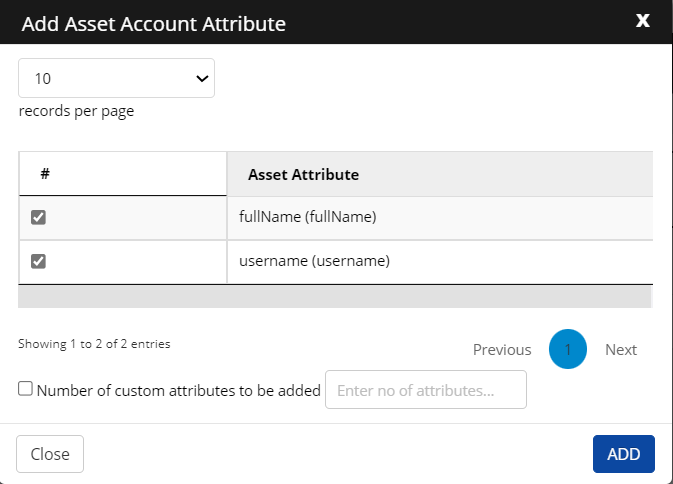
Number of custom attributes to be added: Enter the number of custom attributes to add. You can leave it unchecked as well.
Click ADD.
On the next screen, you can see the added asset account attributes.
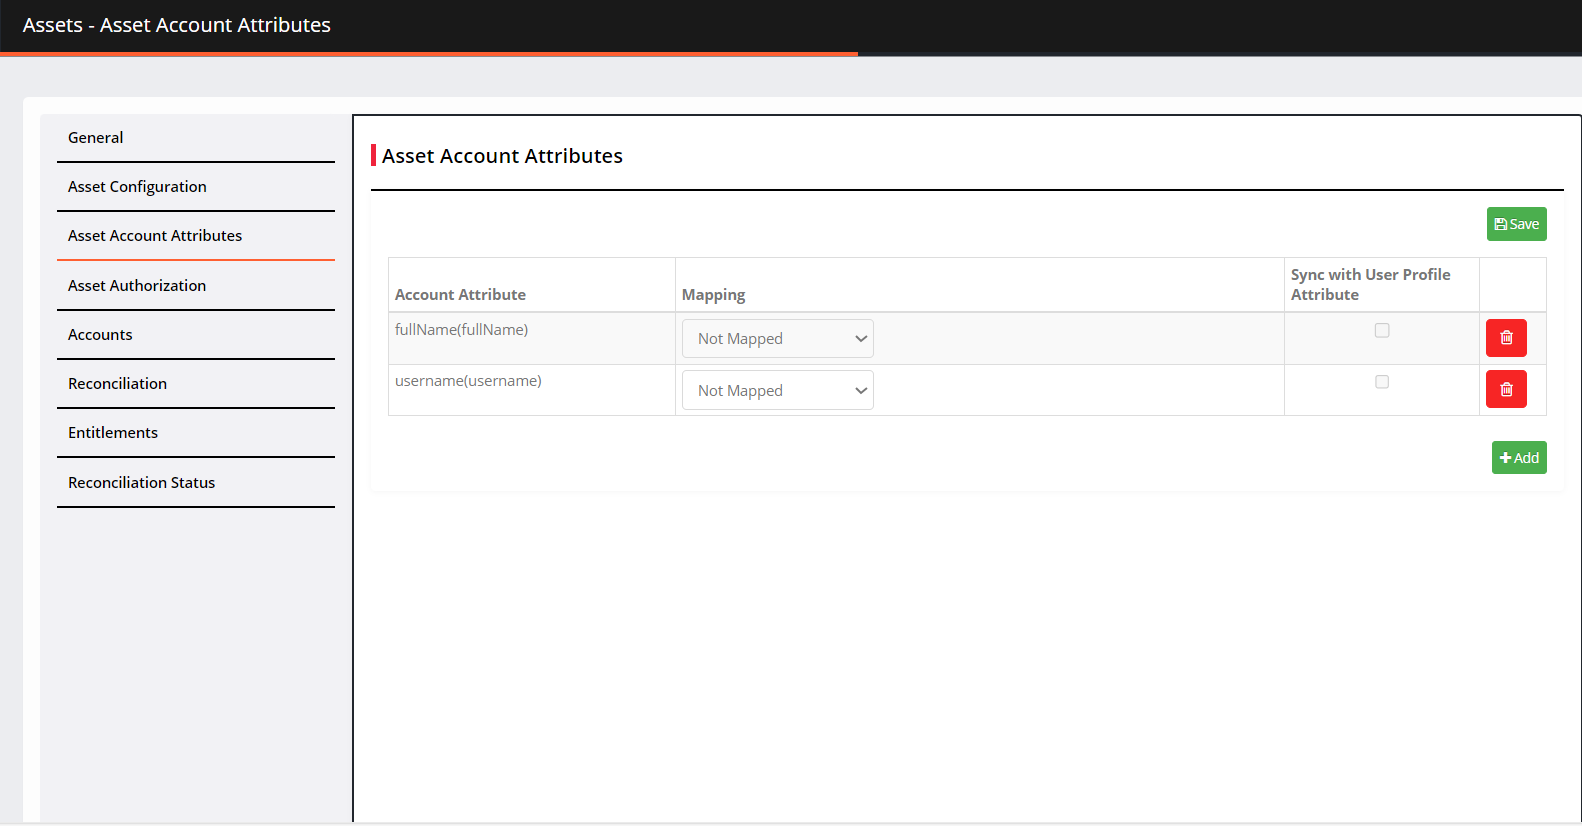
Select the Mapping method from the drop-down.
Application Attribute: When you choose this option, you need to define the attribute that matches with Active Directory.
Expression: A javascript can be written that evaluates to a value. It can be a single value, a variable, or a more complex combination of values, operators, and functions.
Sync with User Profile Attribute: Check the box to sync account attributes with user profile attributes.
Asset Authorization
As an administrator, CI allows you to select specific roles authorized to access an asset.
To authorize roles, follow the steps:
Navigate to Asset Authorization. The asset authorization screen is displayed.
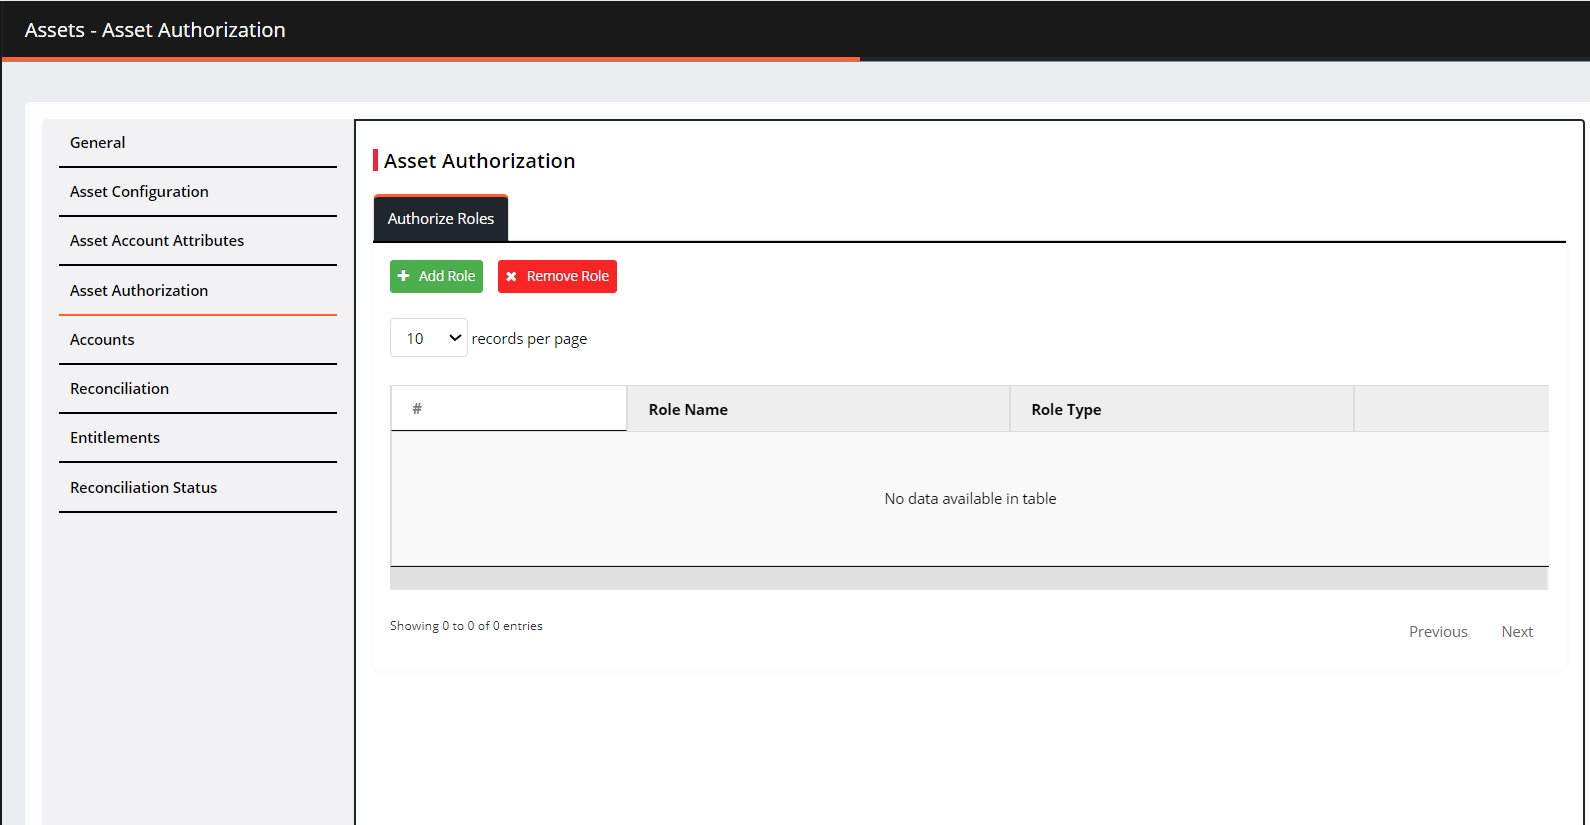
Click Add Role. The Add Role screen is displayed.
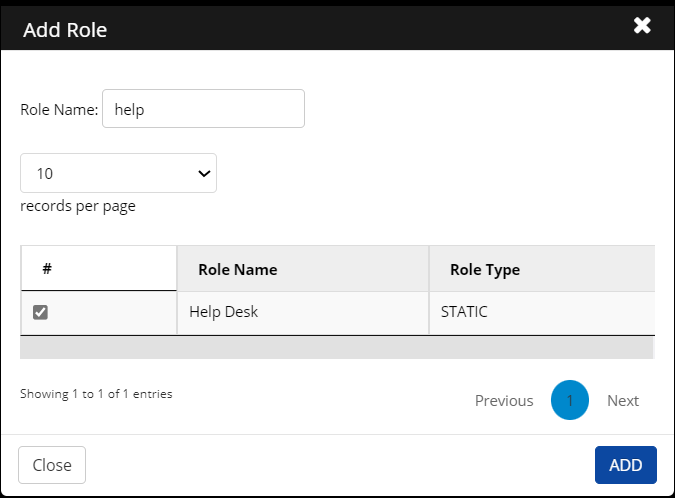
Enter a Role Name in the search field
Select a role from the results and then click Add.
The added role is displayed on the screen.
Accounts
Navigate to Accounts.
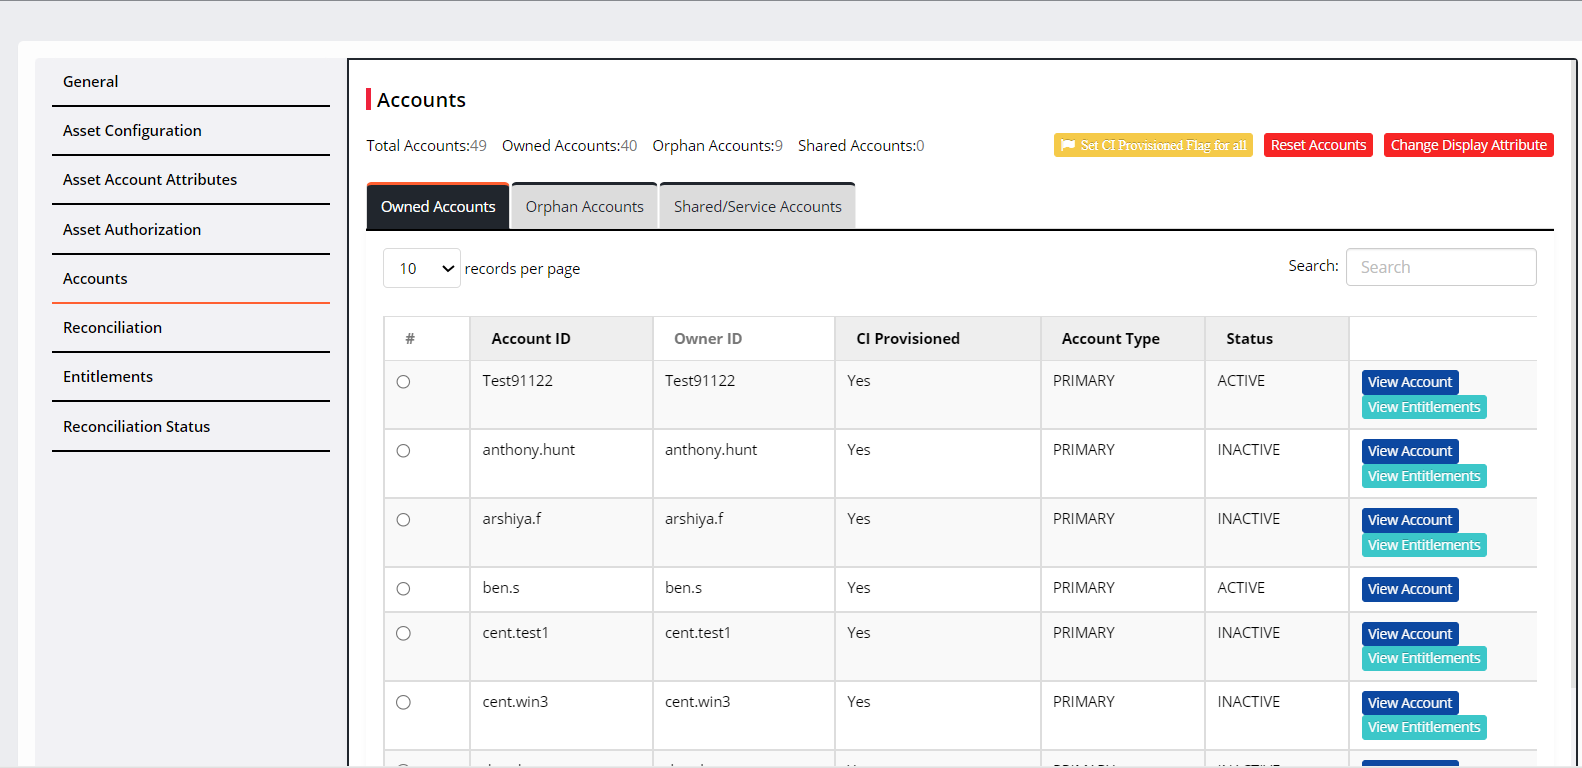
Click Owned Accounts to view a list of owned accounts whose identities are present in CI as well as the Asset.
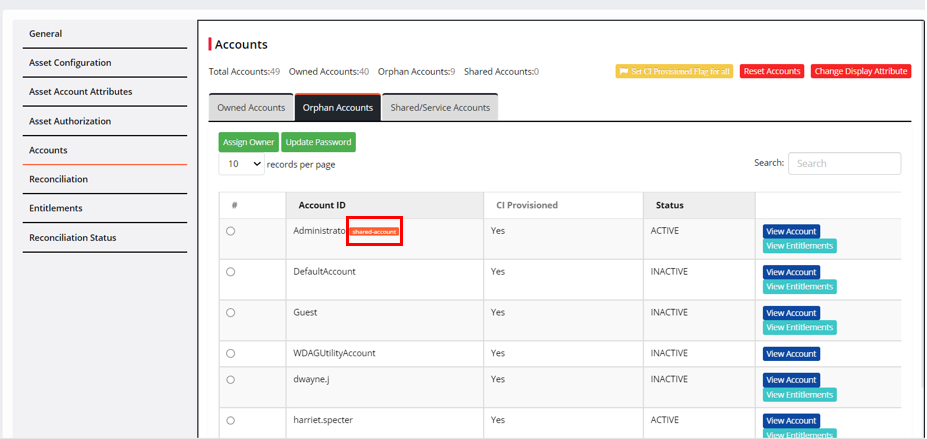
Click Orphan Accounts. It displays the list of accounts whose identities are not present in CI but available in the asset.
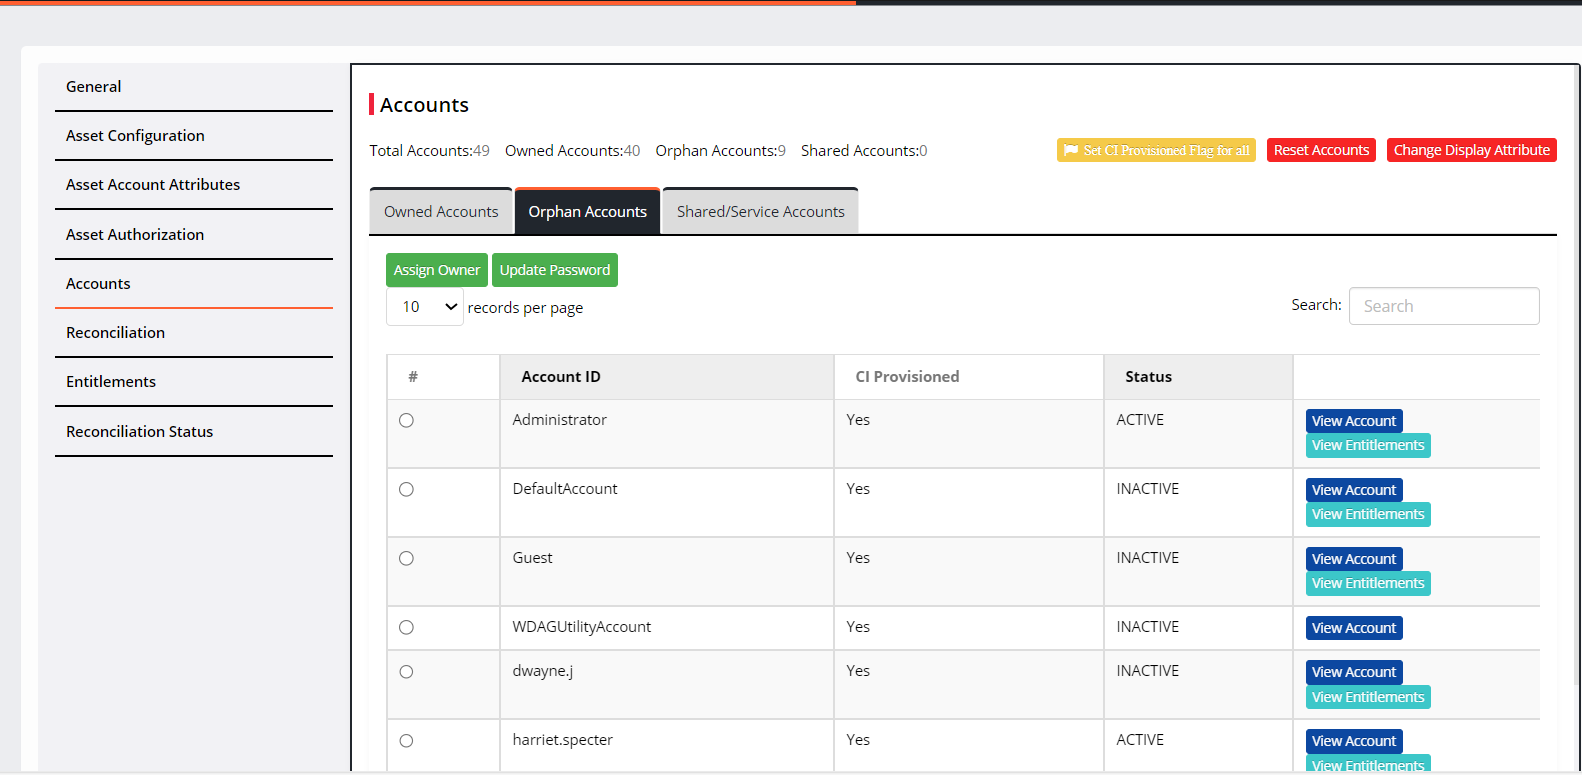
To link the orphan account to a single user manually:
Select an orphan account from the list (one at a time) and click Assign Owner.
Search for the username and select from the results.
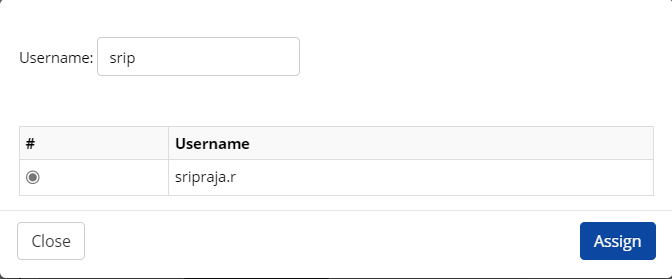
Click Assign. A message stating that “Shared account assigned successfully to the user" will show.
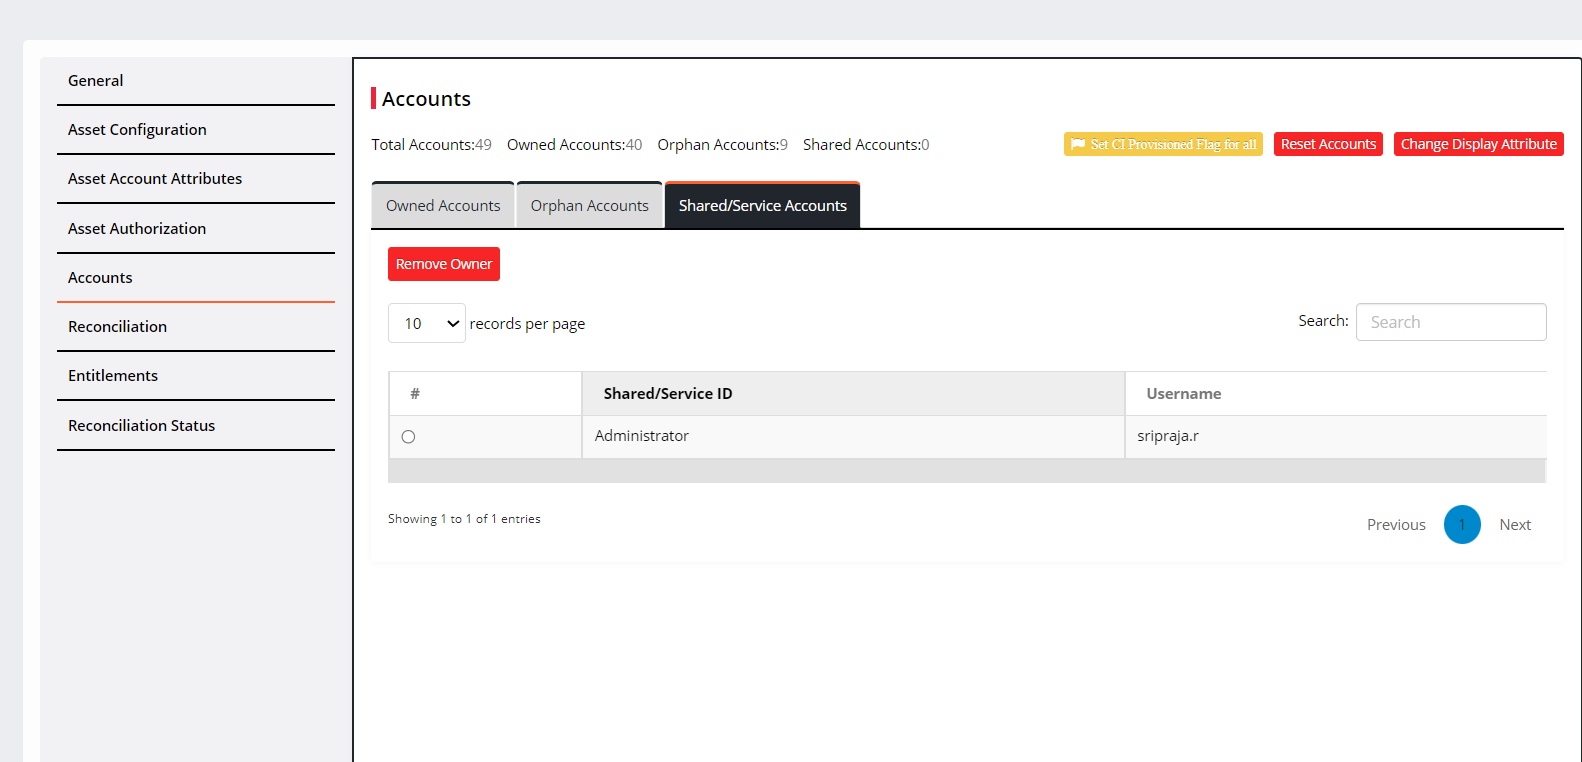
To appear accounts under Shared/Service Accounts, an admin must manually assign the accounts.
Follow the steps to assign accounts manually:
Select the account under Orphan account.
Click Assign Owner.
In the next window, search the username and select one.

Click Assign.
It will display a Shared account beside the account ID.
You will find these accounts under the Shared/Service account.
Reconciliation
Reconciliation involves comparing and aligning accounts and entitlement information from the PIAM application with the data present in Cross Identity. Throughout this process, the following operations are performed:
Retrieve all accounts from the PIAM asset.
Retrieve all entitlements from the PIAM asset.
Retrieve the account-entitlement mapping information.
Assign owners to the new and orphan accounts based on the reconciliation rules.
Modify the existing owned and orphan accounts based on updated information from the PIAM asset.
Remove accounts and entitlements deleted from the PIAM asset from Cross Identity as well.
Navigate to Reconciliation.
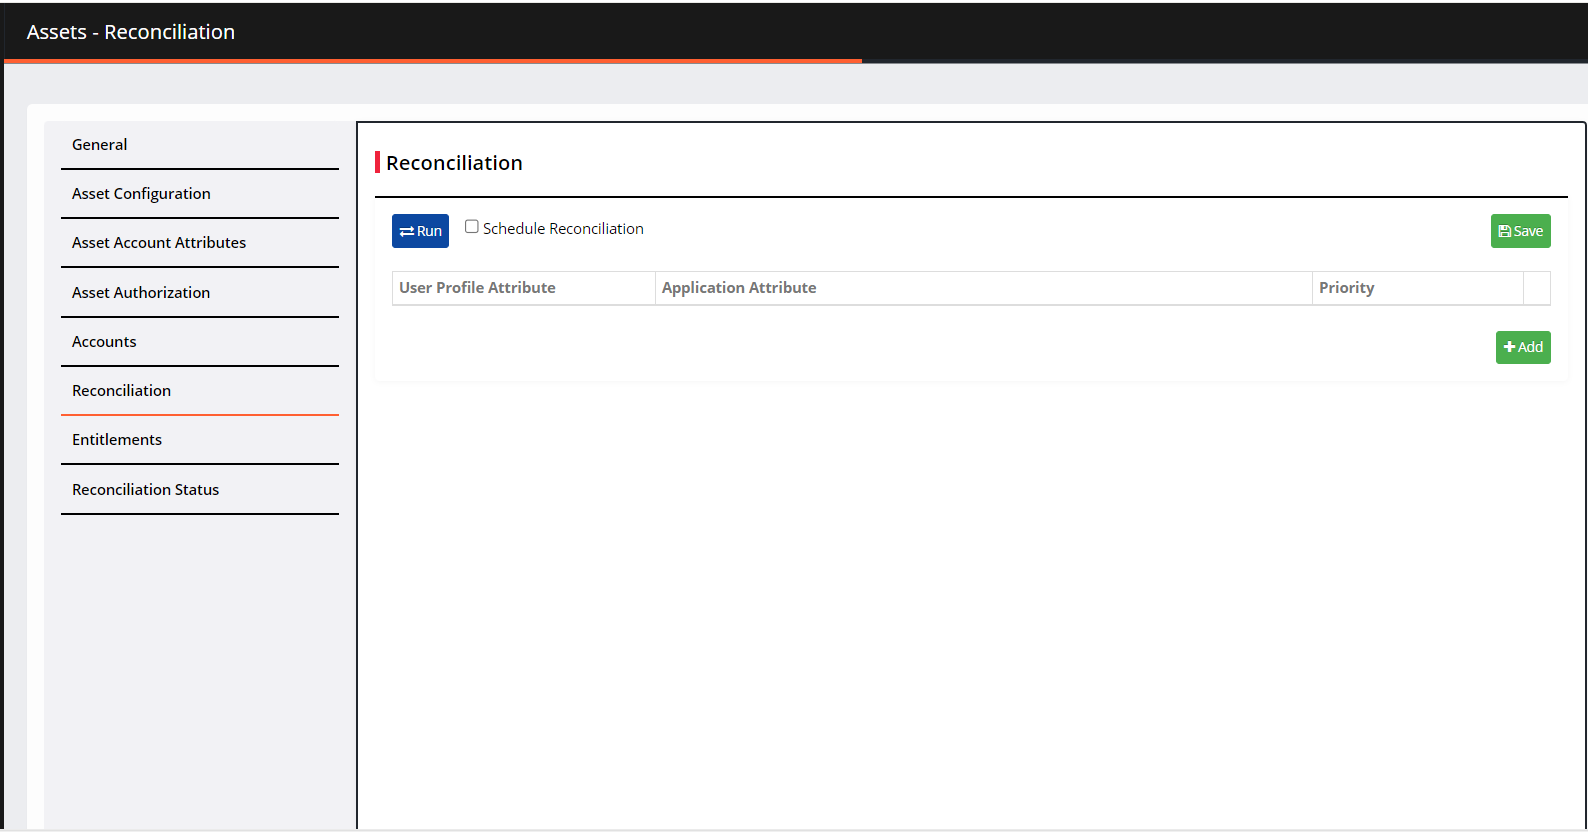
Check the Schedule Reconciliation box.
In the Run reconciliation every field, enter the time in minutes at which reconciliation should run, automatically.
Click Run. The connector is called, and it retrieves the data based on the flags.
Entitlements
Navigate to Entitlements.
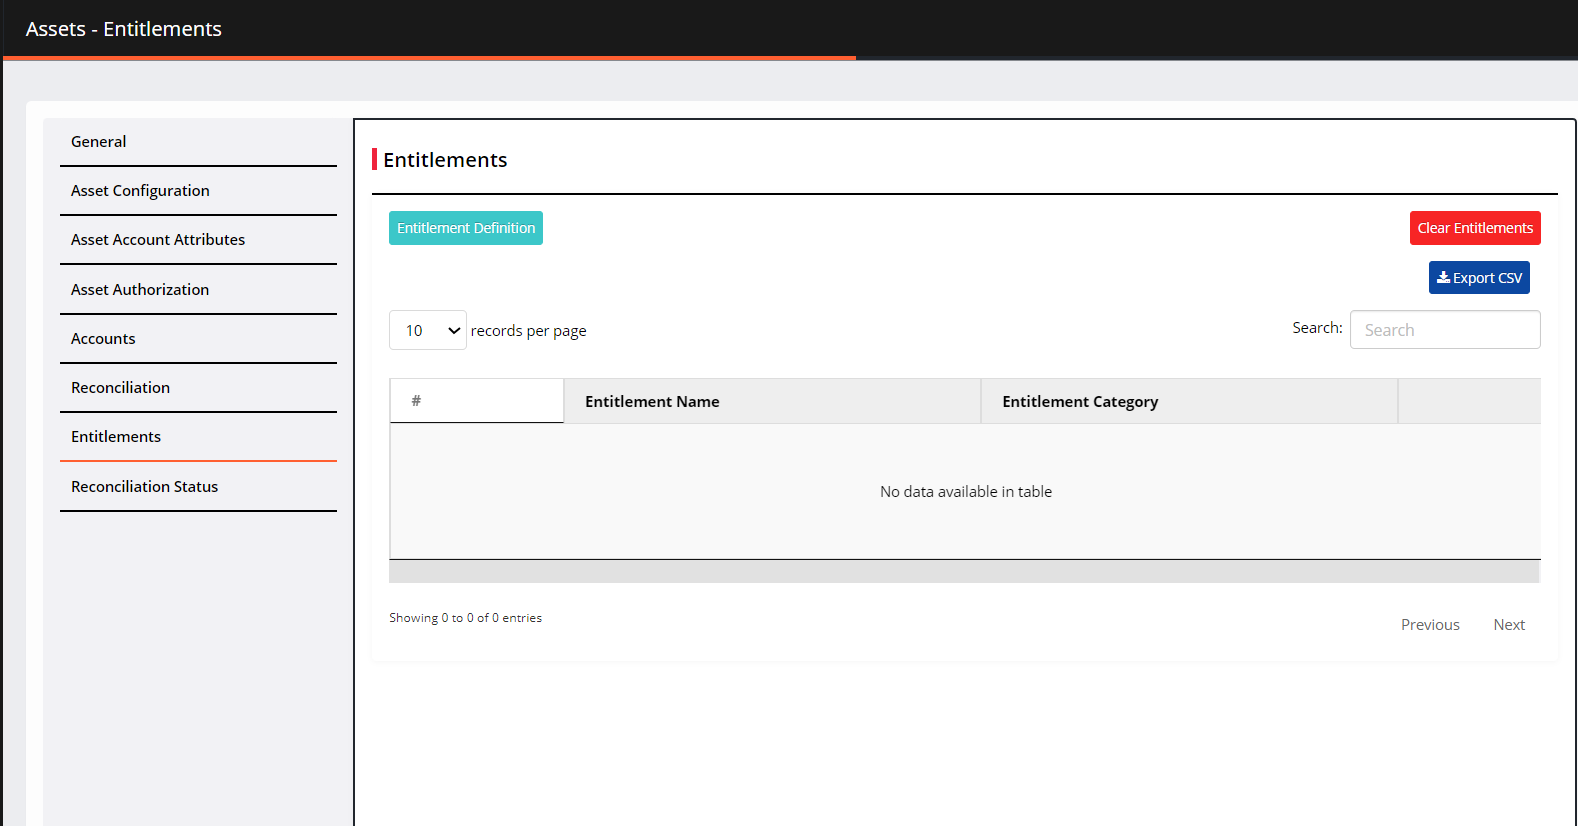
Click Entitlement Definition > Add Entitlement Definition.
Enter the following details in the dialog:
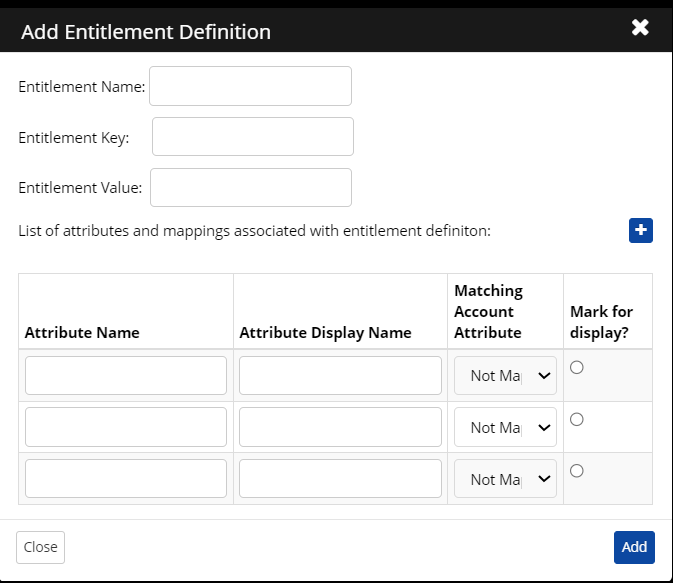
Entitlement Name: Enter the name of the Entitlement Definition.
Entitlement Key: Based on the Entitlement Key, data is fetched from the target application in the connector.
Entitlement Value: Enter the organizational unit.
Enter the Schema for entitlement conditions:
Attribute Name: Enter the Cross Identity Name you use as an attribute reference to retrieve data from the target application. It is also used to identify which attribute is part of the entitlement.
Attribute Display Name: Enter the Attribute Name as it appears in the application's User Interface.
Matching Account Attribute: Enter the attribute mapped to Cross Identity.
Marked for display? : If this column's condition (True or False) is met, CI will identify if the user is part of this entitlement.
Click Add.
Export CSV: You can export the list of entitlements with the value of its custom attributes to a CSV file.
Reconciliation Status
Navigate to Reconciliation Status.
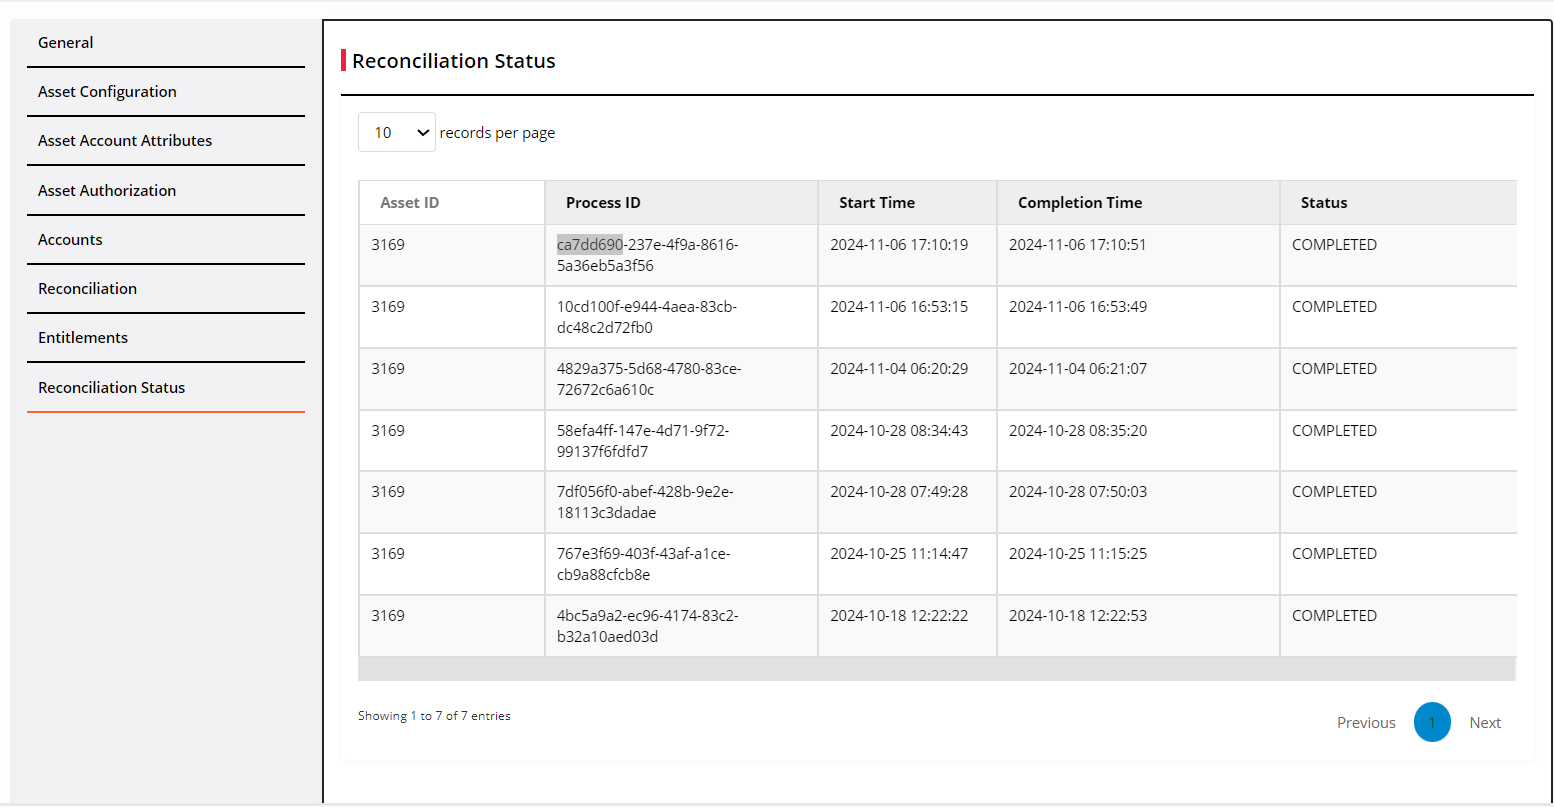
This window shows the reconciliation details like application ID, start and completion end time and the status.
.png)


.png)