- 15 Apr 2024
- 1 Minute to read
- Print
- DarkLight
- PDF
Enable CI Authentication Agent
- Updated on 15 Apr 2024
- 1 Minute to read
- Print
- DarkLight
- PDF
This is another way of automating authentication without requiring passwords. When the Enable CI Authentication Agent option is active and the password policy is in place, CI uses the CI Auth Agent to gather device information such as username, domain joint or not, IP address, and MAC address. This process allows you to securely and effortlessly access the platform without manually inputting login details, as the system automatically validates the device and user information.
Pre-requisites for Authentication agent to work on the end-user system:
User must have the CIAuthAgent installed in his system.
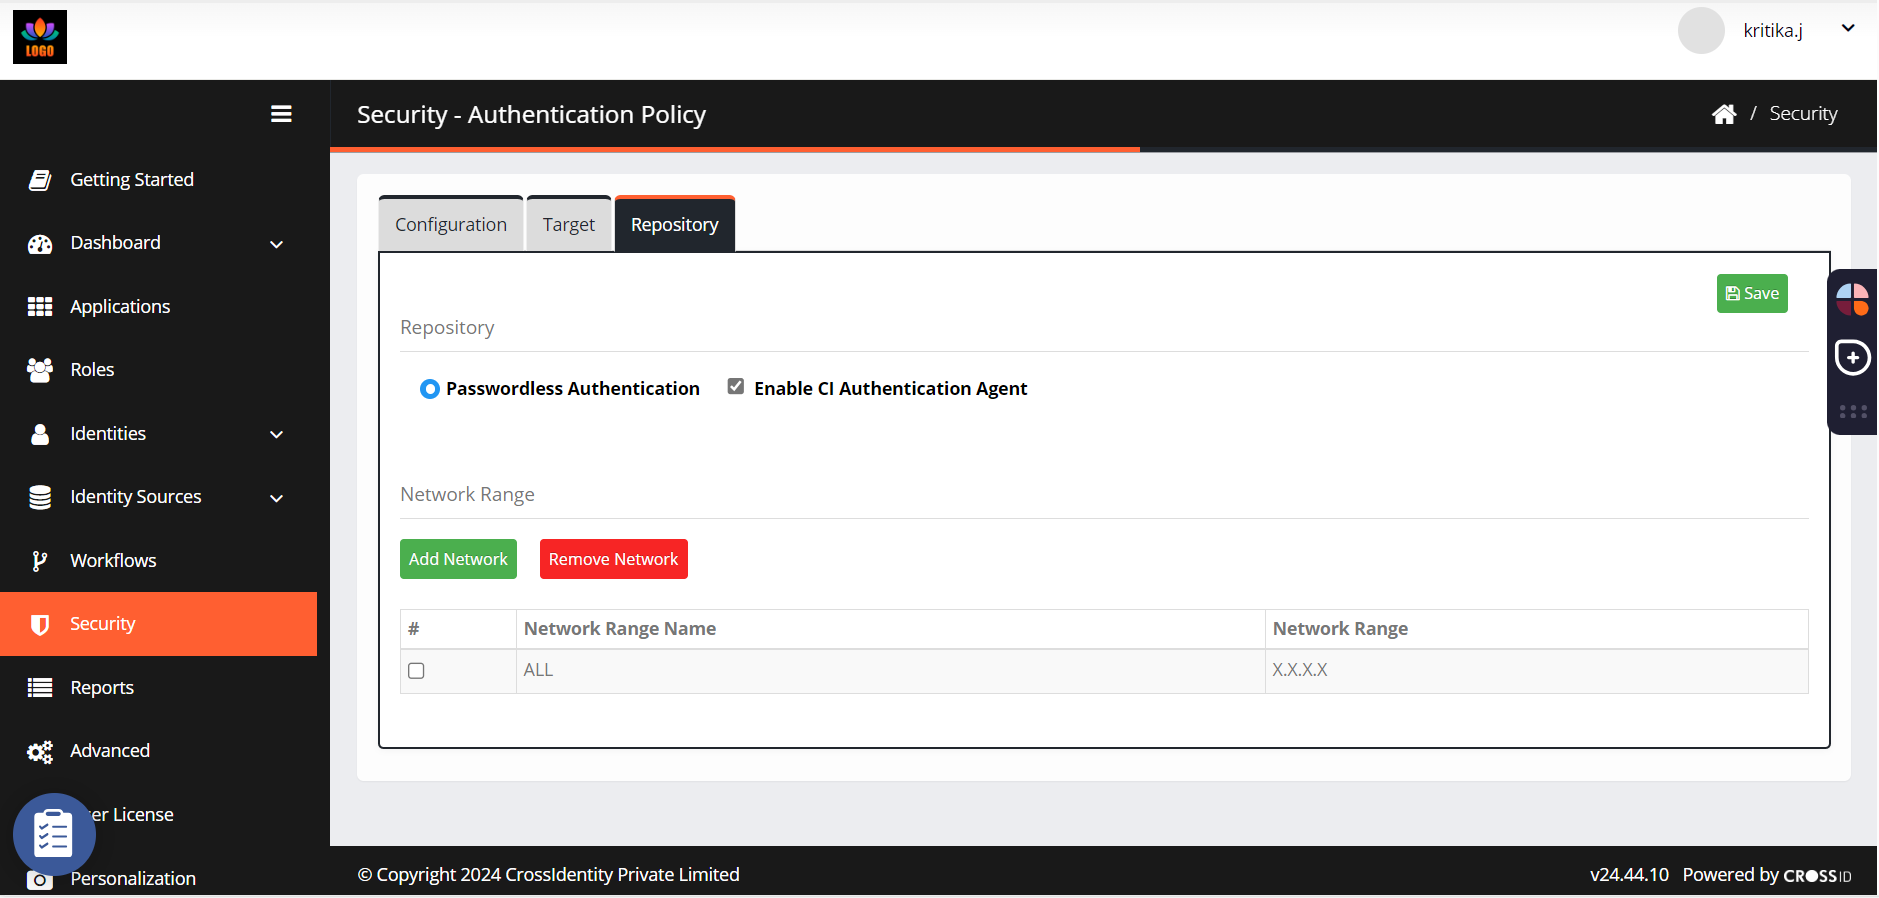
The CI Authentication Agent" option must be enabled in the Authentication Policy of the CI Admin Portal to utilize the Seamless Access feature.
Follow the below steps to Enable CI Authentication Agent:
Login to Cross Identity Admin Portal.
Click Security.
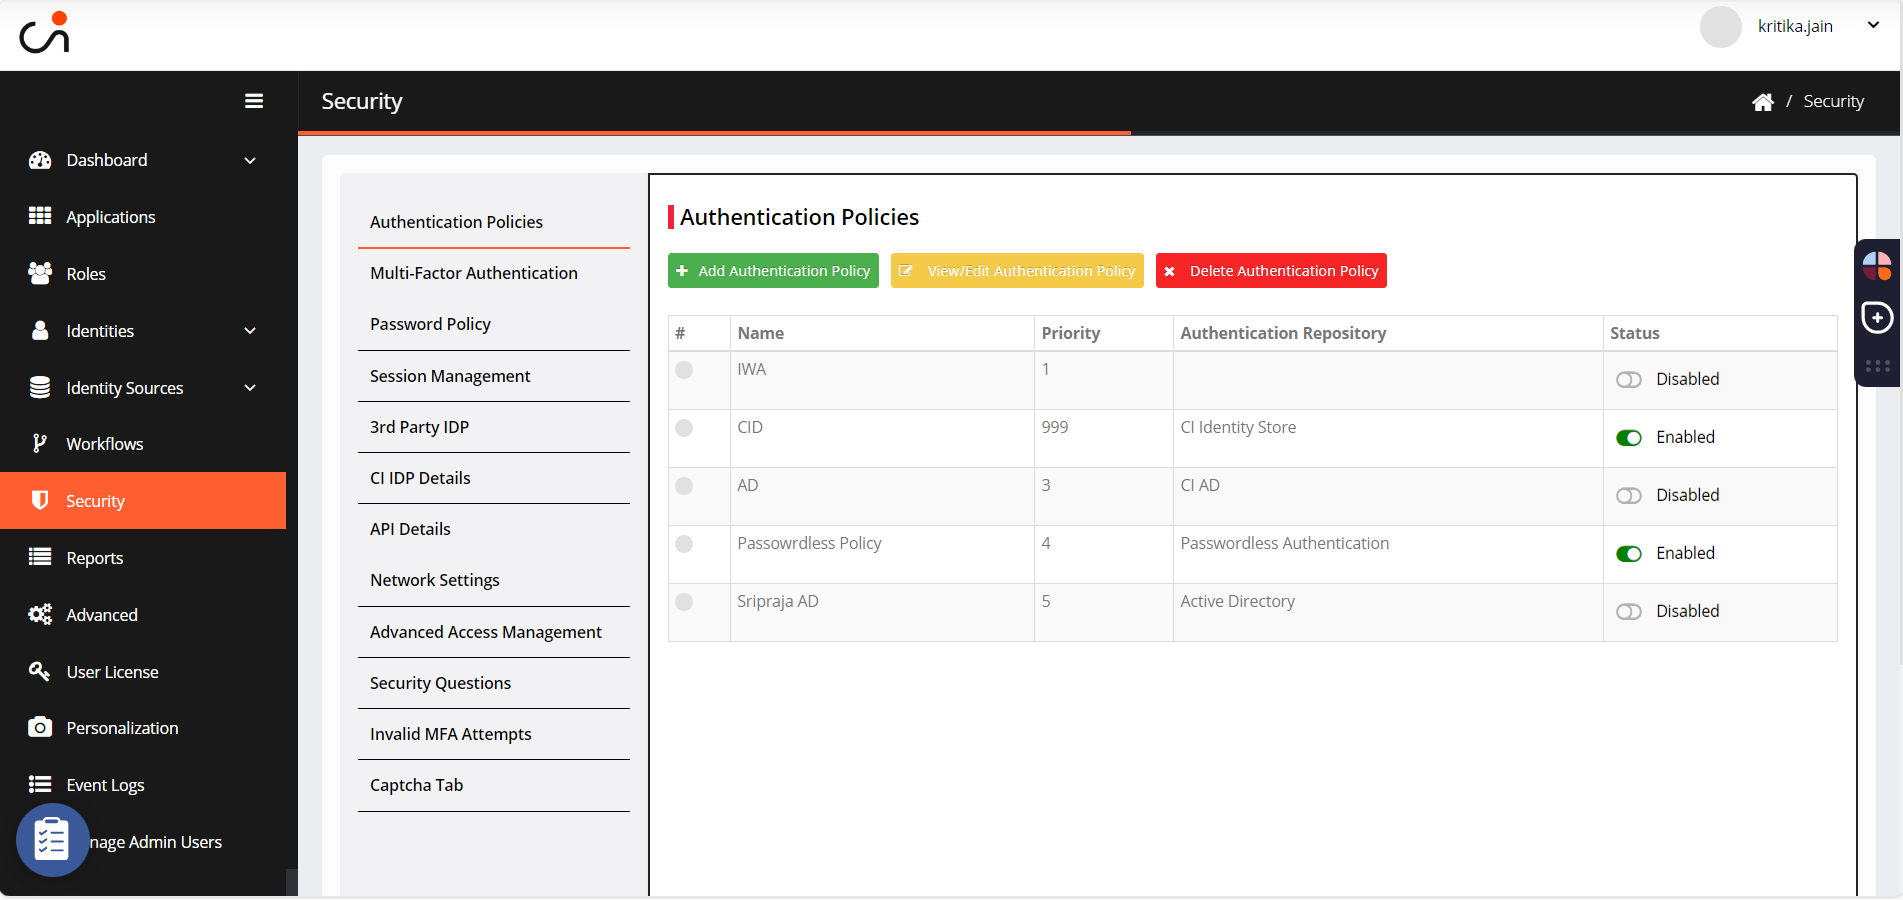
Select Passwordless Policy.
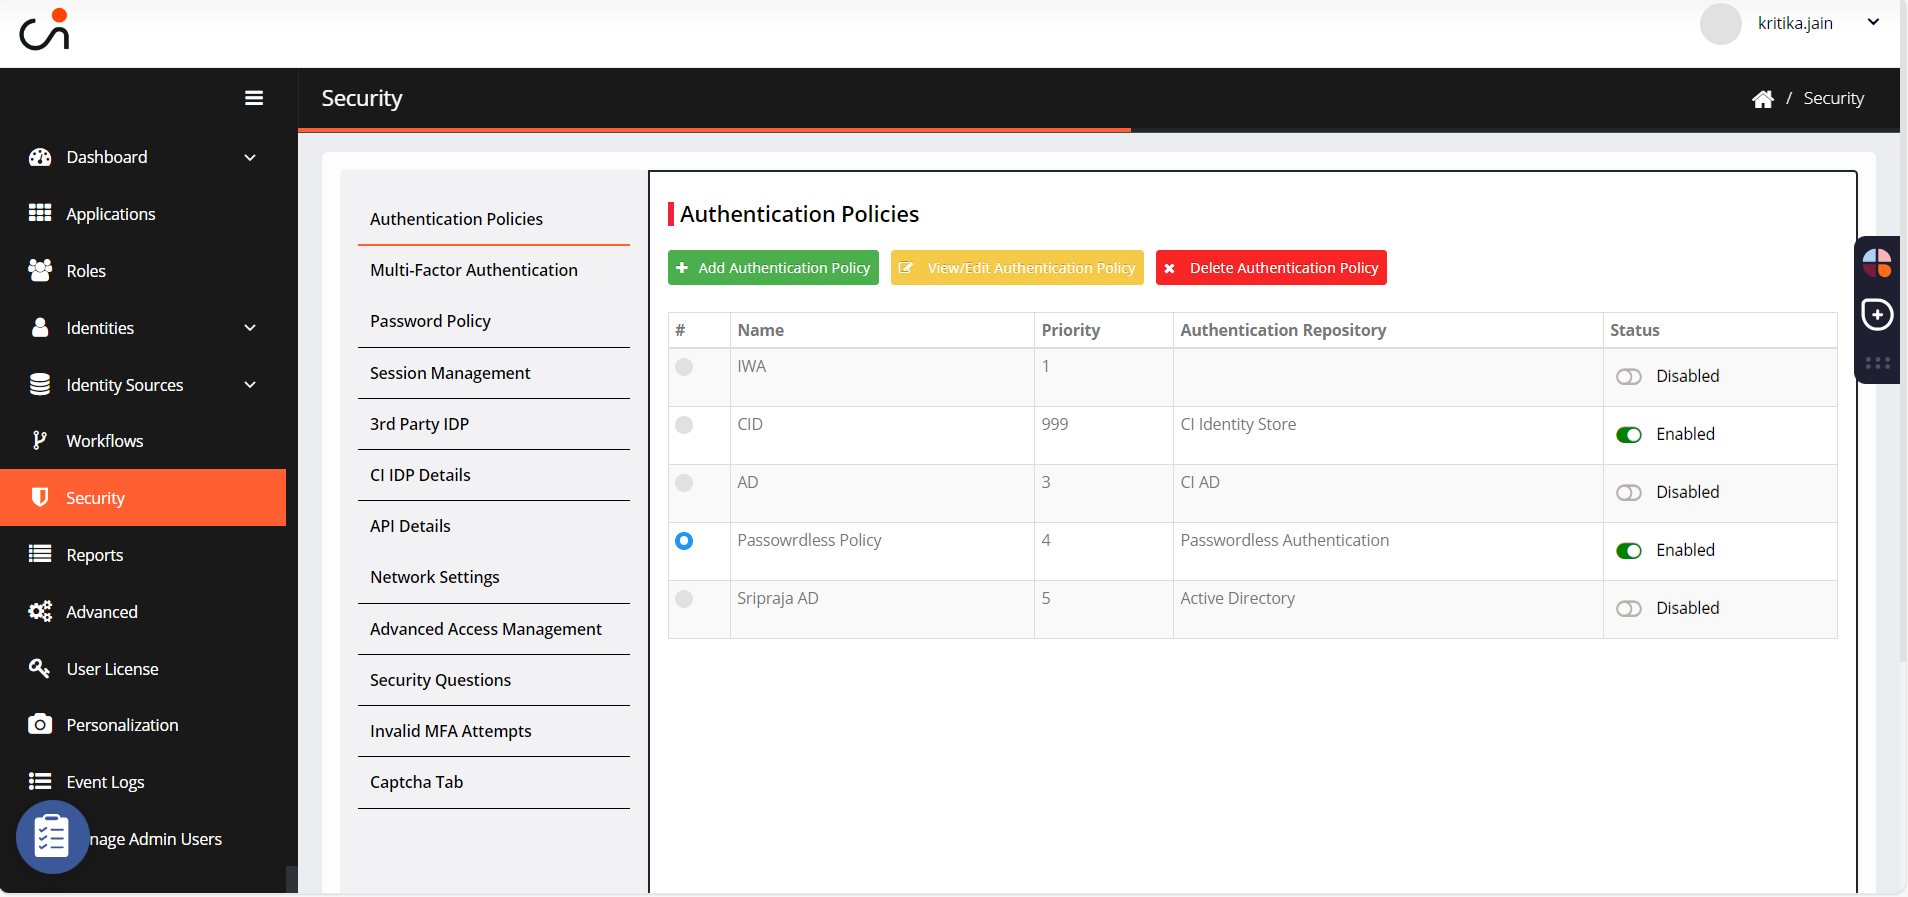
Click View/Edit Authentication Policy.
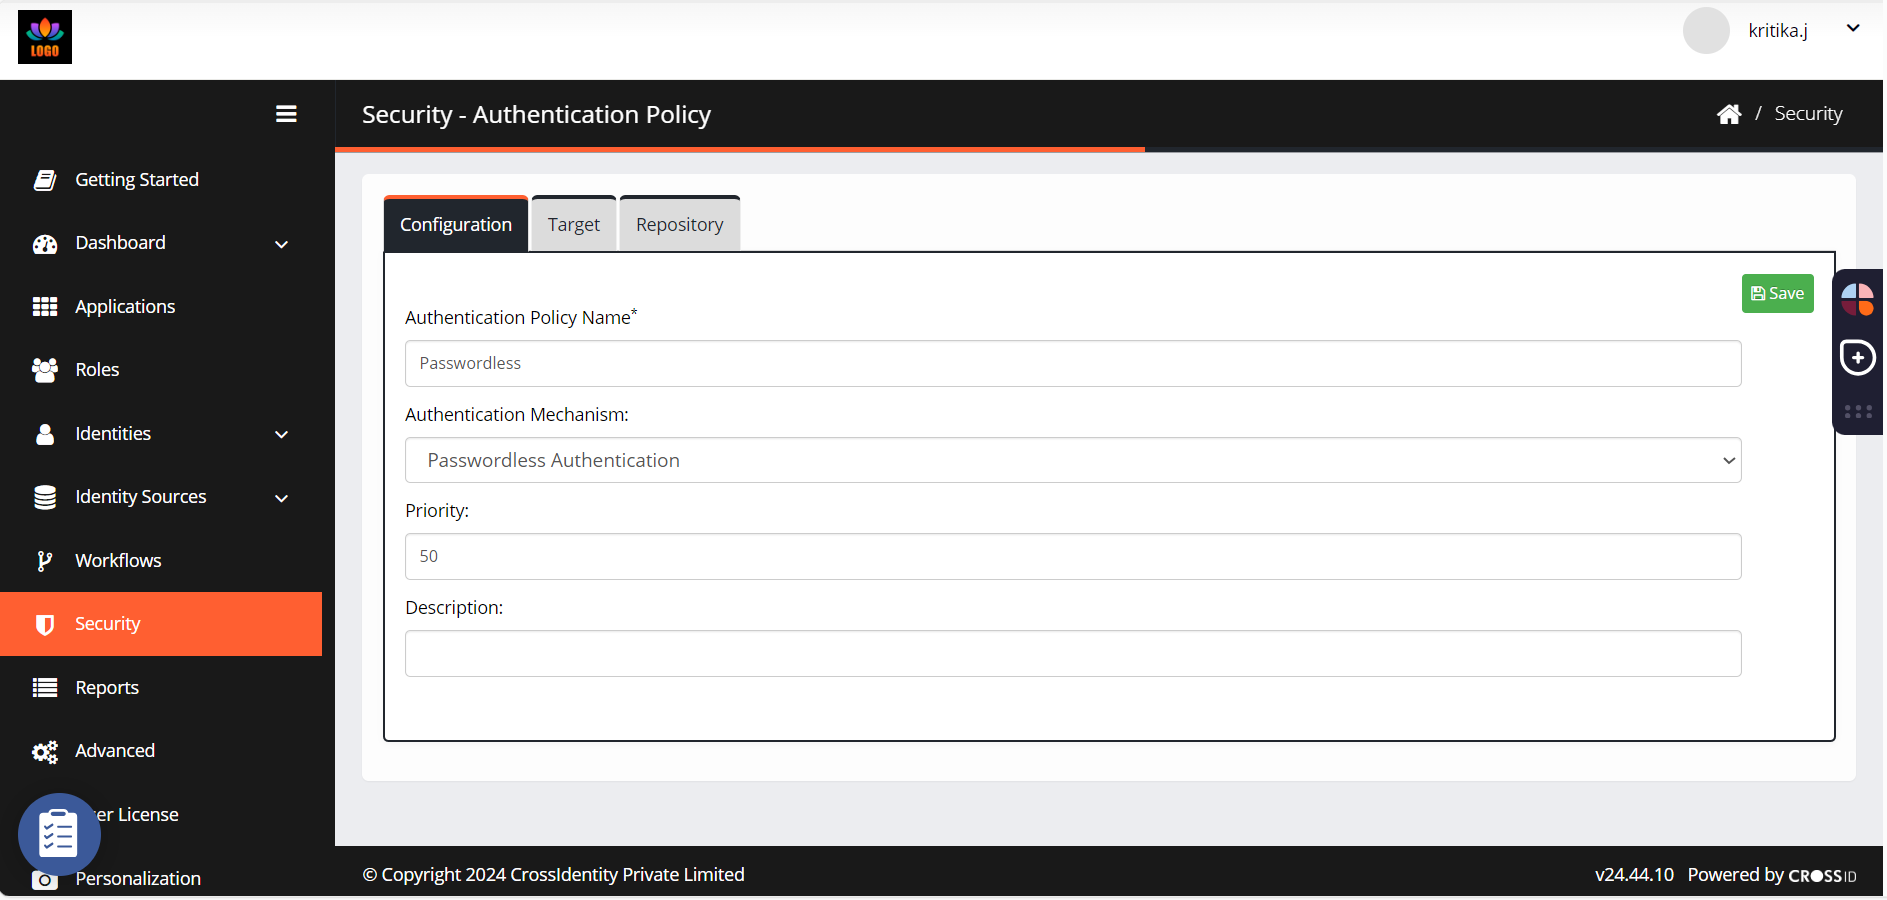
Navigate to Repository.
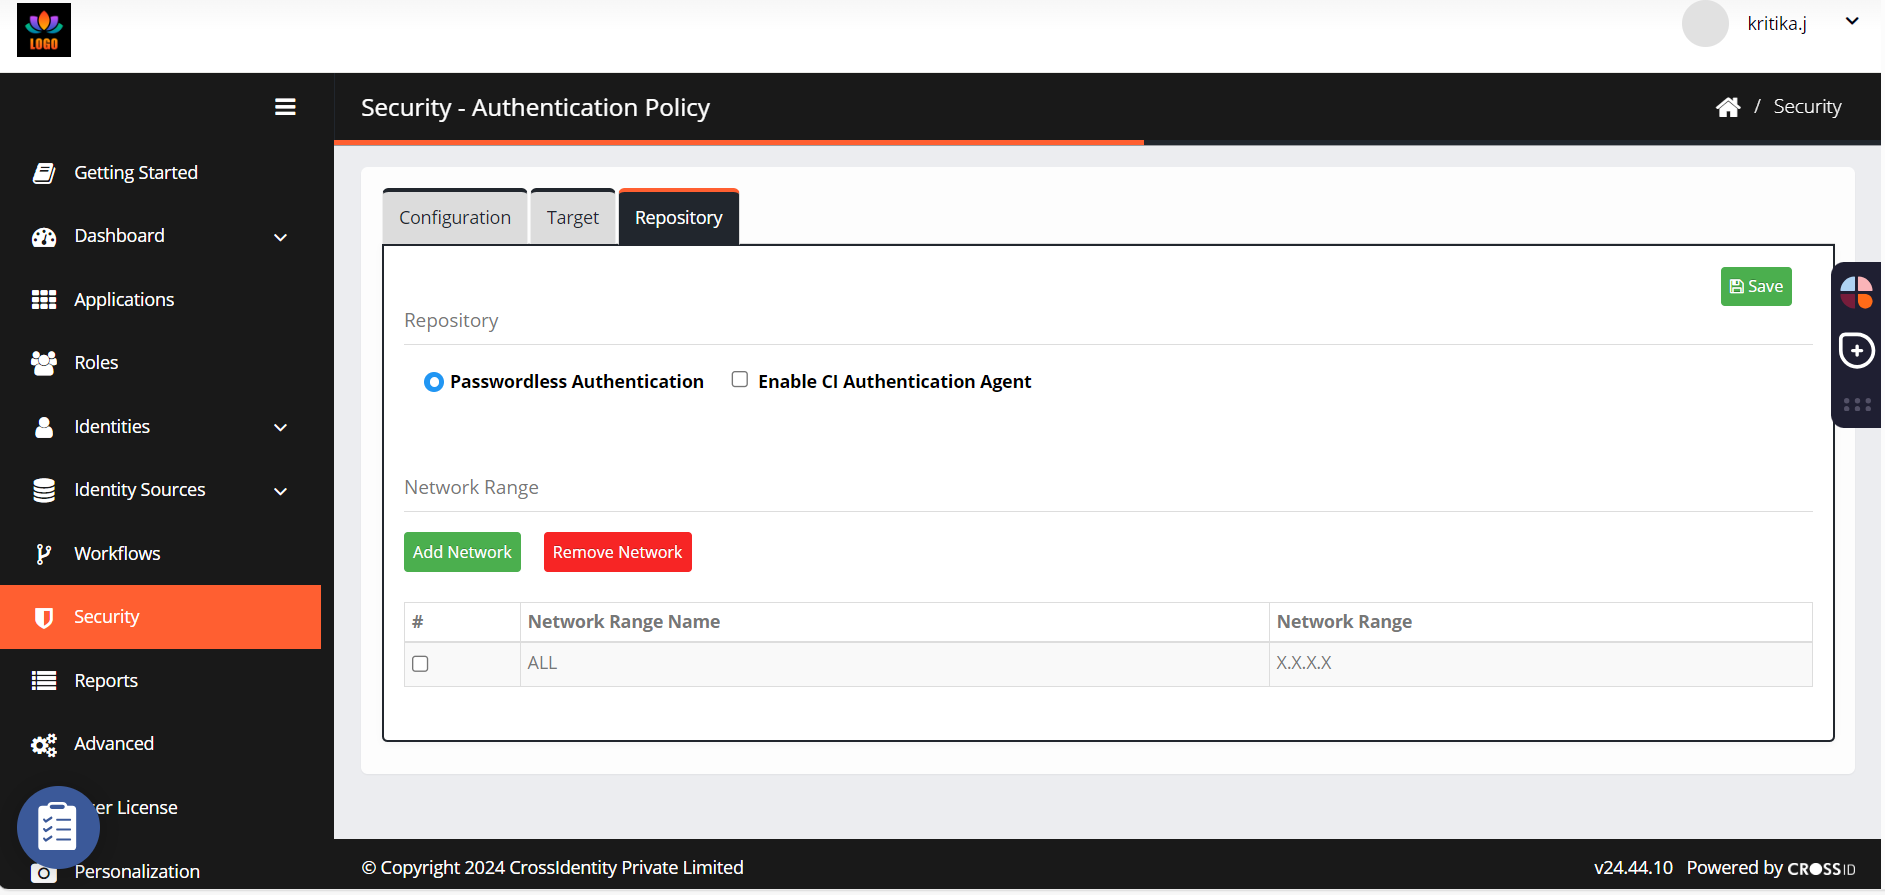
Check the box Enable CI Authentication Agent and save.
Authentication Agent on end-user portal
Login to end-user portal.
It will ask Open CIAuthAgent to collect the info.
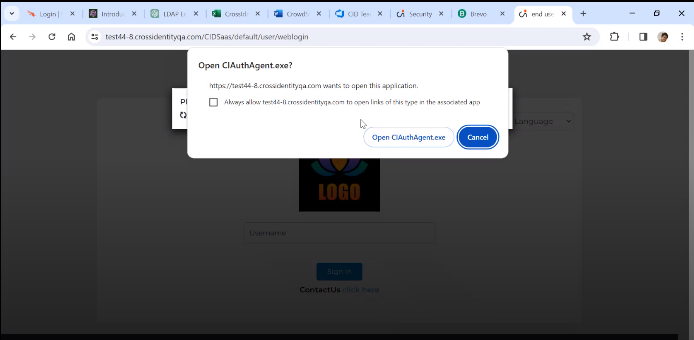
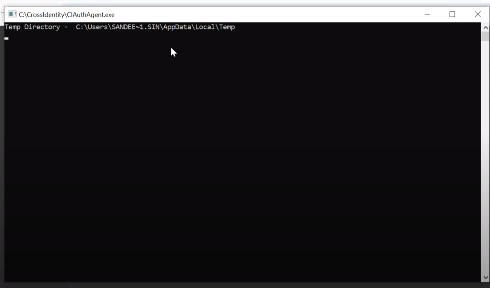
Click Open CIAuthAgent.exe and it opens the .exe window to check whether the system is domain joint.
Once that is done, it will take the username and password by itself. Then, a push notification is sent to your mobile to authenticate.
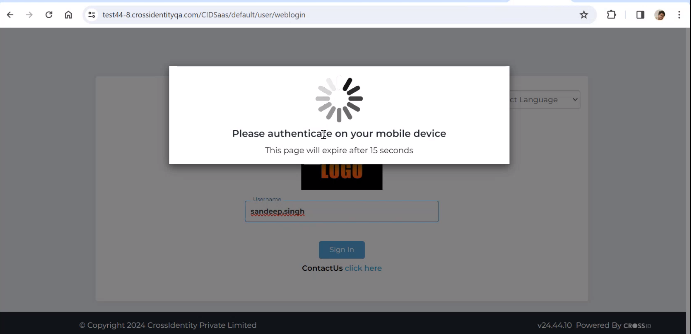
Once you authenticate, you will be directed to Launchpad.
Note:
If the device is non domain joint, you must enter the username and password to login.
.png)


.png)