Configure the connector
- 22 Oct 2024
- 2 Minutes to read
- Print
- DarkLight
- PDF
Configure the connector
- Updated on 22 Oct 2024
- 2 Minutes to read
- Print
- DarkLight
- PDF
Article summary
Did you find this summary helpful?
Thank you for your feedback
Follow the steps to configure the connector:
Login to Cross Identity as Administrator.
Navigate to Applications from the menu. Click + Add Application.
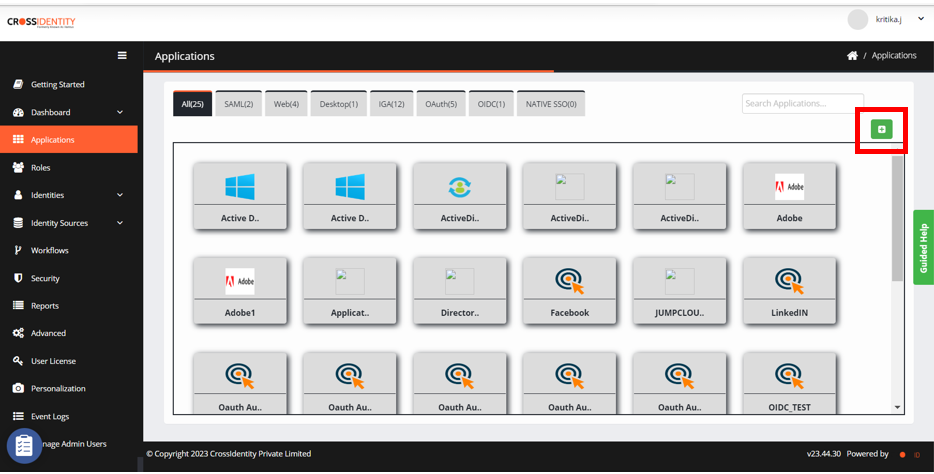
In the AppStore pane, click IGA and search Active Directory.
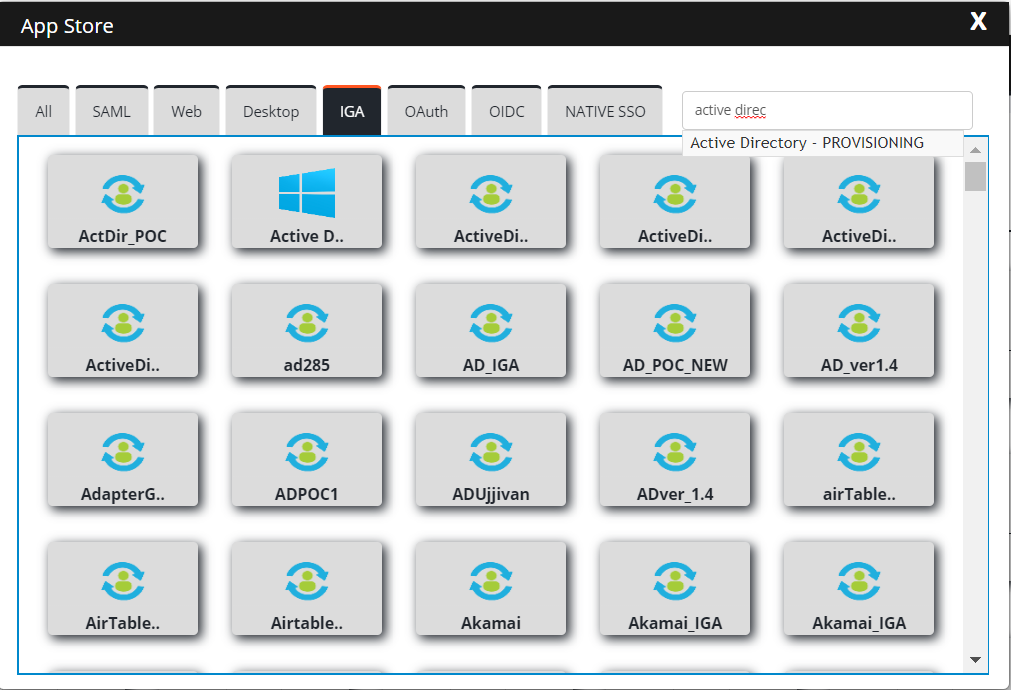
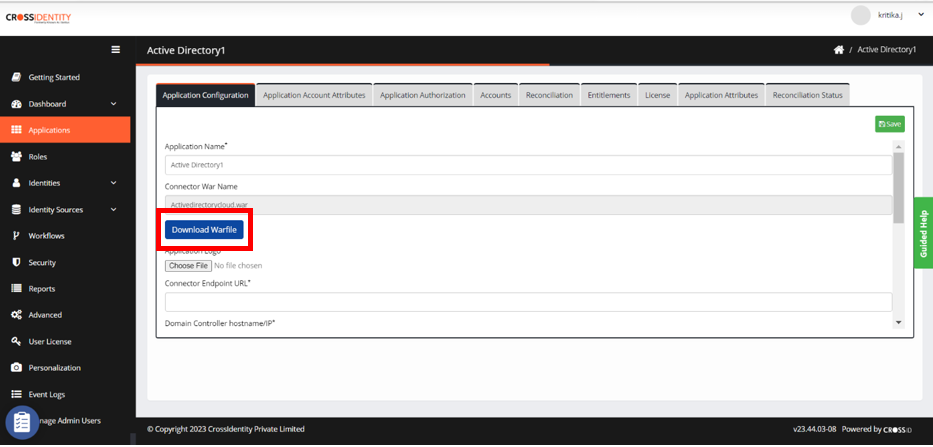
Select the application and it will take you to the Application Configuration page.

Fill out the required details as mentioned earlier in the Pre-requisite section.
Application Name: Provide the application name.
Connector War name: This is an uneditable field.
Application Logo: Upload a logo for the application.
Click Save.
Check for active directory war files in C:\Program Files\Apache Software Foundation\Tomcat 9.0\webapps in this location.
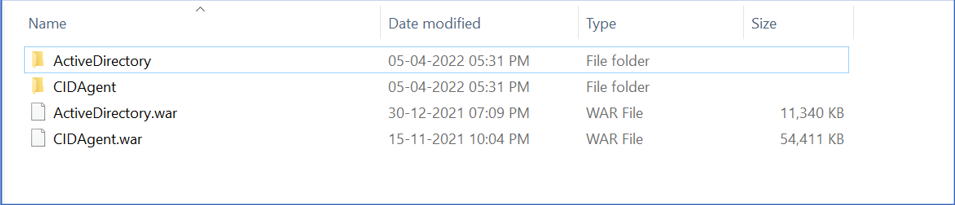
If the ActiveDirectory.war file doesn’t exist, download the war file from CI. Once Downloaded place the war file in C:\Program Files\Apache Software Foundation\Tomcat 9.0\webapps and restart the agent.
Go to Application Account Attributes and click +Add.
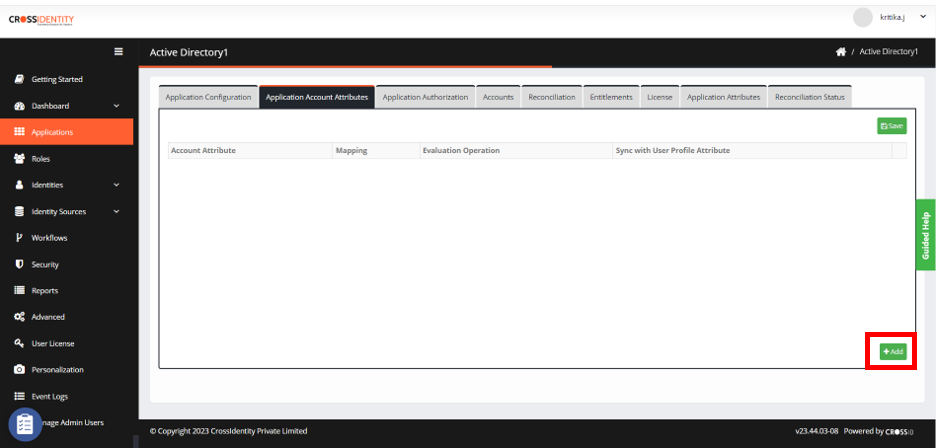
Select necessary attributes by checking the appropriate boxes and click ADD.

Define User-to-Account Mapping according to the business requirements. After adding the account attributes, map the attributes as required.
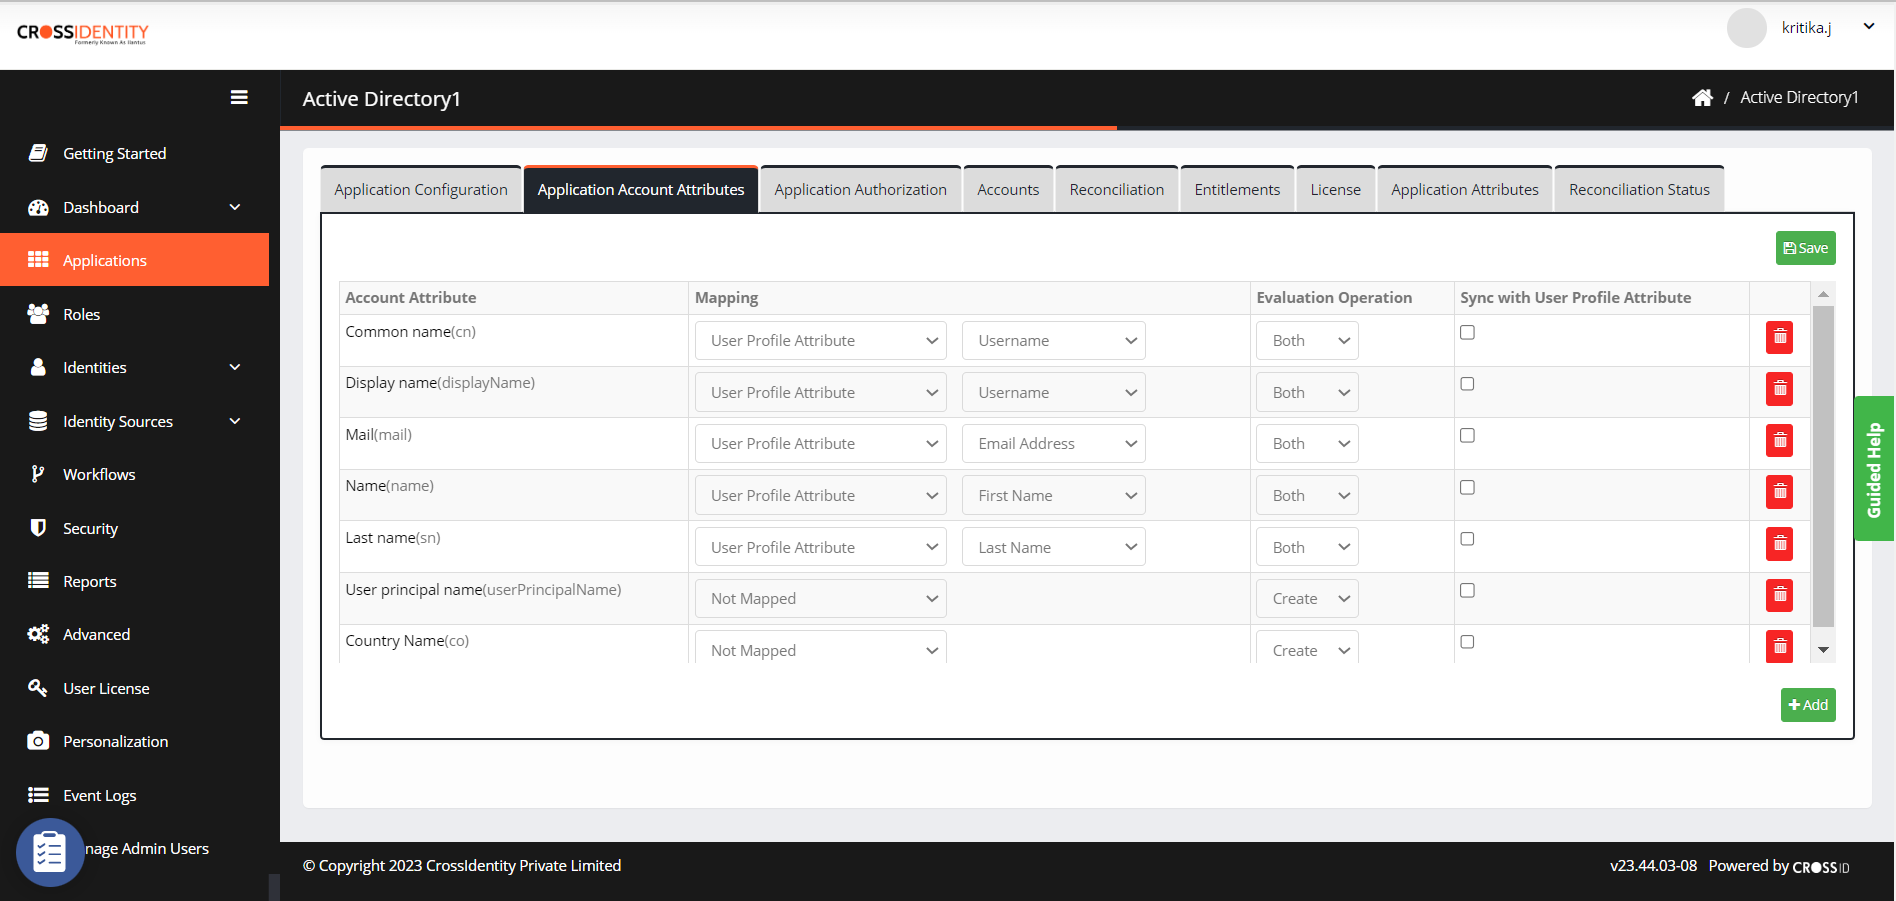
Evaluation Operation: Select Create, Modify, and Both from the drop-down list to apply the operation on the selected attribute. It sends the value based on the selection made to the target application.
Sync with User Profile Attribute: Check the box to sync account attributes with user profile attributes.
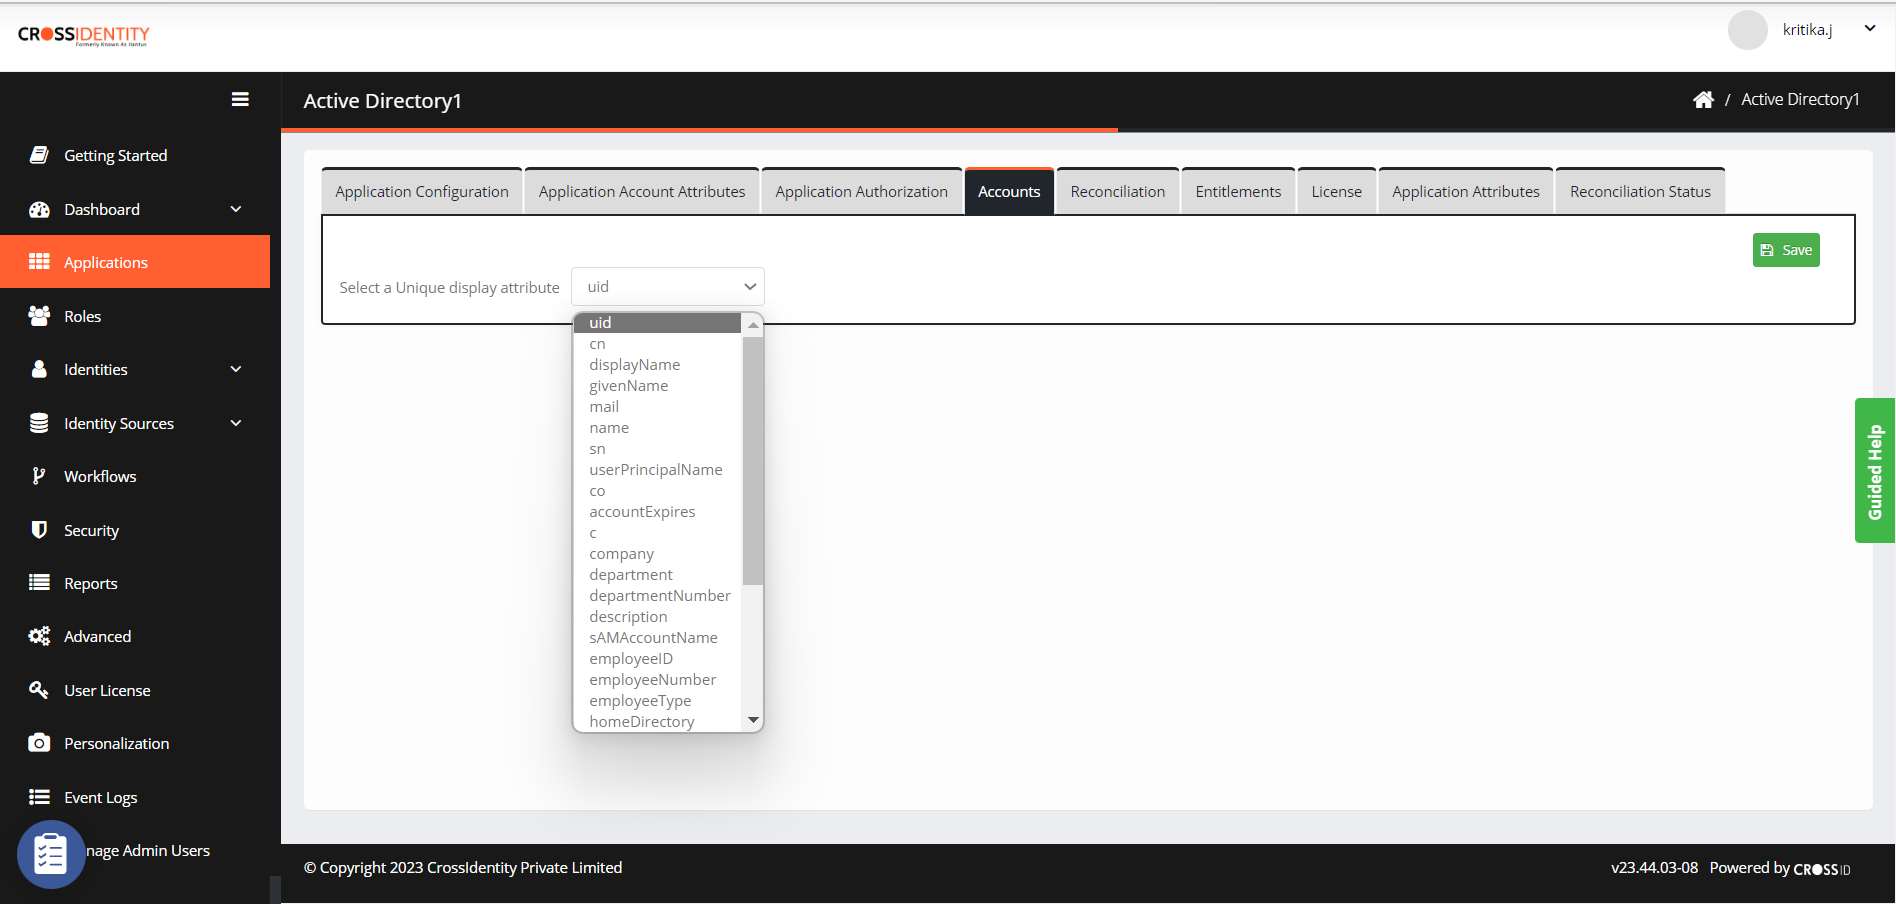
Go to Accounts and select a unique attribute to link to identity and configure it as a display attribute.
Navigate to Entitlements.
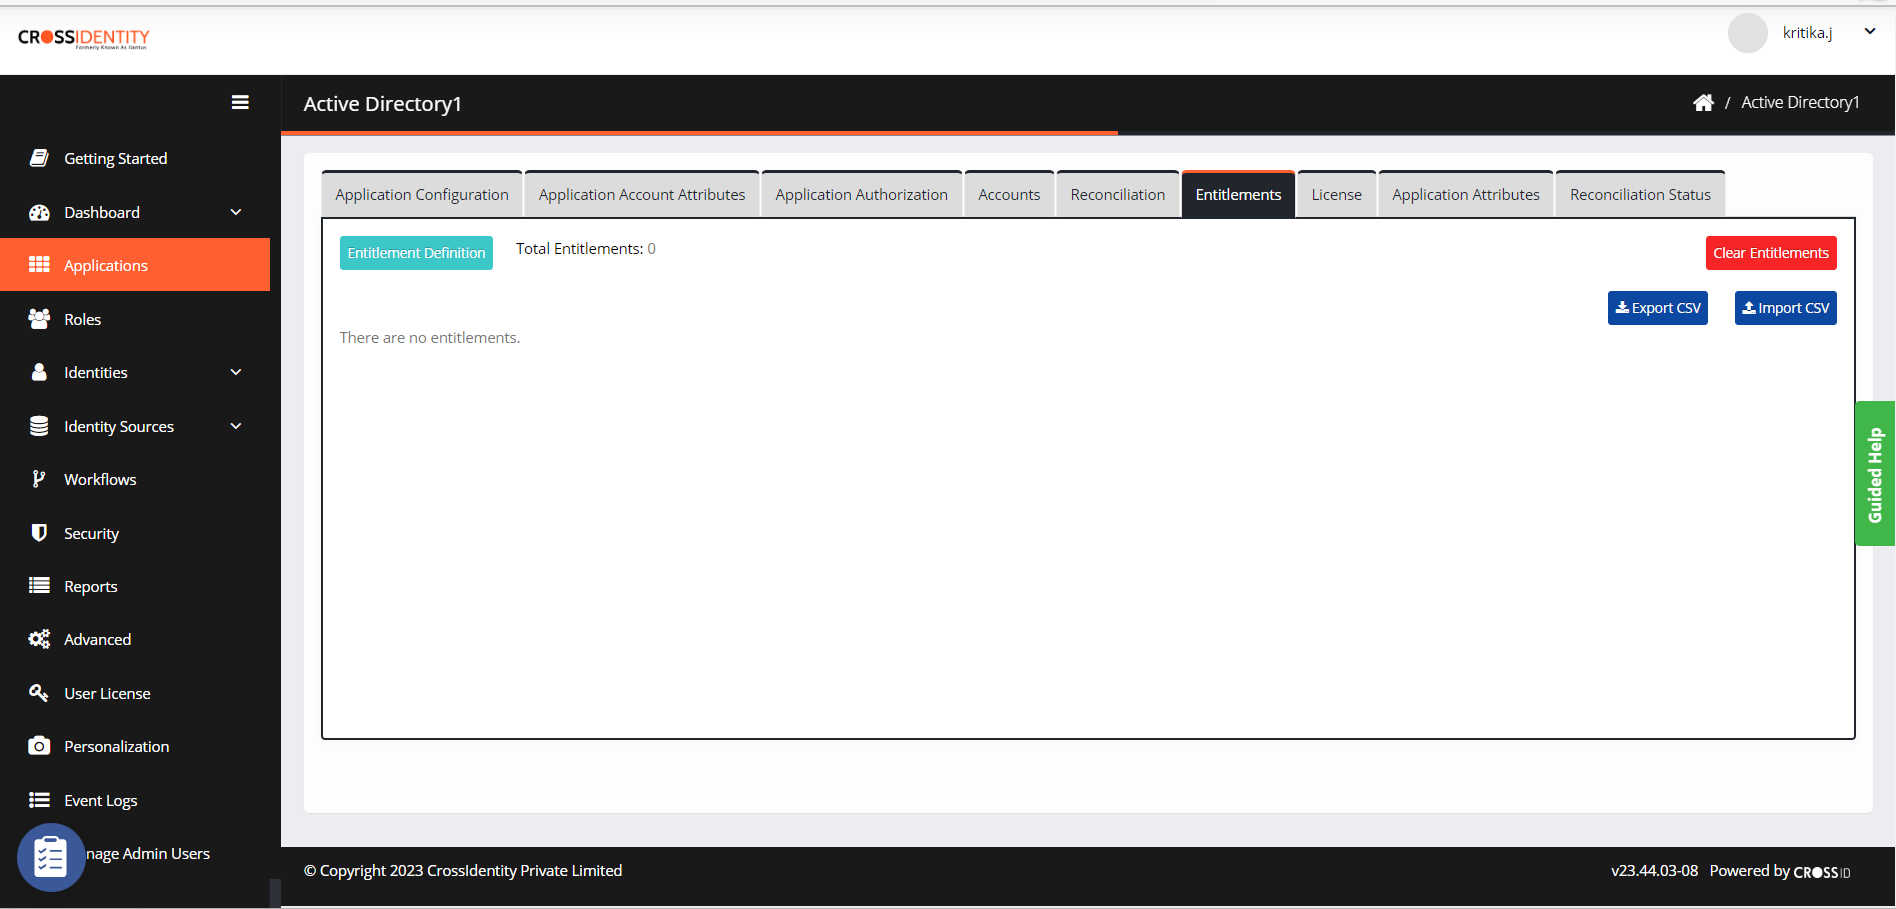
Click Entitlement Definition > Add Entitlement Definition to add the entitlement definition.
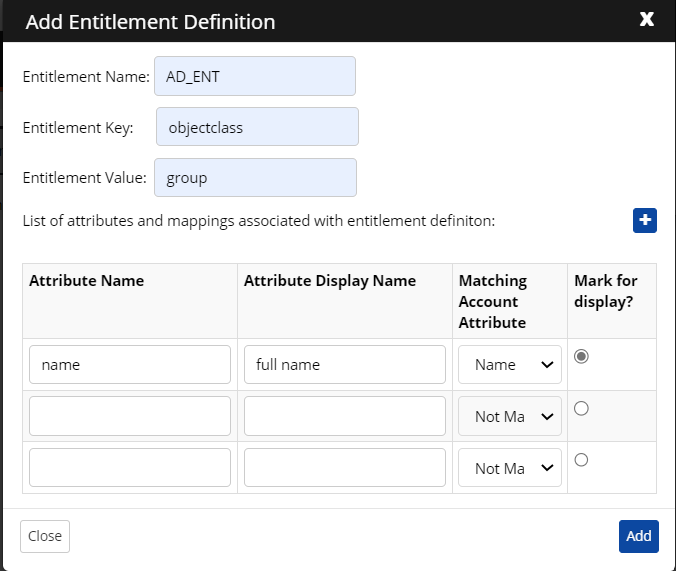
The entitlement key and value are checked in the connector to fetch group details and OU details respectively. As per the schema defined, the group names and their members are fetched and will be displayed in the Entitlement Tab.
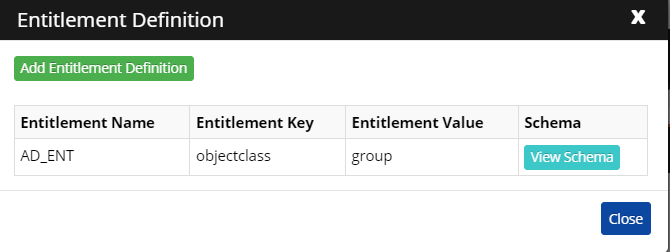
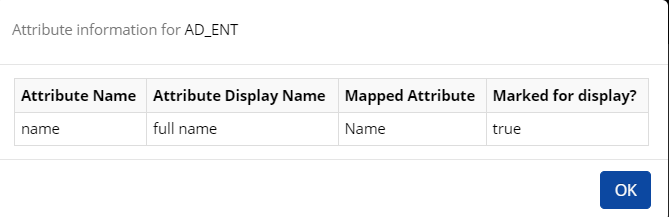
Click View Schema. In the connector, Attribute Name fields are used to fetch group names and members of that group from the respective API responses. The Attribute Display name is user-defined. The mapped attribute is mapped to the Distinguished Name (as we are considering DN as a unique key attribute) which represents the Group name, and the chosen will be displayed in the CI UI entitlement section.
Click Application Authorization to assign a role.
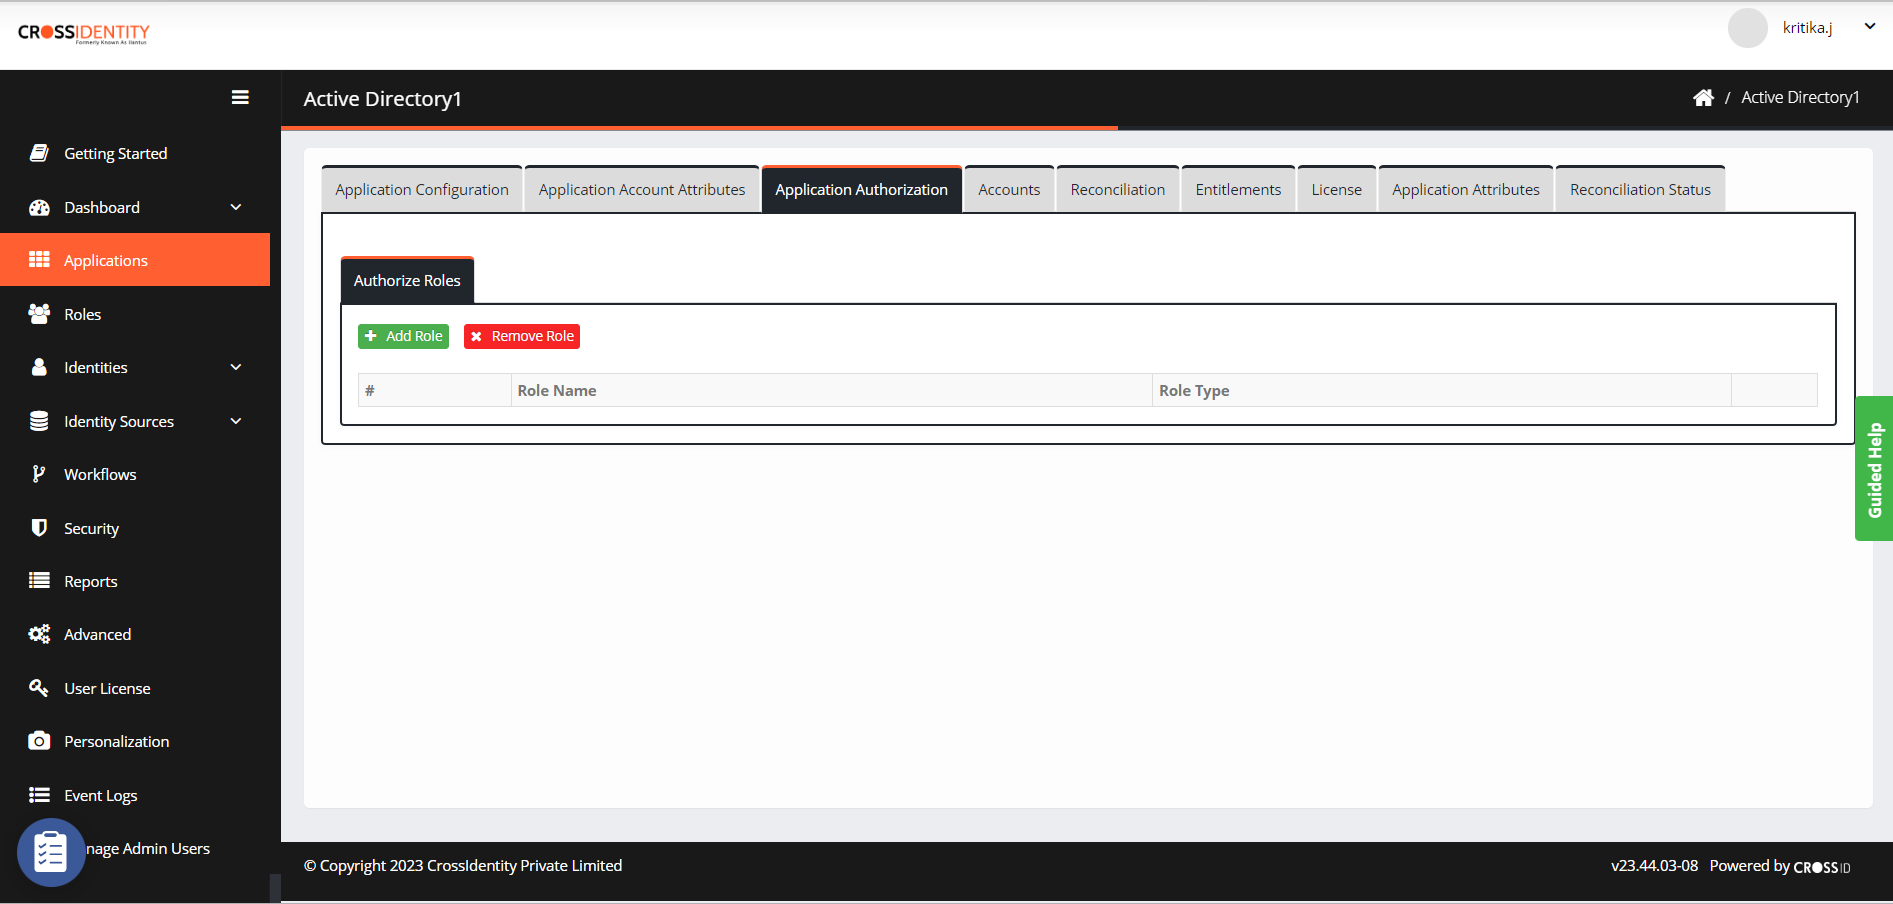
Click Authorize Role > Add Role. Search for the role added in CI and select the appropriate role name by checking the box and clicking ADD.

Navigate to Reconciliation to set the recon rule.
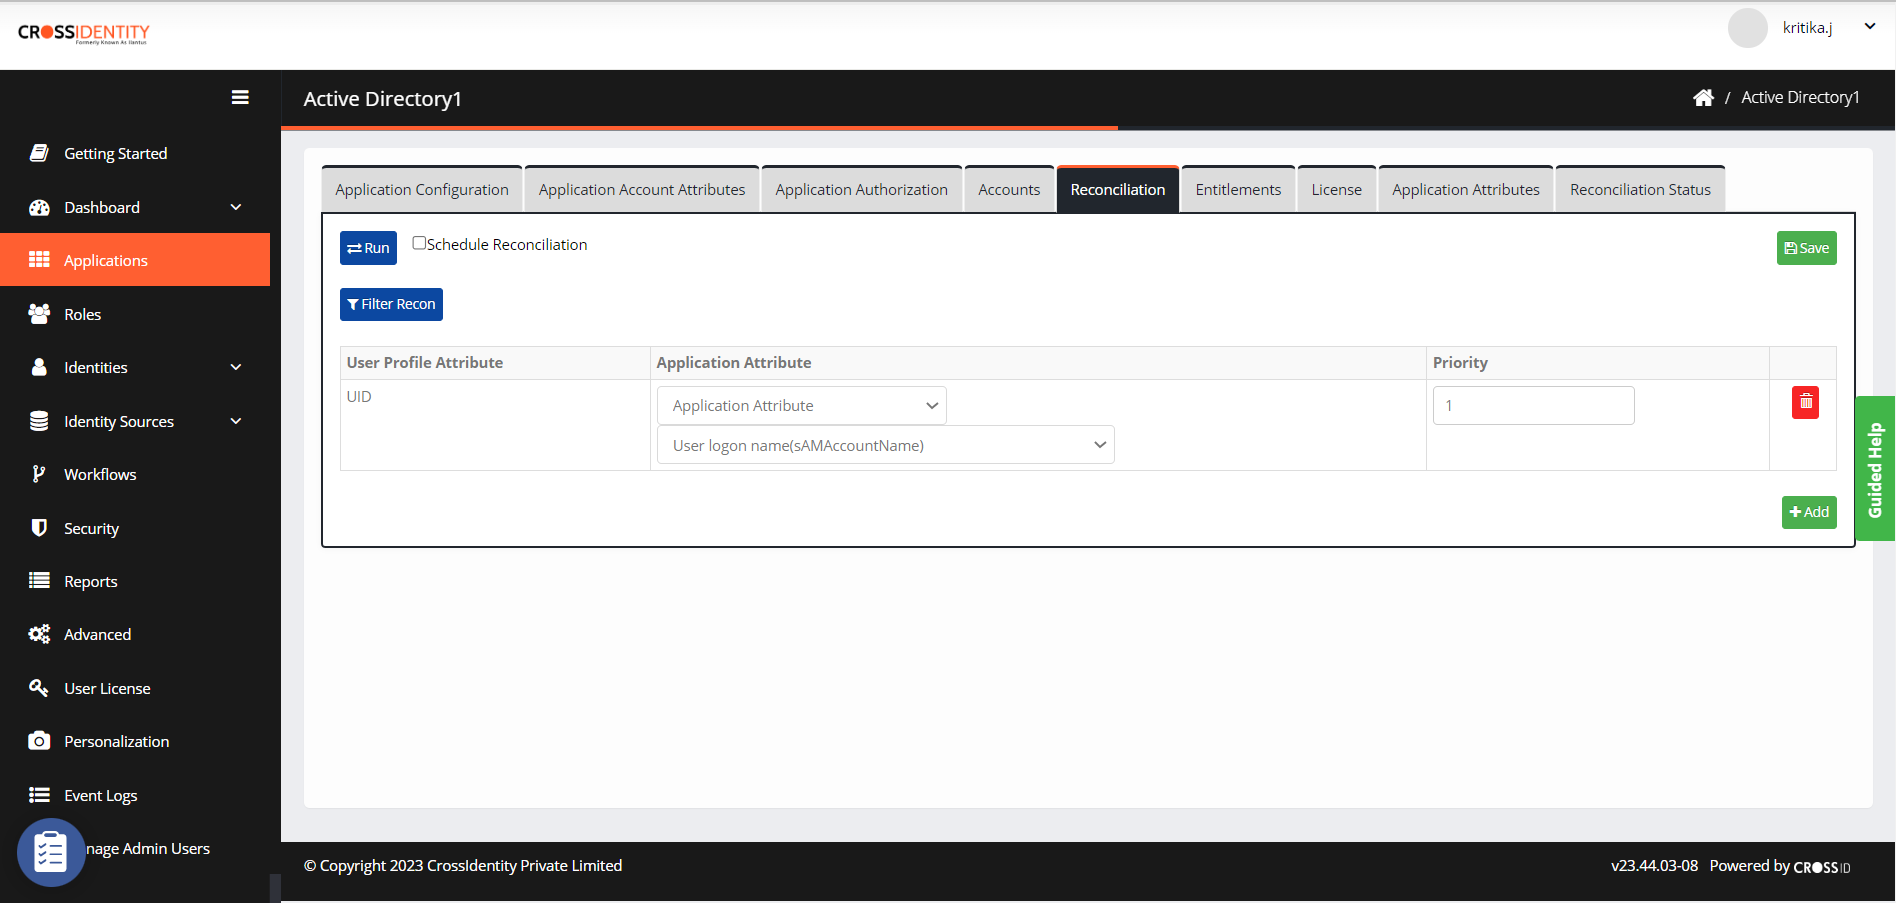
Click Save.
Important:
The Recon rule is a must to link the CI identity and its respective account from the Target application using a unique link attribute (like email, employee ID, SAMAccountName, etc.). Multiple attributes can be considered by choosing the priority.
Click Run to initiate the recon process.


Was this article helpful?
.png)