Authentication Policies Setup
- 18 Feb 2025
- 3 Minutes to read
- Print
- DarkLight
- PDF
Authentication Policies Setup
- Updated on 18 Feb 2025
- 3 Minutes to read
- Print
- DarkLight
- PDF
Article summary
Did you find this summary helpful?
Thank you for your feedback
Authentication Policies in Cross Identity are designed to facilitate multiple authentication methods across domains, including authentication for individual users. These policies enable authentication across a range of channels, including Cross Identity Store, Active Directory, and Identity Provider, allowing users to be authenticated using a variety of methods.
If there is no authentication policy setup, authentication occurs in Cross Identity by default.
This section covers:
Add an Authentication policy
Validating Authentication Policy
Authentication Policy with Authentication Mechanism as a Username/Password
Go to Security > Add Authentication Policy.

Enter a name for your authentication policy in the Authentication Policy Name field.

Select the Authentication Mechanism as Username/Password.
Set the Priority and enter the Description.
Note:
Priority cannot be the same for the two policies.
Click Save.


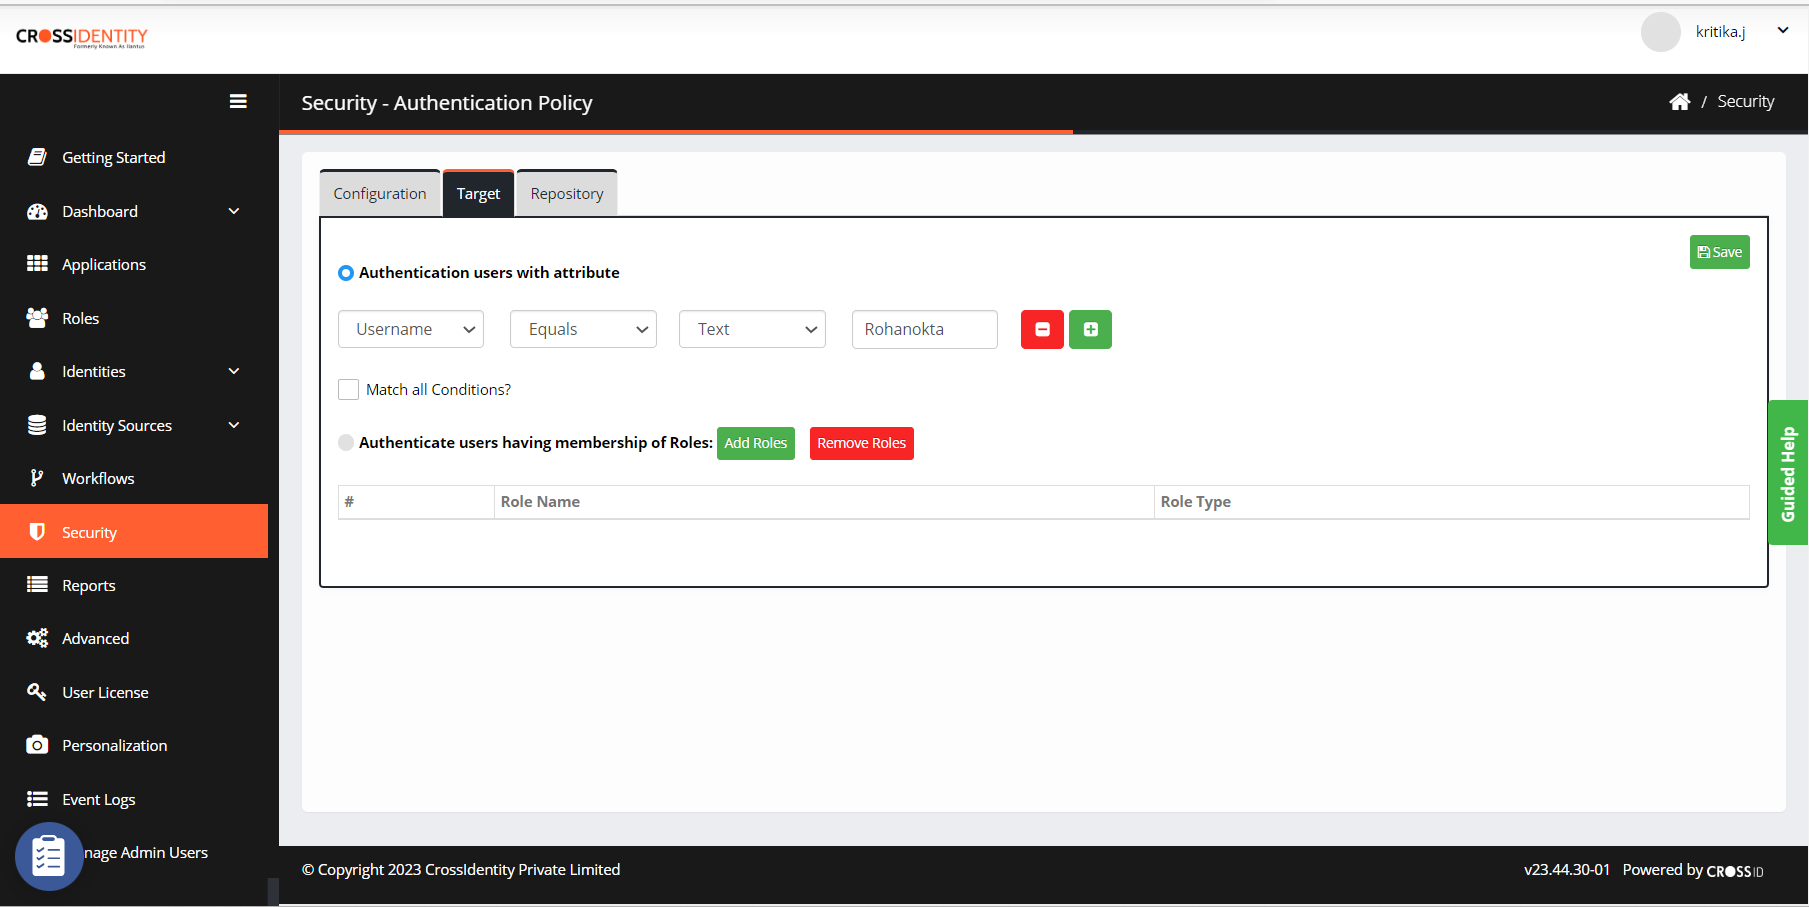
Target
Click Target to define the users for which the authentication policy will apply across multiple network ranges.

Select the radio button Authentication users with attributes to authenticate users with attributes.
Select an attribute and enter a condition with its corresponding value, such as Location and the value set to Bangalore. This ensures that when a user logs into Cross Identity, the system checks if the user belongs to Bangalore before applying this authentication policy.
To add multiple conditions to a policy, select +.
Choosing Match all Conditions instructs the system to employ an AND query between attributes, requiring all conditions to be satisfied for the policy to take effect.
If this option is not selected, the system will apply Or query between the attributes, meaning that the policy will be applicable if any of these conditions are met.
To authenticate users based on their roles, select Authenticate users having membership in the Roles box.
Click Add Roles and select the roles.
Click Save.

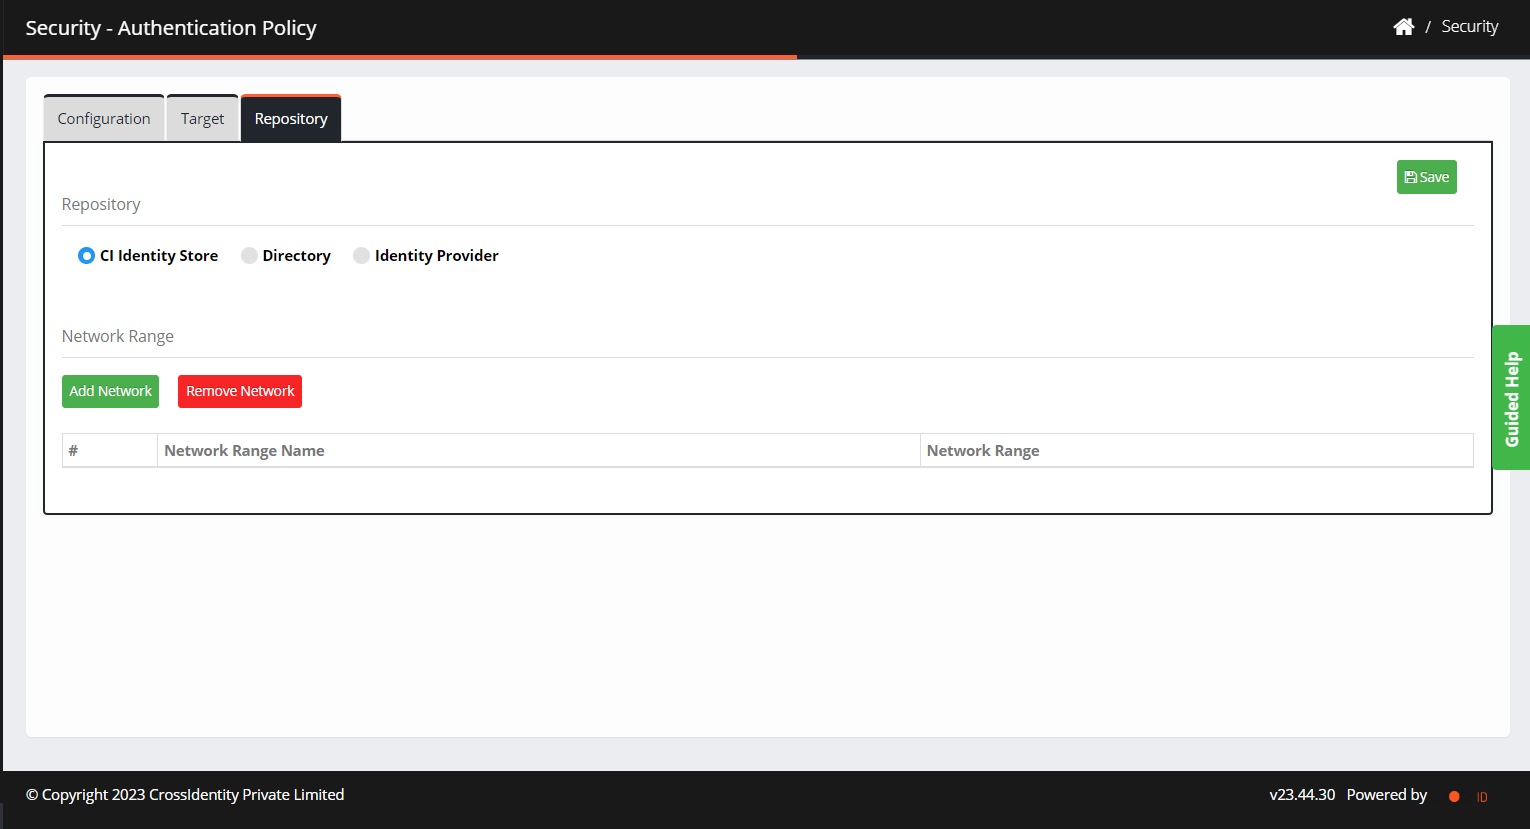
Repository
Go to Repository to define the authentication rule for the user.
You can choose CI Identity Store, Directory or Identity Provider.
Repository
Description
CI Identity Store
It validates the user’s information against the Cross Identity database. The user credentials or authentication are against CI credentials stored in the Cross Identity database.
Directory
It validates against the credentials stored in the Directory.
Identity Provider
It verifies the users’ information against the selected application.
Note:
On selecting CI Identity Store, there is no option to add an Identity Store.
Add Directory/Add Identity Provider option is available if you select Directory/Identity Provider.
Search and select a directory/identity provider and click Add.

Note:
All the directories configured in the identity sources menu are feasible for selection. Also, you can select only one directory at a time.
Add a network range for authentication by clicking Add Network.
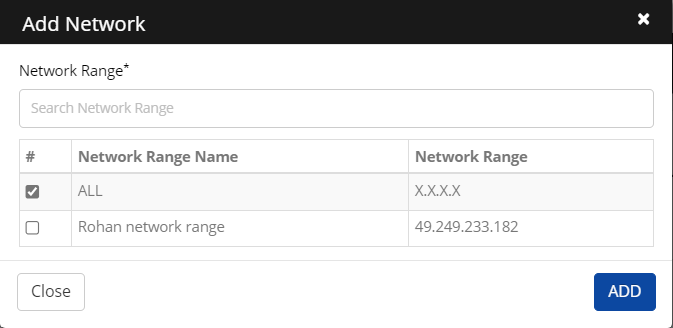
Select a network range and click Add.
Click Save.


Authentication Policy with Authentication Mechanism as Password Policy
Go to Security > Add Authentication Policy.
Enter the name for your authentication policy in the Authentication Policy Name field.

Select the Authentication Mechanism as Passwordless Authentication.
Set the Priority and enter the Description.
Click Save.

Target
On the Target tab, enter the user's name to whom the passwordless authentication policy should apply.
You can also choose to authenticate users based on their roles. For this, you need to check the Authenticate users having membership in the Roles box. Click Add Roles to add functions for authentication.
Select Match all Conditions, and it applies And queries between the attributes, and if it is not selected, it applies Or query between the attributes.
Click Save.

Repository
Click Repository. It will always be Passwordless Authentication.

Add a network range by clicking Add Network.
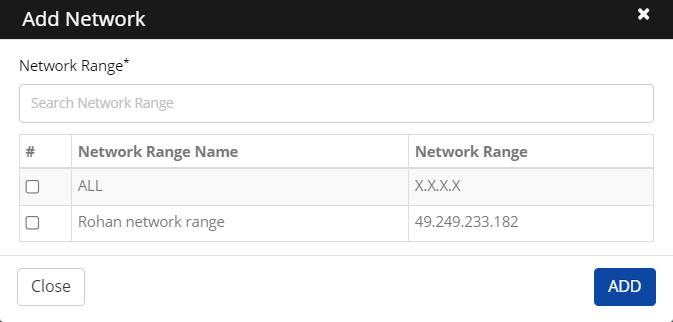
Select a network range and ADD to complete the authentication.
Click Save.


Authentication Policy with Authentication Mechanism as Multi-Factor Authentication
Go to Security > Add Authentication Policy.
Enter the name for your authentication policy in the Authentication Policy Name field.

Select the Authentication Mechanism as Multi-factor Authentication.
Set the Priority and enter the Description.
Click Save.

Target
On the Target tab, enter the user's name to whom the MFA policy should apply.

You can also choose to authenticate users based on their roles. For this, you need to check the Authenticate users having membership in the Roles box. Click Add Roles to add functions for authentication.
Select Match all Conditions, and it applies And queries between the attributes, and if it is not selected, it applies Or query between the attributes.
Click Save.

Repository
Click Repository.

Here, enable the preferred MFA method. Once enabled, the user will be prompted to go through authentication as chosen here.

Click Enable Callback and enter the URL.
If enabled, the user will be logged in to the application.
If not enabled, the user will be redirected to the launchpad.

Click Save.
Validating Authentication Policy:
When validating a user imported from Active Directory, it is a part of the Cross Identity user group and should be validated against Active Directory. It will authenticate the user against the Active Directory data stored with the specified user name and password rather than the credentials configured in the Cross Identity.


Was this article helpful?
.png)