Directory Integration
- 17 Feb 2025
- 2 Minutes to read
- Print
- DarkLight
- PDF
Directory Integration
- Updated on 17 Feb 2025
- 2 Minutes to read
- Print
- DarkLight
- PDF
Article summary
Did you find this summary helpful?
Thank you for your feedback
Cross Identity can integrate with various Source of Truth (SoT) systems such as Enterprise and Active Directories which manage the users in the organization.
It also allows multiple directory domains to be configured with the solution. This allows administrators to configure features required for those specific domains.
In Cross Identity, you can import directories and their respective data – identities and roles. You can also add, configure, and delete based on your needs.
This section covers the following:
Add a Directory
Navigate to Identity Sources > Directories.

Click Add Directory. The Add Directory window is displayed.
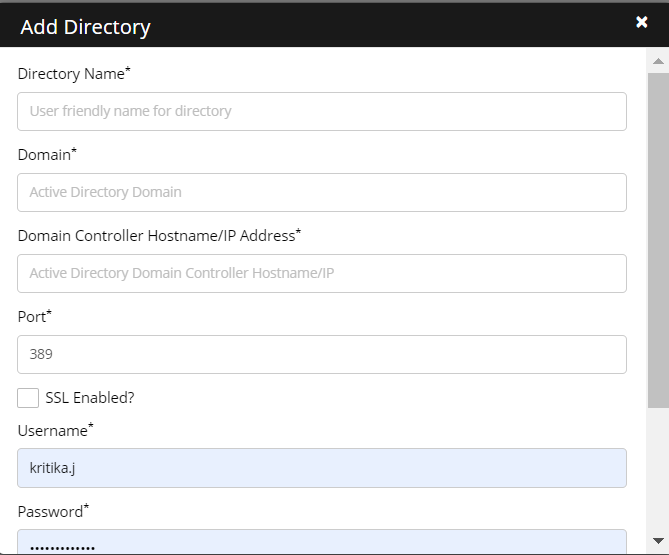
Enter the following details:
Directory Name: Enter the directory name.
Domain: Enter the domain name. For example, qatesting.local.
IP Address: IP address/hostname can be configured. Example: 10.10.2.33,10.10.2.34.
Information:
Cross Identity supports adding multiple Domain Controllers (DCs) to integrate with Active Directory. You need to put a comma after each IP address.
Port: Enter the port number.
SSL Enabled: If the port number is non-SSL then no need to check the SSL Enabled box. If the port number is SSL then check the SSL Enabled box.
Username and Password: Username and Password fields are not prepopulated. Provide the service account username and password of the Active directory being configured.
Search Base: Multiple OUs can be configured. They are separated by a pipe ‘|’ symbol. Example, OU=OU51ARJUN,DC=qatesting,DC=local
Click Add. A "Successfully added directory new directory" confirmation message is displayed.


Configure a Directory
Select a directory name and click View/Edit Directory.

The directory settings are the default screen.

Test Connectivity: Click to check the connectivity to the configured SoT system. It will display the message of whether SoT connectivity is successful or failed.

The screen will display the details entered during the directory addition process, and these fields can be edited, enabling modifications if necessary.
You will see the details entered when the directory is added. These fields are editable, allowing for modifications if desired.
Click Save.


Attribute Mapping
Click Attribute Mapping.

The User Attributes are the Cross Identities attribute, and the Directory Attributes are the target Application’s attribute.
To map the attributes, select a textbox or expression from the drop-down list.
If the ‘text box’ is selected, enter the attribute name manually.
If it is an expression, you need to write an expression to it.
Example:
Expression for user domain.
function getVal() {var val='cicorpAD';
return val ;
}
Primary Attribute: Select an attribute to mark as a primary attribute, so that Cross identity will identify the unique attribute to import users from the directory.

Information:
The mandatory attribute mapping comes along with the solution.
Advanced Settings
Click Advance Settings.
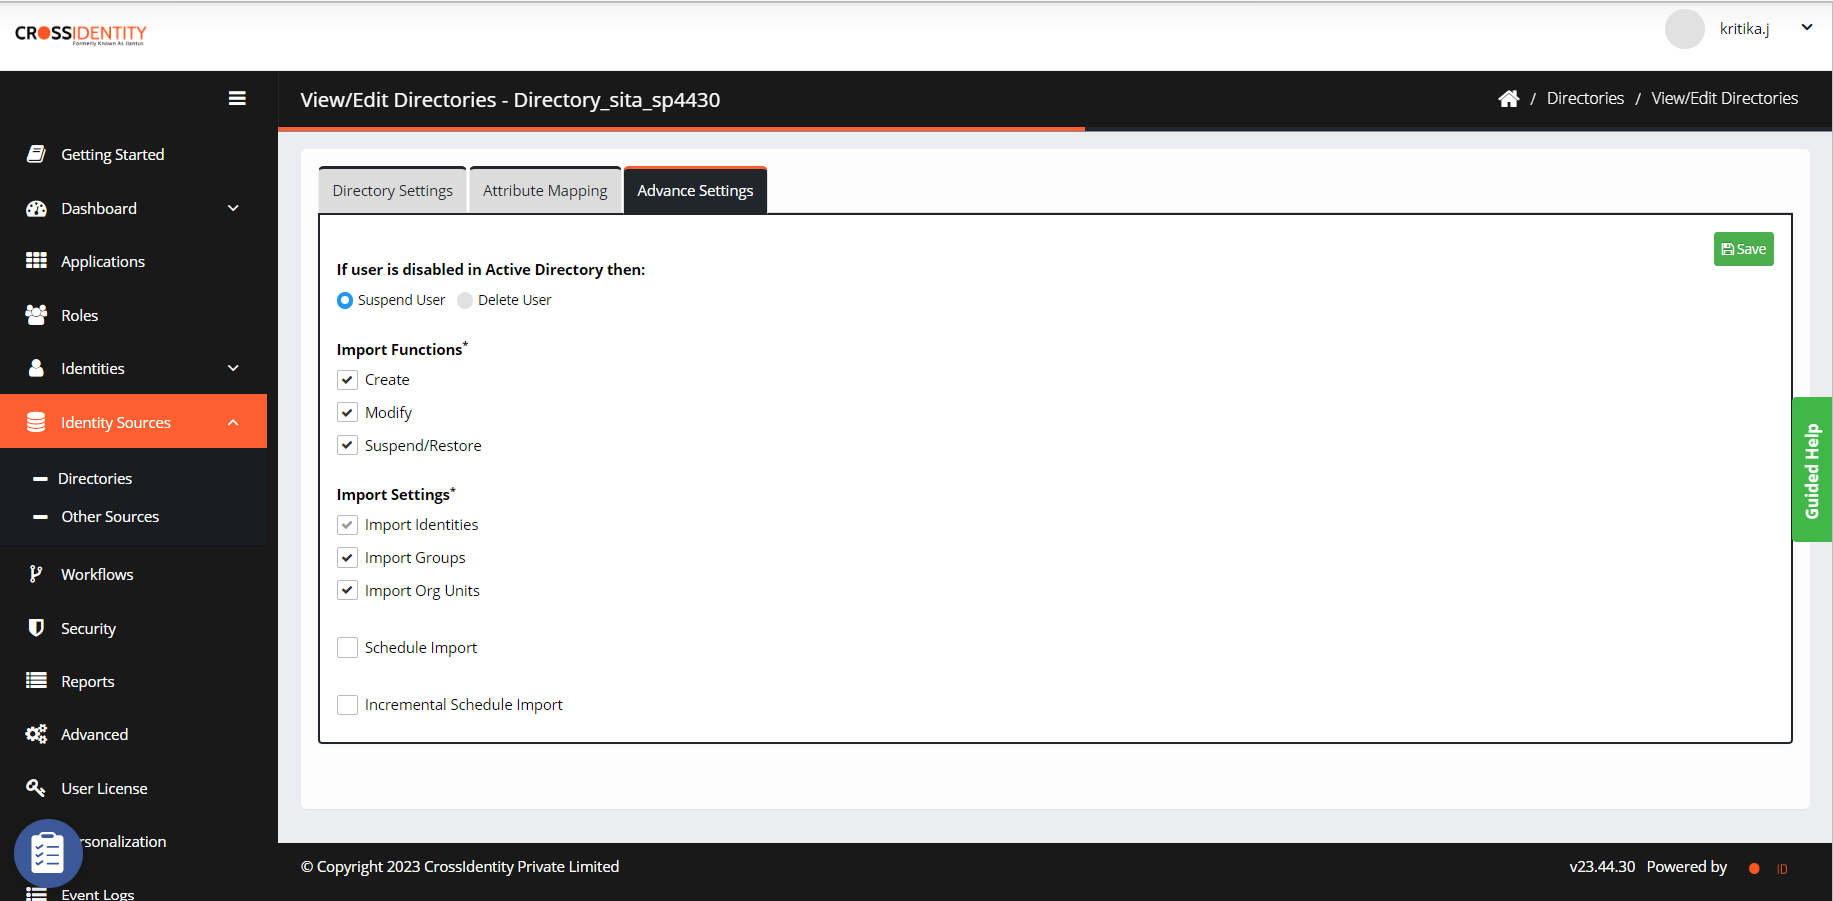
If the user is disabled in Active Directory, you can suspend or delete the user.
The Import Functions enable you to selectively define Active Directory SoT functions to create, modify, suspend, or restore users into Cross Identity. You can choose the import functions by selecting the appropriate boxes.
You can also import identities, groups or org units by selecting the appropriate boxes under Import Settings.
Schedule Imports: Check schedule import to run import at an interval. Enter the duration in minutes to run import every minute.
Incremental Schedule Import: Check schedule import to run import at an interval. Enter the time duration in minutes to run the import.

Was this article helpful?
.png)