Identity Sources
- 16 May 2024
- 4 Minutes to read
- Print
- DarkLight
- PDF
Identity Sources
- Updated on 16 May 2024
- 4 Minutes to read
- Print
- DarkLight
- PDF
Article summary
Did you find this summary helpful?
Thank you for your feedback
Cross Identity includes a built-in identity store that serves as a centralized directory for all users and roles created within the system, as well as in other sources. Additionally, Cross Identity can integrate with various Source of Truth (SoT) systems, including CSV files, Enterprise Directories, Active Directories (AD), and applications such as HRMS. This enables organizations to streamline the onboarding process for new users and effectively manage the lifecycle of users and their access to applications.
Cross Identity supports multiple SOTs at the same time in one tenant.
Add an Identity Source
Navigate to Identities Sources from the menu.r

Click Add Identity Source.
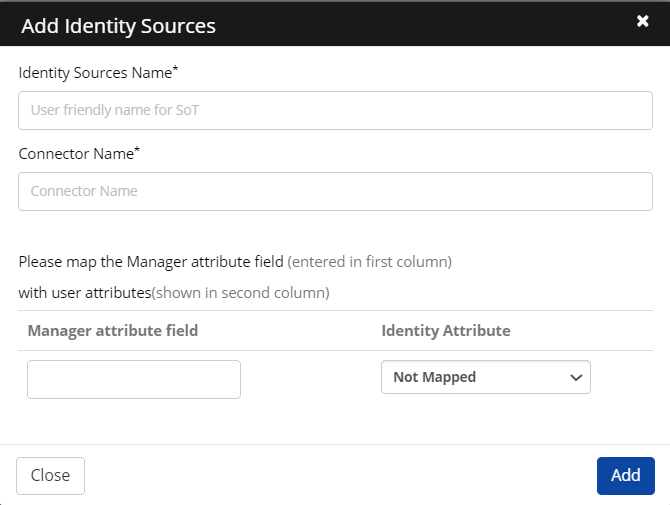
Provide the following details to configure the SoT:
Identity Source Name: Enter an SoT name.
Connector Name: Enter the connector's name that helps to establish a connection between the SoT portal and Cross Identity.
Manager Attribute field: Enter a manager name in the Manager Attribute field of the SoT portal and map it to an identity attribute of Cross Identity.
Click Add. The Identity Source is successfully added.


Configure an Identity Source
After the connector is configured, the admin user lands on the configuration screen. The configuration screen consists of the following tab:
Select an Identity source name and click View/Edit Source. The Edit Identity Source window is displayed.
General
This is the default screen on the configuration page.

The screen displays the added Identity Source Name and Connector Name.
Click Test Connection to check the connectivity to the configured SoT system.
It will display the message of whether SoT connectivity is successful or failed.

Select Schedule Identity Source to run import operation from Identity Source every minute.
Initiate SUSPEND/DELETE/DO NOTHING operation to verify whether the user is either deleted or suspended from Identity Source. If the "DO NOTHING" is chosen and a user import is initiated, the records of users not included in the user import are suspended or deleted. Any update will be skipped if this option is selected.
Click Save.


Note:
DO NOTHING option is added to allow the user import to avoid the delete and suspend identities in Cross Identity if such users are not included in the user list supplied by the SoT Connector.
Import
Click Import. The Import tab is displayed.
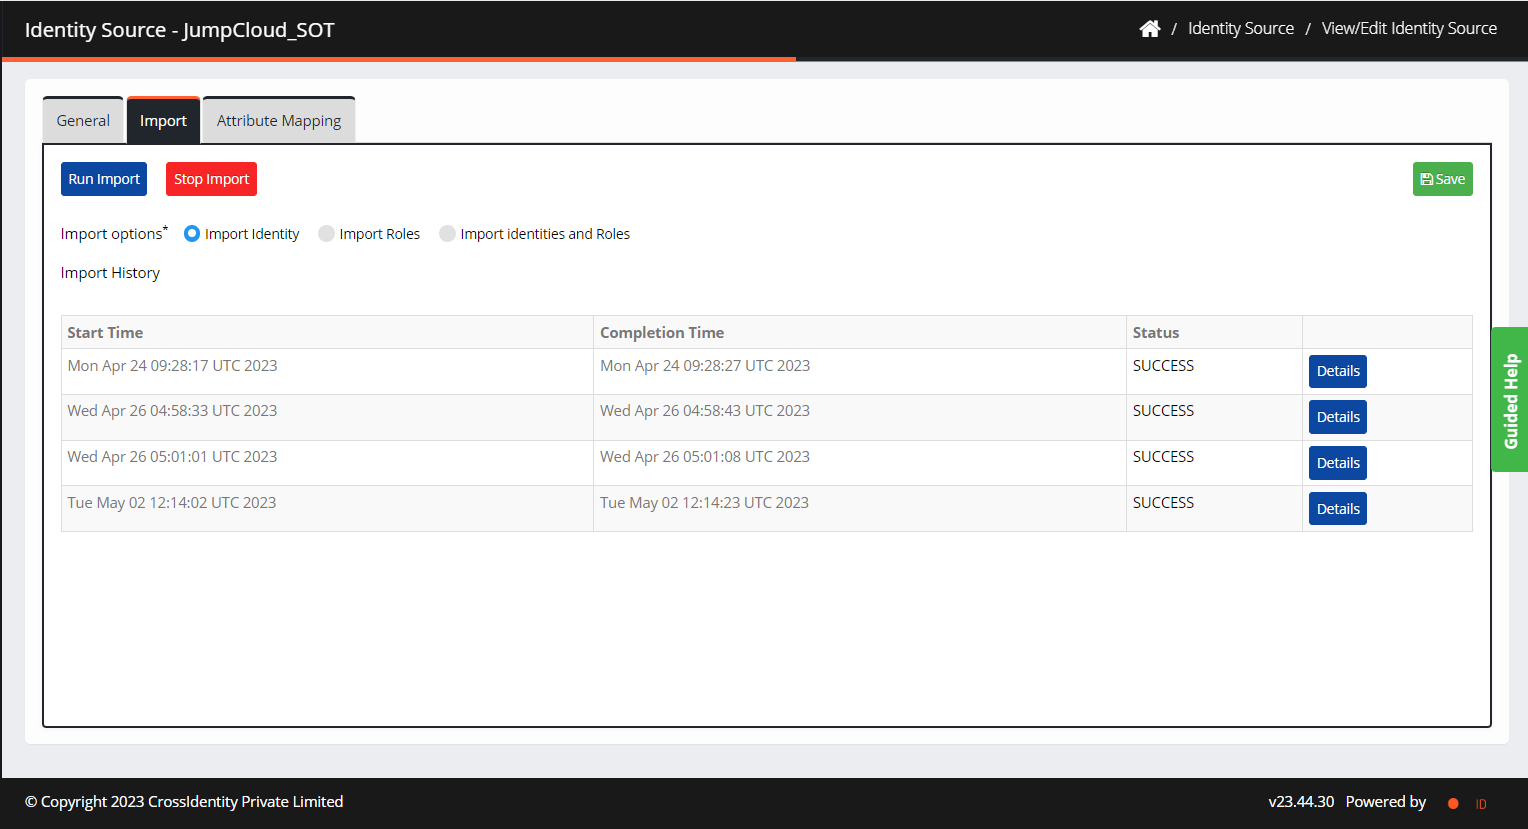
Select either of the available Import options:
Import Identity
Import Roles
Import Identities and Roles
Click Run Import. The users and roles are imported from the HRMS system to Cross Identity.

Attribute Mapping
Attribute Mapping enables an admin to map SOT attributes with Identity (CI User) attributes. Ensure to keep the following pointers in mind:
Click Attribute Mapping. The Attribute Mapping tab is displayed.


The option must be available from other sources, which include Orange HRMS, Oracle EBS, Workday, SAP, or any other future HR SOT sources.
These attribute mappings must be evaluated before the CI user is created, as these mappings may have used User ID or Email generation logic.
In the Evaluation Operation, specify if the logic must get executed during the creation or modifications of the attributes.
For ALL the Identity Sources (Directories and Other sources):
You can add and remove the attribute mappings for each row between Identity Source and Identity (CI User).
The field must be alphanumeric. Only hyphens, underscores, and periods (.) are allowed as special characters. Blank spaces are not allowed.
You can write Javascript expressions in the SOT Attributes text field.
The SoT user attributes must be referred to in the expression as variables: SOT.getAttribute(<AttrName>) = Returns the value of the current SoT user's attribute.
Use the following five CID functions in the expression:
USER.isAttrUnique(<AttrName>, <value>) - Returns "true" if the <value> for the attribute is not present for any user in the system. Else, returns "false".
Information:
Ensure that the user is unique in Cross Identity irrespective of the source/directory.
USER.getUserID(<USER.getUserID AttrName>, <value>) - Returns UserID of the User with <AttrName> have <value>. It may return zero or more values.
USER.getMgrUserID(<username>) - Returns UserID of the Manager of the User with<userid>.
SOT.getAttribute(<AttrName>) = Returns the value of the current SoT user's attribute (incoming value from SOT).
USER.getAttribute(<Username>,<AttrName>) - returns the user attribute value for a particular Username
Example 1:
SOT Attribute "Expression" and Identity Attribute (CI User) is mapped to "Username". Below expression will allow to auto-generate the CI User ID.strUID = SOT.getAttribute(FName) + "." + SOT.getAttribute(LName);i=0;While (!USER.isAttrUnique("UserName", strUID)){i = i+1;strUID = SOT.getAttribute(FName) + "." + SOT.getAttribute(LName) + i;}return strUID;
Example 2:
You can mark which attribute is the unique attribute between SOT and CI User. You can select Employee Number, Email, or UserID as the unique attribute during add/update/terminate/search operations. This can be any attribute of the CI User. General Expressions:
You can use Constant strings in the expression:
Example: "TC"Branching (IF(<condition>){} Else{}) and looping (While (<condition>){}) should be able to use in the expression.
Boolean Conditions (true/false) and other conditions (>, <, =, !=) can be used in the expression. How about OR, AND, NOT, and is there a need for ~ ?. Yes needed (&& - AND, | - OR, ! - NOT)
All Javascript String management functions can be used in the expression:String.substring(<value>, <start_index>, <len>) - Returns string that is started from <start_index> with <len> lengthString.contains(<String1>, <String2>) - Returns true if String2 is part of Strng1 else returns false.String.toUpperCase(<value>) - Returns upper-case string of <value>String.toLowerCase(<value>) - Returns lower-case string of <value>String.trim(<value>) - Returns the trimmed string of the <value>
It supports other Javascript functions as well.
The expression should end with the below statement: return <value>; After the execution of the expression, the system will return "<value>". This <value> will be mapped to the value of the CID User attribute selected on the right side.
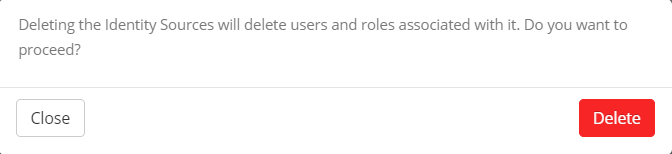
Delete an Identity Source
Select an Identity Source and click Delete Identity Source.
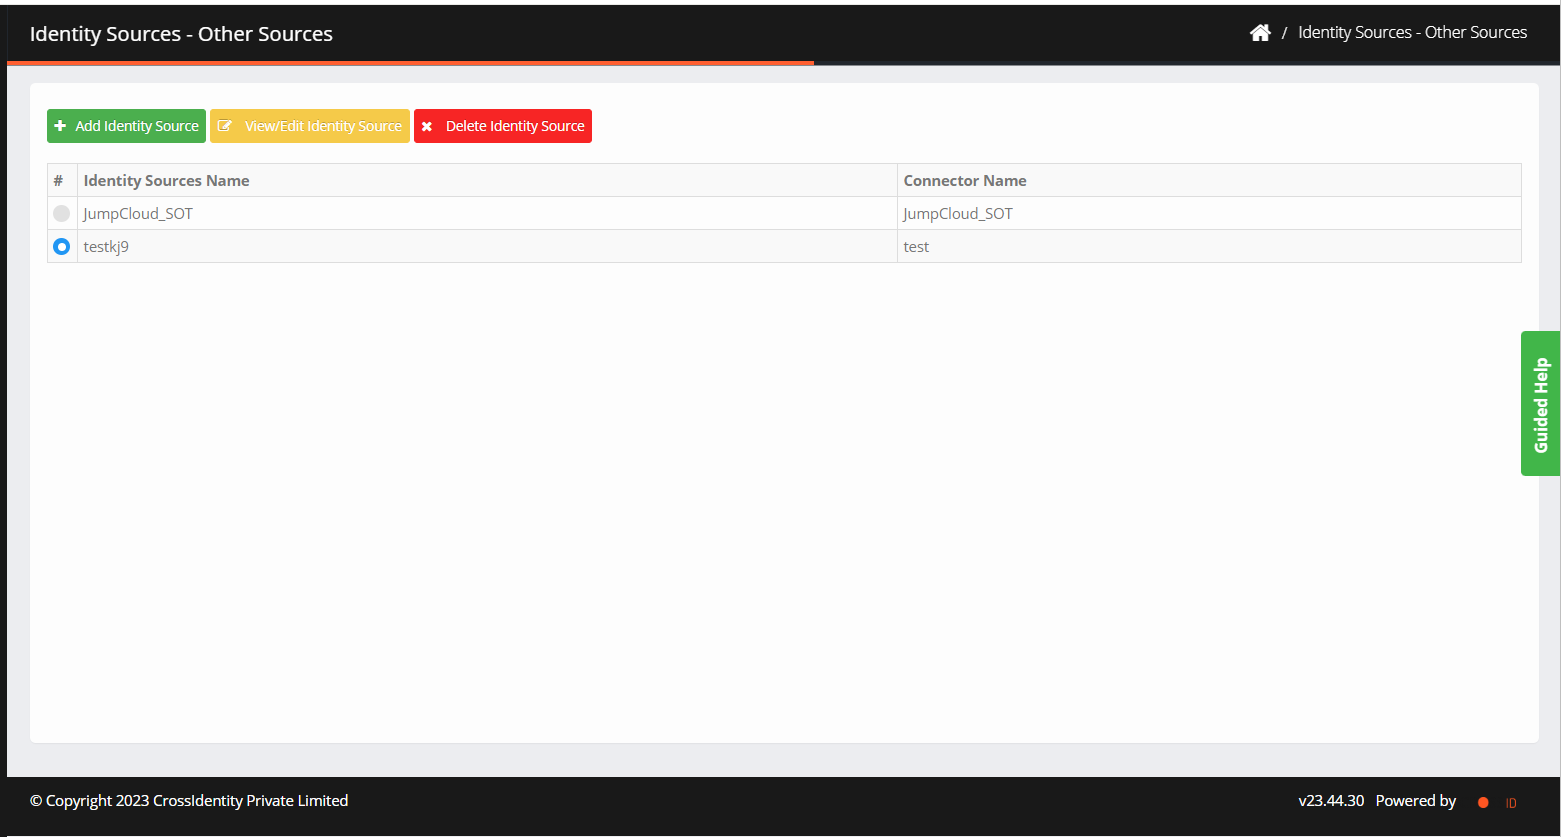
Click Delete. An "Identity Source deleted successfully" confirmation is displayed.


Was this article helpful?
.png)