Configure OAuth applications
- 08 May 2024
- 5 Minutes to read
- Print
- DarkLight
- PDF
Configure OAuth applications
- Updated on 08 May 2024
- 5 Minutes to read
- Print
- DarkLight
- PDF
Article summary
Did you find this summary helpful?
Thank you for your feedback
The OAuth 2 authorization framework is a federated protocol used to achieve Single sign-on (SSO). It ensures that end users can access the application hassle free after successfully authenticating against Cross Identity. The Cross Identity application generates tokens and is available to the target applications. Users can access the protected resources using these tokens without revealing their long-term credentials or identity.
How OAuth works in CI:
The following diagram illustrates the OAuth 2.0 authorization flow:
Step 1: The resource owner clicks on Connect to CI on the client screen (OAuth Debugger). The Client screen is redirected to the Authorization server. In addition, the client sends some configuration-related information that the authorization server requires. Also, it sends different grant types.
Step 2: The Authorization server prompts a user login consent to provide permission for the client.
Step 3: The client will return to the authorization server and request an access token.
Step 4: The client requests the authorization server to exchange the grant type for an access token.
Step 5: The client can access the information on the resource server.
Configure O'Auth Application
Navigate to Applications from the menu. Click + Add Application.

In the AppStore pane, click OAuth to view apps. Example- Oauth Code.
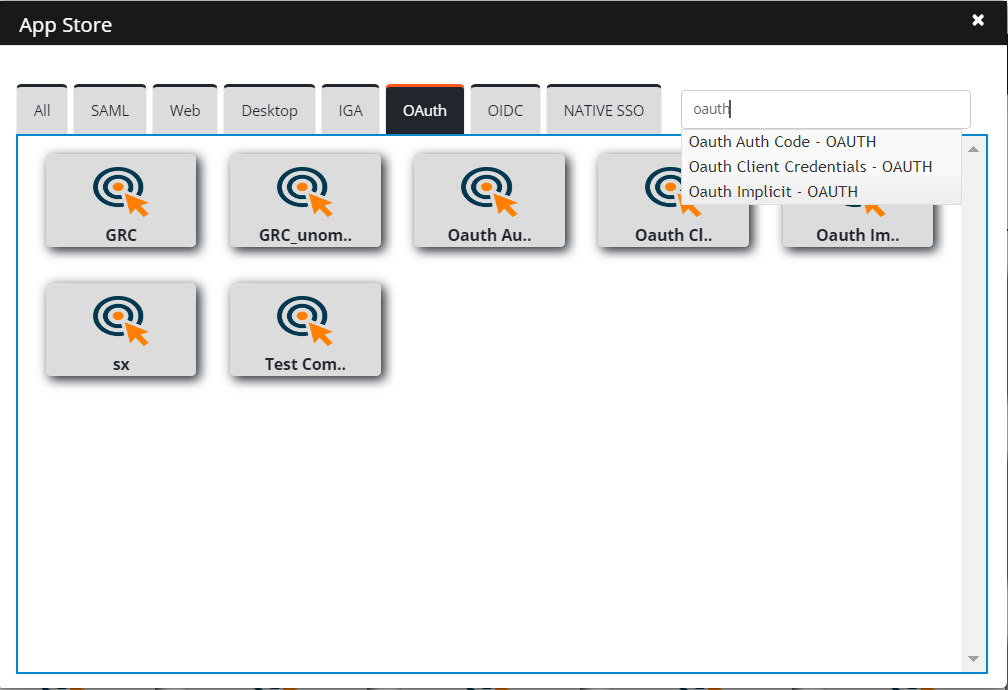
Select the application and it will take you to the Application Configuration page.


Information:
If the target application tries to communicate with the CI application to get the OAuth token, then the application must be specified with a username and password.
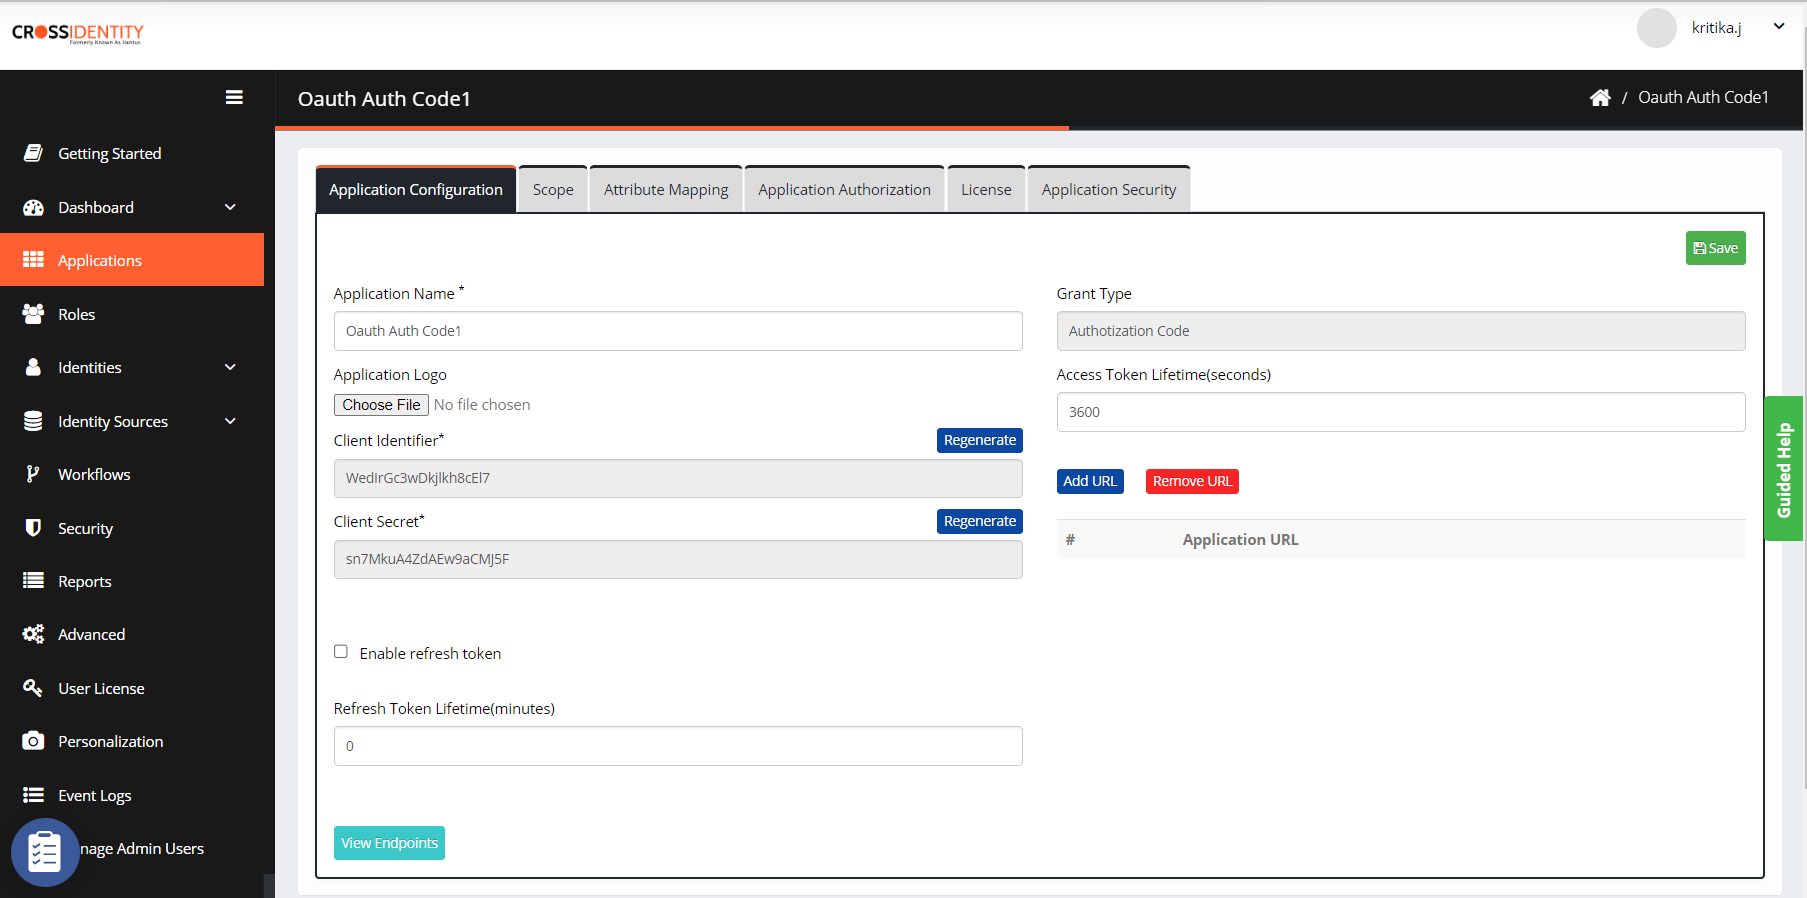
Configure the application using the following:
Application Name: It is a pre-filled text field. The name can be edited as per requirement.
Application Logo: Upload a logo for the application or select the default logo available on the user's system.
Client Identifier: The client ID is generated automatically when an application is onboarded from the App Store. It is the application's username, communicating with Cross Identity.
Client Secret: When an application is onboarded from the app store client secret key is generated. This client secret is a Password for the application to communicate with Cross Identity.
Enable refresh token: Select this field to refresh the token after the configured time.
Refresh Token Lifetime (minutes): Specify the lifetime to refresh the application token after the configured time the token refreshes. By default, it is set to 3 minutes.
Grant Type: The following grant types can be assigned to the target applications while configuring:
Authorization code
A temporary code clients use to exchange an authorization code for accessing tokens.
Implicit
It is a way for a single-page JavaScript app to get an access token without an intermediate code exchange step.
Client Credential
It is used by clients to get access tokens to access their resources.
Resource Owner Password Grant
It is used where the resource owner has a trust relationship with the client, such as the device operating system or a highly privileged application.
Access Token Lifetime (Seconds): Specify the OAuth access token time in seconds. By default, it is set to 3600 seconds.
Add URL: Click Add URL button and specify the URL. You can add multiple URLs.
Remove URL: Select the URL you want to delete and click the Remove URL button.
View Endpoints: Click View Endpoints to view the available endpoints:
Authorization Endpoint
Token Endpoint
UserInfo Endpoint
Token Introspection Endpoint
Token Revocation Endpoint
Refresh Token Endpoint
Click Save. The "Successfully associated provisioning application" confirmation message is displayed.
Scope
You can configure multiple scopes; Scope can be any attribute OAuth accepts it takes as a basis to Identify.
Navigate to Scope. The screen is displayed.

Click Add Scope.
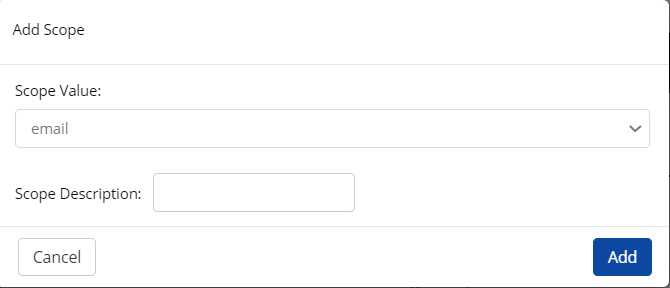
Select the Scope Value from the drop-down and provide the Scope Description.
Click Add and the “Scope added successfully” confirmation message is displayed.


To remove a scope:
Click Remove Scope.
Select a scope to delete.
"Do you want to remove the selected scope" a confirmation message is displayed.
Click Remove. It will confirm that "Scope removed successfully."
Attribute Mapping
You can map Cross Identity attributes to the third-party application (For Example, Salesforce). These third-party application attributes are defined in the User Schema Attributes tab which is part of Advanced Screen.
Navigate to Attribute Mapping.

Map Profile attributes with User Attributes and click Save. A confirmation message is displayed.

Application Authorization
You can add roles and users and authorize them to access the applications.
Authorize Roles
As an administrator, CI allows you to select specific roles authorized to access an application.
To authorize roles, follow the steps:
Navigate to Application Authorization. The application authorization screen is displayed.
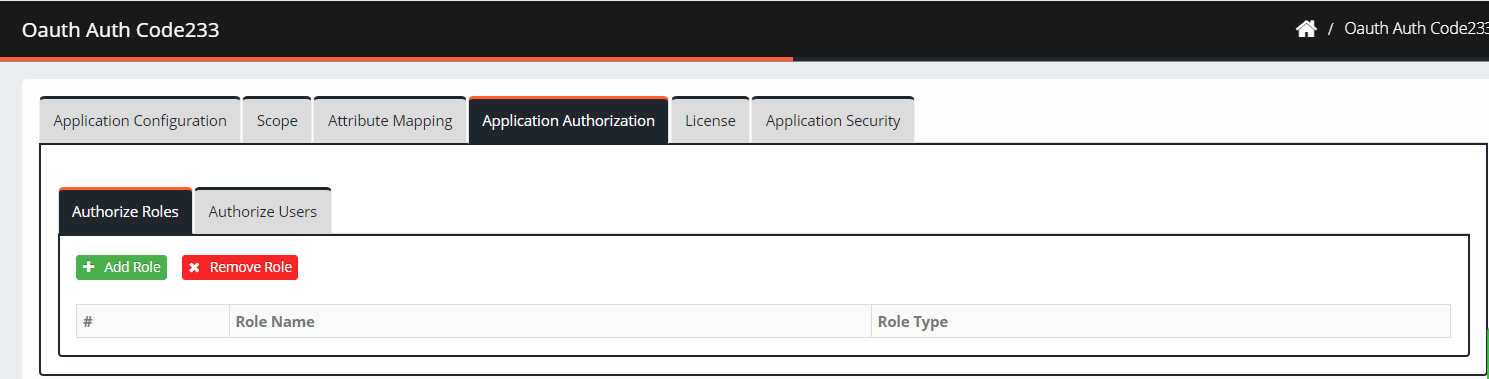
Click Authorize Role > Add Role. The Add Role screen is displayed.
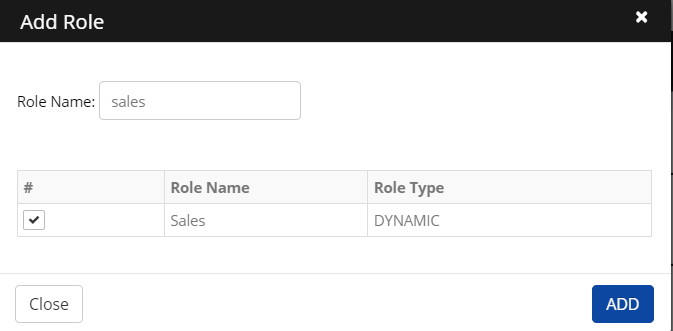
Enter a Role Name in the search field
Select a role from the results and then click Add.
The added role is displayed on the screen.
Information:
Based on the role type, it allows the user to select either static or dynamic.


Authorize Users
As an administrator, CI allows only specific users to access the application.
To authorize users, follow the steps:
Click Authorize Users > Add User.
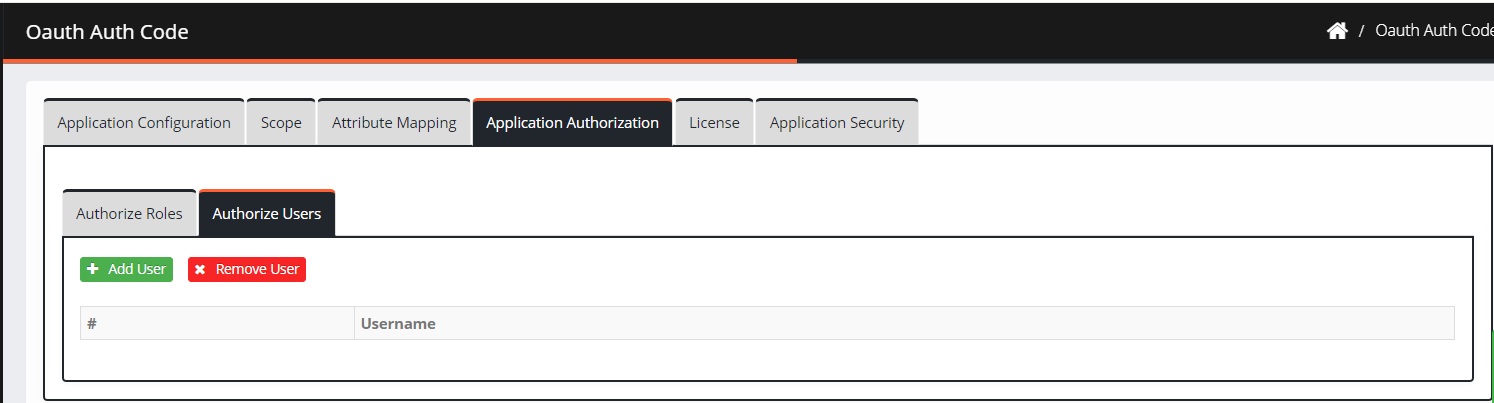
Enter a username in the search field.
Select a user from the results and then click Add.

The added user is displayed on the screen.
Information:
You can remove users from the Remove User tab.


License
This applies to the pay-per-use model, where the admins can assign a specific number of licenses for use in SSO. This prevents over-utilization of the application.
Navigate to License.
Max. User Licenses: Enter the maximum number of licenses which can be issued to the application.
Application License Price: Enter the price for each license to calculate the total cost and displayed it on the Consumption Dashboard.
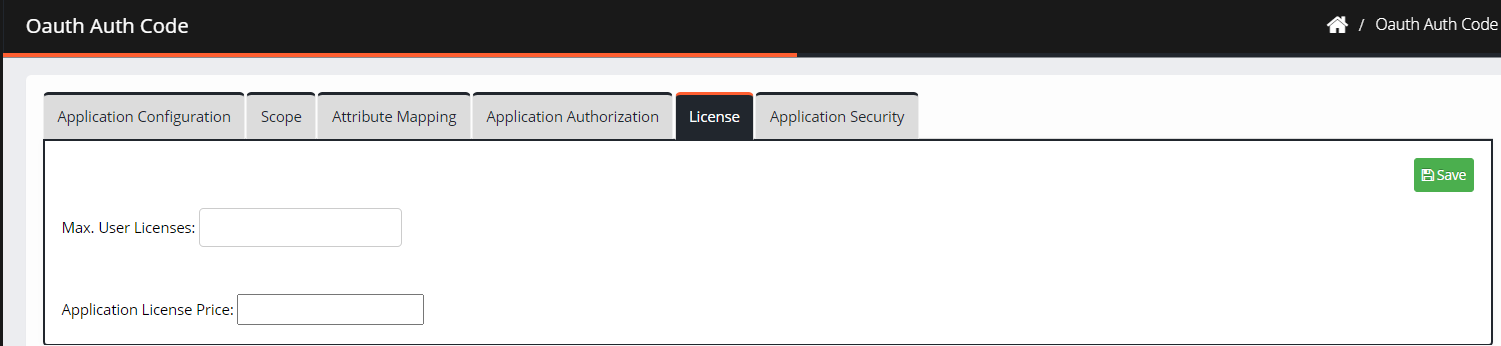
Click Save.

Application Security
You can set up multi-level authorization to improvize the security level. All SSO applications can have an additional parameter defined by an administrator.
To set up multi-level authorization:
Navigate to Application Security.
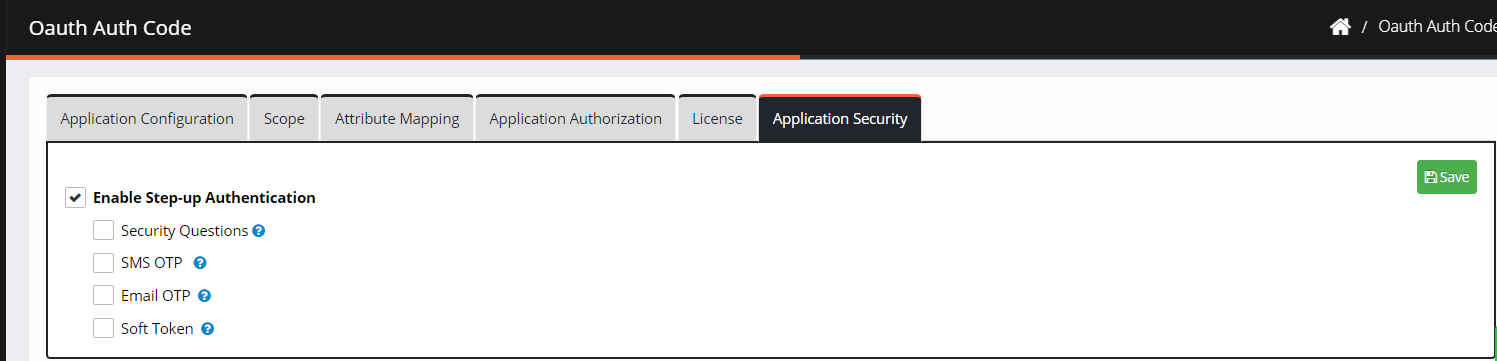
Check the box Enable Step-Up Authentication.
Select an authentication method:
Field Name
Description
Security Questions
Users must answer all the available security questions displayed on the screen.
SMS OTP
Users receive one-time passwords on their registered mobile numbers. A phone number is dynamically derived from the user's profile.
Email OTP
Users receive one-time passwords on their registered email addresses. The email address will be dynamically derived from the user's profile.
Soft-Token
Six-digit one-time passcode is generated on the Soft Token app on the user's mobile number. The user needs to enter the passcode for verification.
Click Save. The "Successfully updated application step-up authentication" confirmation message is displayed.
Whenever End-User tries to access the SSO application, they will be redirected to MFA for Authentication and Consent.
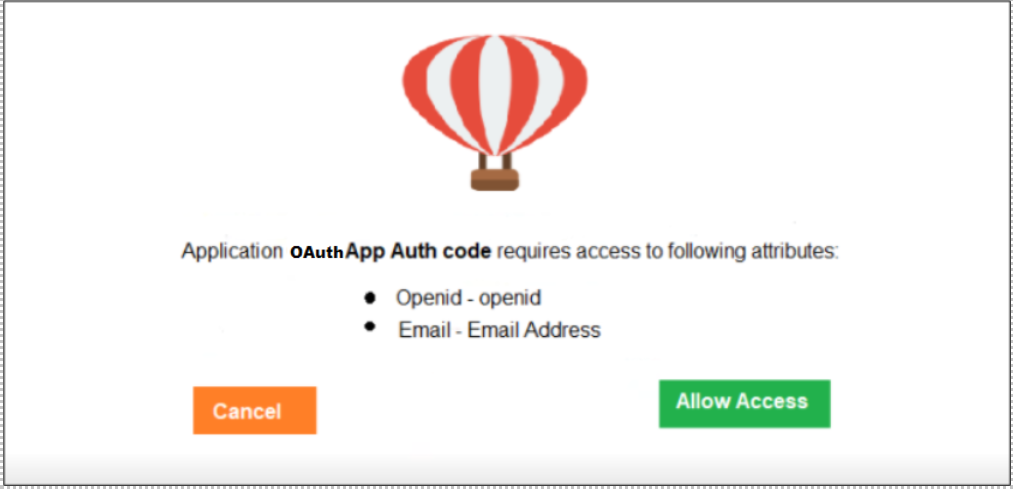
After the access is granted, the user will consent to access the Application. This will be verified from End-User->My Profile->Consent.

This is the Application Security from CI-Level to End-User Application.


Was this article helpful?
.png)