Configure IGA applications
- 15 Feb 2025
- 7 Minutes to read
- Print
- DarkLight
- PDF
Configure IGA applications
- Updated on 15 Feb 2025
- 7 Minutes to read
- Print
- DarkLight
- PDF
Article summary
Did you find this summary helpful?
Thank you for your feedback
To configure the IGA application:
Navigate to Applications from the menu. Click + Add Application.

In the AppStore pane, click IGA to view apps. Example- Active Directory.

Select the application and it lands on the Dashboard.

The Dashboard offers a snapshot of total accounts, total entitlements, entitlements without accounts, and orphaned/owned accounts in an IGA application.

Navigate to the General tab to update application information.

Fill in the following information:
Application Name: It is a pre-filled text field. The name can be edited as per requirement.
Application Description: You can specify the application details, including its purpose and other relevant information.
Application Logo: Upload a logo for the application or select the default logo available on the user's system.
Application Owner: Provide the name of the application owner.
Dormancy Period(no. of days)*: Provide the number of days for the dormant policy.
License: Enter the maximum number of user licenses which can be assigned and the application price per license.
Go to the Application Configuration tab for application details.

Provide the information in the following fields:
Test Connection: You can test the connectivity between the IGA application and the target application/system.
Download Warfile: It downloads the connecter file on your system.
Domain Controller hostname/IP: Provide the domain controller hostname or IP.
Port: Enter the port number.
Domain: Provide the domain name of the domain controller.
SSL: Select the SSL check box, if the port number entered is an SSL port.
Administrator DN: Enter the administrator username.
Administrator Password: Enter the administrator password.
Managed OU: Provide the name of the location where the user needs to be created.
Click Save. 'An Application updated successfully' confirmation message is displayed.


Application Account Attributes
Go to Application Account Attributes.

Click +Add. Select the application attributes you want to map and then click ADD.

On the next screen, you can see the added application account attributes.
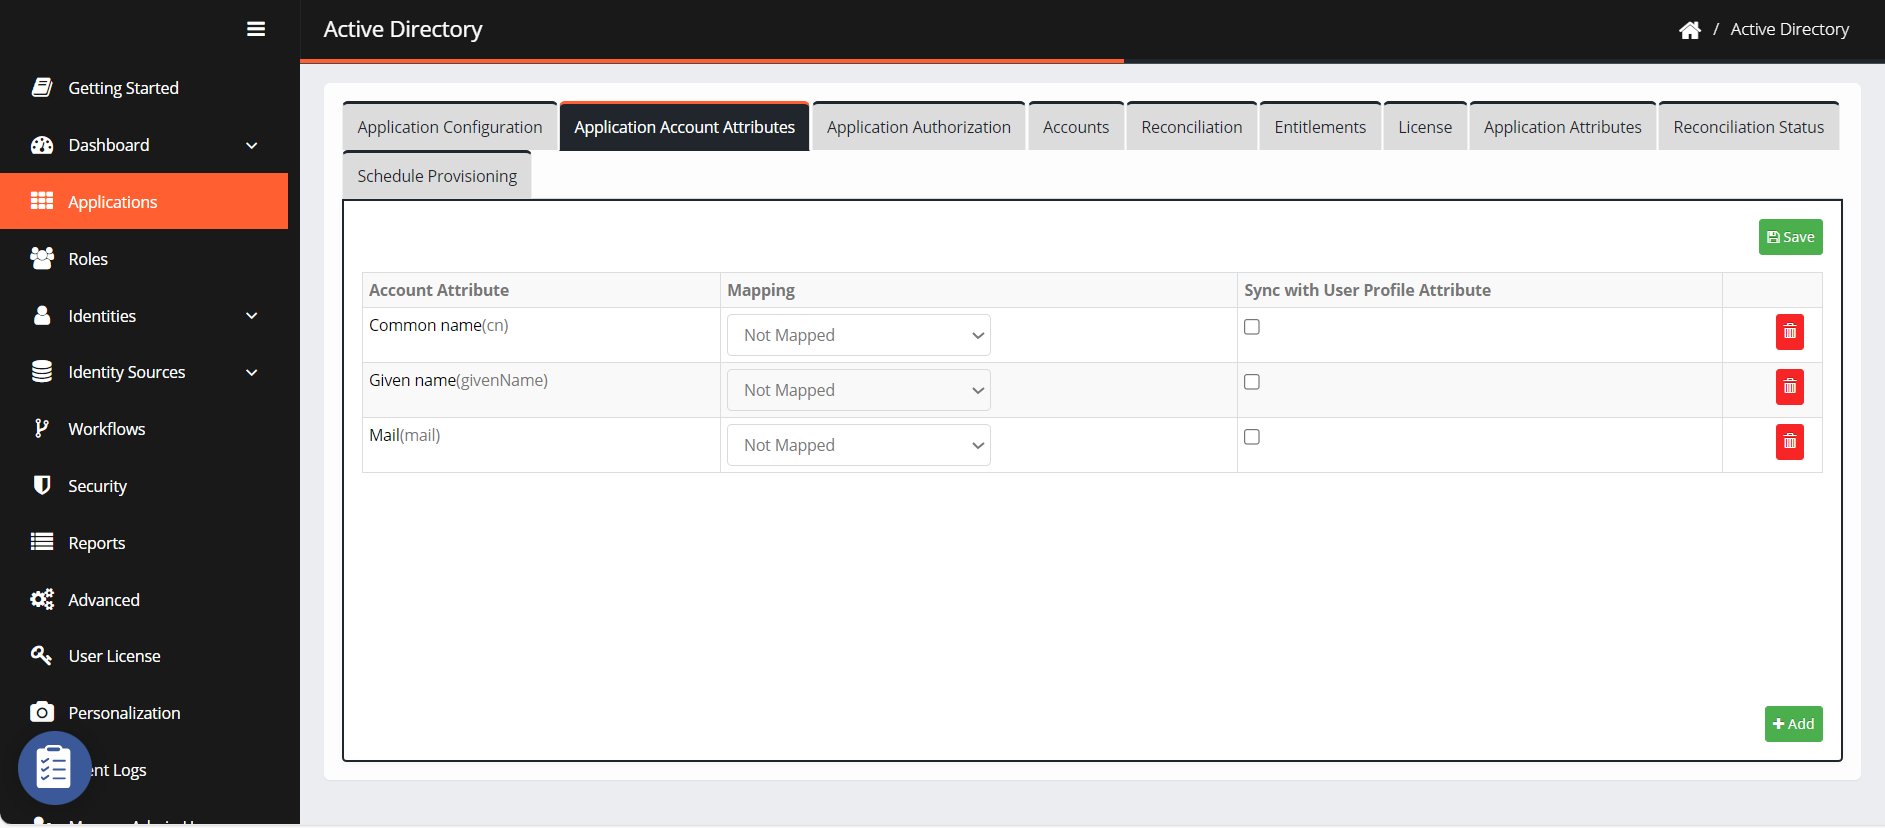
Select the Mapping method from the drop-down.
User Profile Attribute: When you choose this option, you need to define a user attribute that matches with Active Directory.
Important:
When you select Username as an account attribute, Sync with User Profile Attribute will be disabled.
Example of applying expression in SoT to Identity attribute mapping:
emailAddress – is a Cross identity attribute.
User_email – is a SoT dn attribute.
function getVal() {
if(USER.isAttrUnique('emailAddress',SOT.getAttribute('user_email')) == true) {
var fname = SOT.getAttribute('user_first_name');
var lname = SOT.getAttribute('user_last_name');
var empId = SOT.getAttribute('user_uid');
var newEmail = fname+"."+lname+empId+"@mailinator.com";
return newEmail;
}
return SOT.getAttribute('user_email');
}Example of applying expression in Directory to Identity attribute mapping:
function getVal() {
if(USER.isAttrUnique('emailAddress',DIR.getAttribute(‘email’)) == true) {
var fname = DIR.getAttribute(‘givenname');
var lname = SOT.getAttribute('sn');
var newEmail = fname+"."+lname+"@mailinator.com";
return newEmail;
}
return SOT.getAttribute('user_email');
}
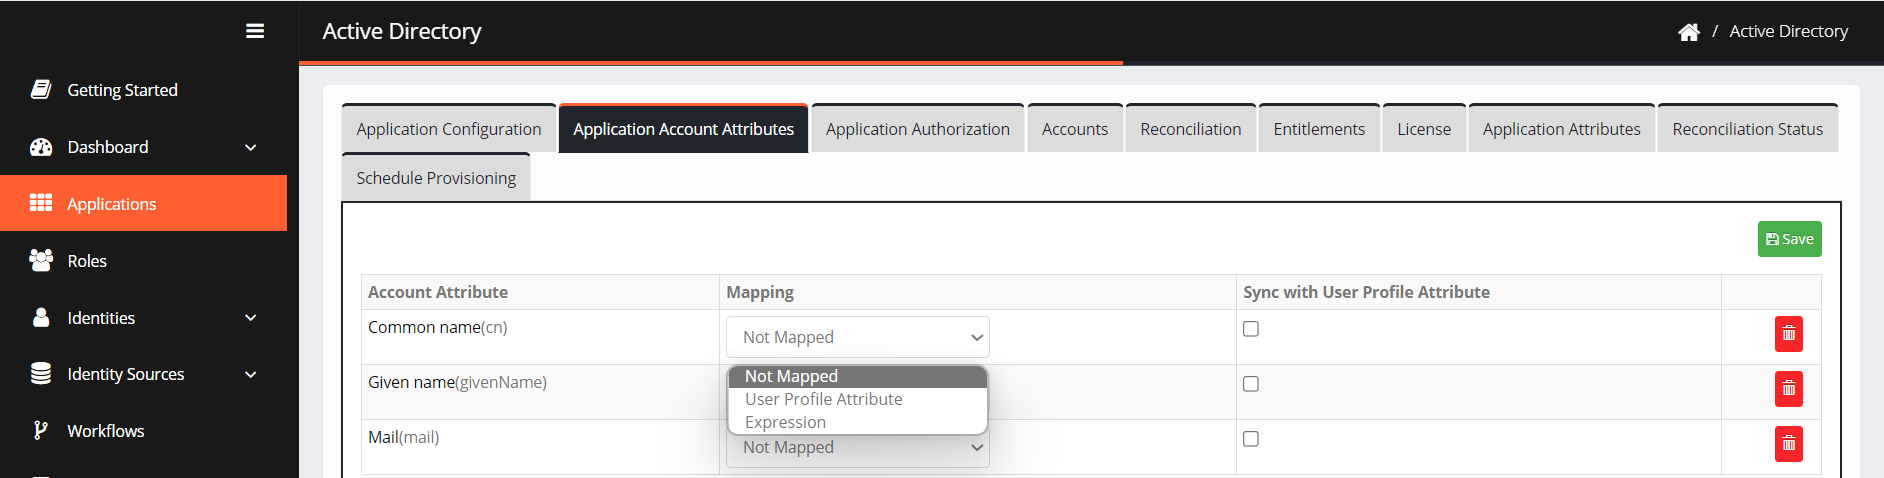
Sync with User Profile Attribute: Check the box to sync account attributes with user profile attributes.


Application Authorization
You can add roles and users and authorize them to access the applications.
As an administrator, CI allows you to select specific roles authorized to access an application.
To authorize roles, follow the steps:
Navigate to Application Authorization. The application authorization screen is displayed.

Click Authorize Role > Add Role. The Add Role screen is displayed.
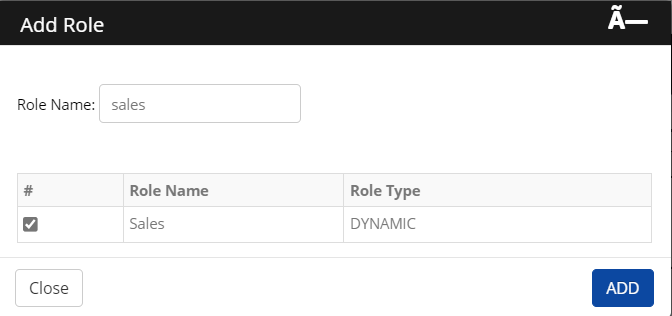
Enter a Role Name in the search field
Select a role from the results and then click Add.
The added role is displayed on the screen.


Information:
Based on the role type, it allows the user to select either static or dynamic.
Accounts
A yellow hat icon accompanies each Account ID, indicating whether it is a regular or privileged account. Also, it shows if the account status is dormant.
Icon | Description |
|---|---|
| This icon indicates the privileged account. |
| It indicates the dormant account. |


Navigate to Accounts.

Click Owned Accounts.
You can utilize a filter to organize the information according to user category, account status, and additional criteria.

To change a User Category to regular or privileged, select an account and then click Change User Category.

Enter the number of days to grant access and click Submit. The category will change to a Regular account.

Click Orphan Accounts. You will see the list of Orphan Accounts.
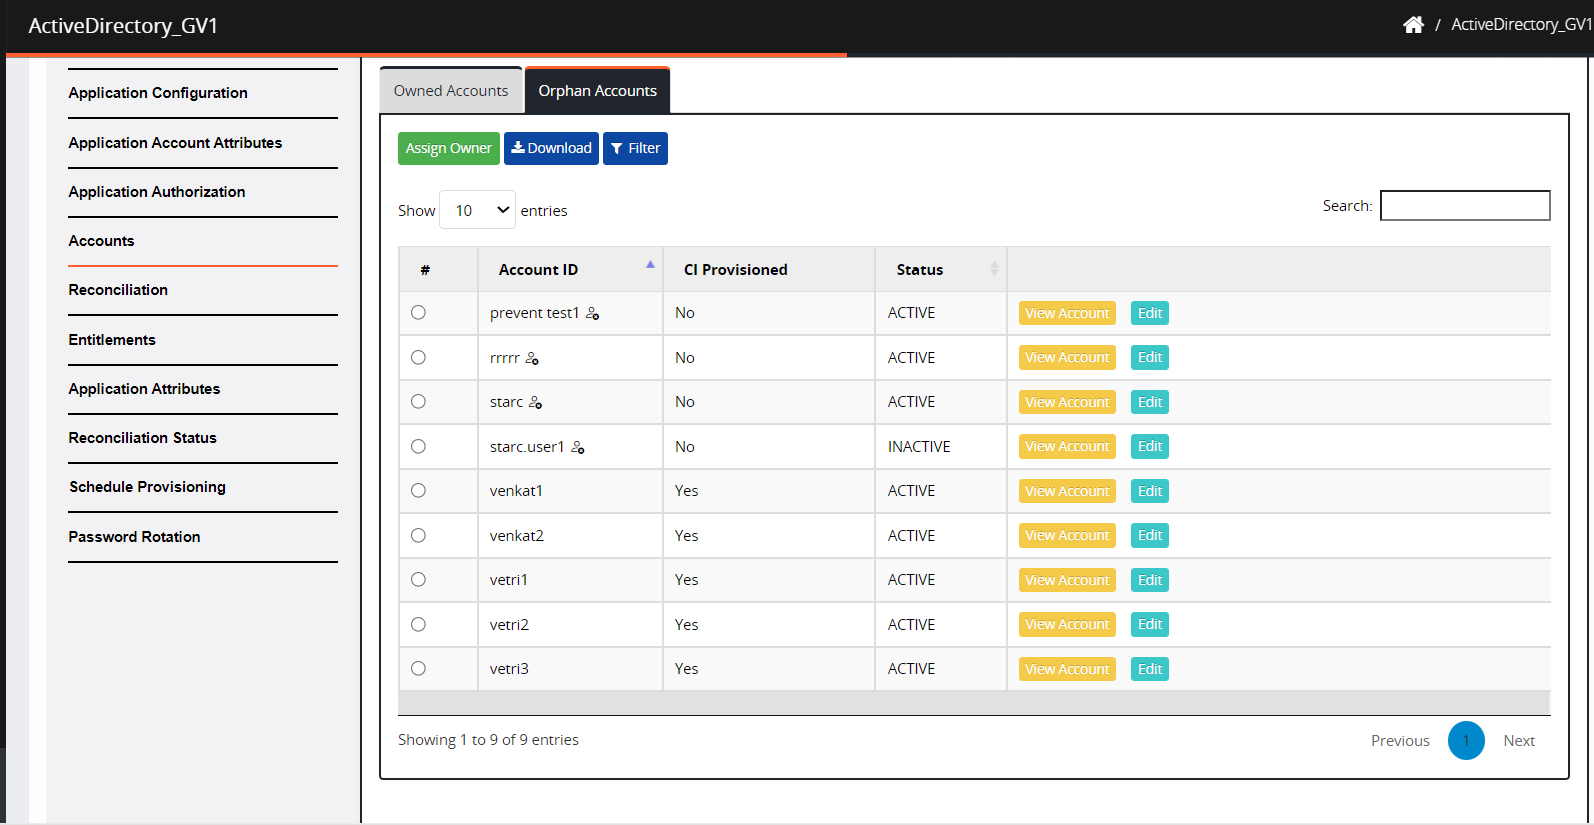
To link the orphan account to a single user manually:
Select an orphan account from the list (one at a time) and click Assign Owner.
Search for the username and select from the results.
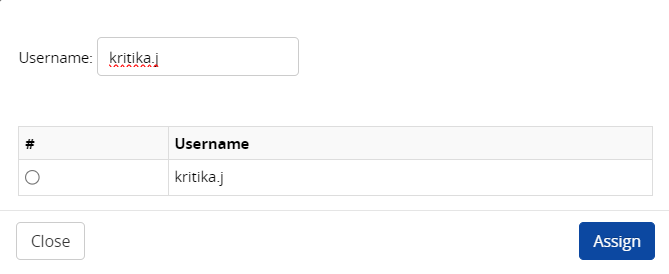
Click Assign. A message stating that “ Owner assigned successfully” will show.


Reconciliation
Reconciliation involves comparing and aligning accounts and entitlement information from the IGA application with the data present in Cross Identity. Throughout this process, the following operations are performed:
Import all accounts from the IGA application.
Import all entitlements from the IGA application.
Import the account-entitlement mapping information.
Assign owners to the new and orphan accounts based on the reconciliation rules.
Modify the existing owned and orphan accounts based on updated information from the IGA application.
Remove accounts and entitlements deleted from the IGA application from Cross Identity as well.
To configure reconciliation:
Navigate to Reconciliation.
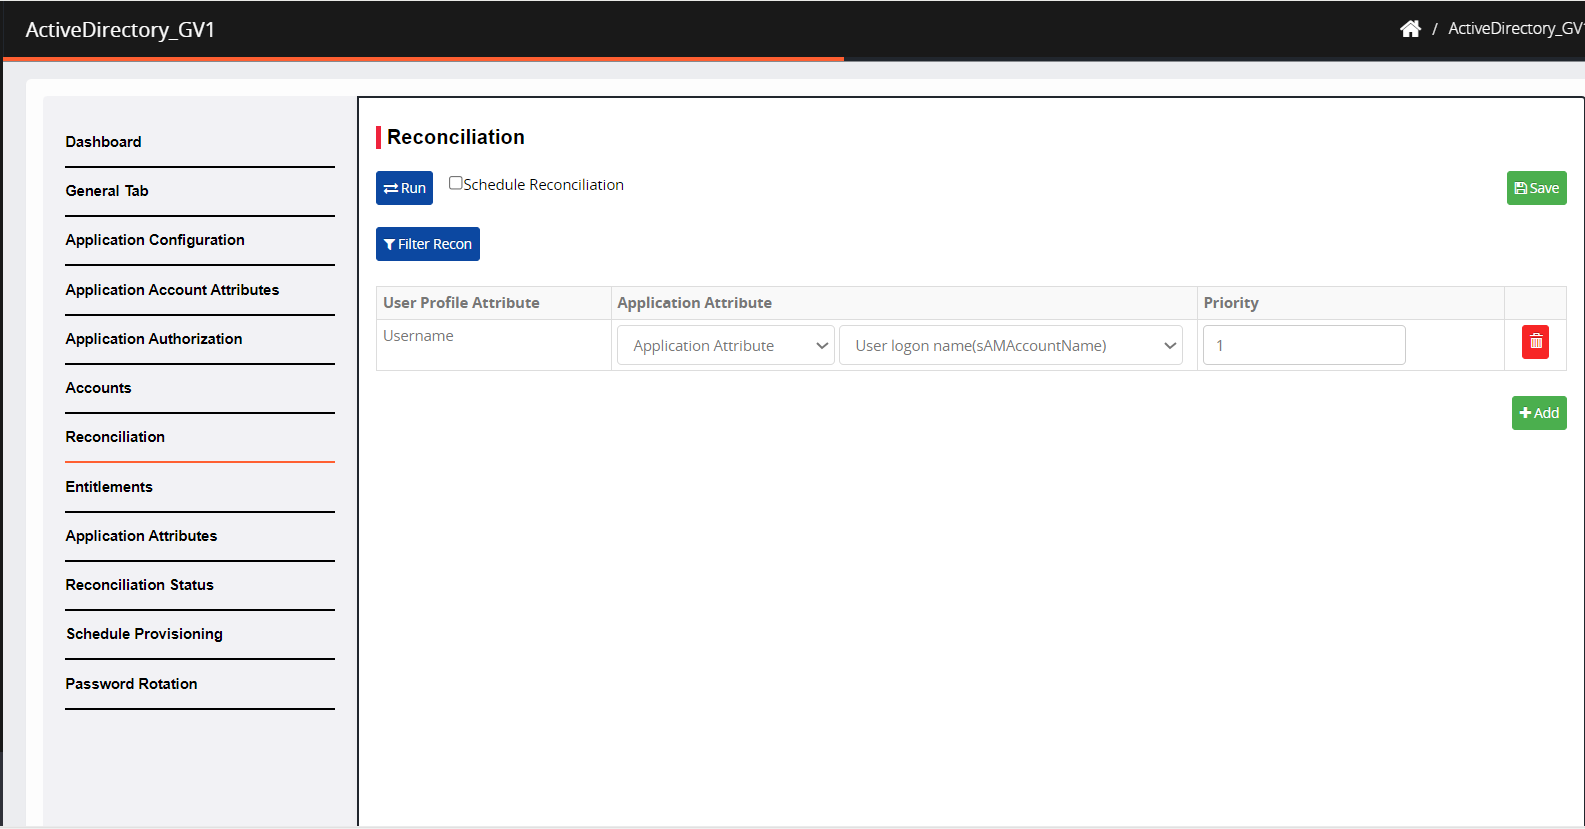
Check the Schedule Reconciliation box.
In the Run reconciliation every field, enter the time in minutes at which reconciliation should run, automatically.
Click Run. The connector is called, and it retrieves the data based on the flags.
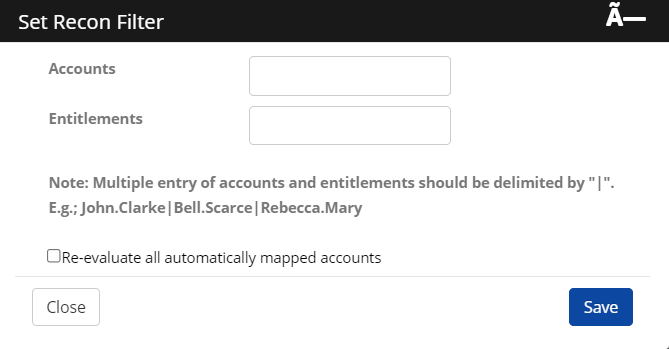
Click Filter Recon. The Set Recon Filter screen appears.
Specify Accounts and Entitlements.
Check the box Re-evaluate all automatically mapped accounts, to disconnect and reconnect all the links. After the reconciliation, if it's unchecked, the account-mapping rule is executed only for the new and orphan accounts (non-connected accounts).
After reconciliation, only the new and existing orphan accounts are evaluated for finding owners. Existing owned accounts are not re-evaluated.
Information:
Reconciliation will be done based on the revaluation of the attribute and will not be done by default.


Entitlements
Navigate to Entitlements. A yellow hat icon accompanies each entitlement name, indicating whether it is a regular or privileged entitlement.

Select an account to change an Entitlement Category to regular or privileged and click Change Entitlement Category.

Enter the number of days to grant access and click Submit. The category will change to a Regular account.

Click Entitlement Definition > Add Entitlement Definition.
Enter the following details in the dialog:

Entitlement Name: Enter the name of the Entitlement Definition.
Entitlement Key: Based on the Entitlement Key, data is fetched from the target application in the connector.
Entitlement Value: Enter the organizational unit.
Enter the Schema for entitlement conditions:
Attribute Name: Enter the Cross Identity Name you use as an attribute reference to retrieve data from the target application. It is also used to identify which attribute is part of the entitlement.
Attribute Display Name: Enter the Attribute Name as it appears in the application's User Interface.
Matching Account Attribute: Enter the attribute mapped to Cross Identity.
Marked for display? : If the condition (True or False) in this column is met, CI will identify if the user is part of this entitlement.
Click Add.
Export CSV: You can export the list of entitlements with the value of its custom attributes to a CSV file.
Import CSV: You can update the values of custom attributes in a CSV file and import them to update the corresponding value in Cross Identity.


View Entitlement Definition
To view Entitlement Definition:
Click Entitlement Definition.
The connector will check if the Entitlement Key exists in the target application and then fetch the entitlements from the target application. You can define multiple entitlement keys in this definition.Click View Schema to view the entitlement conditions.
Attribute Name: It is the Cross Identity Name you use as an attribute reference, to retrieve data from the target application. It is also used to identify which attribute is part of the entitlement. In the above screen, 'cn' is from the target application attribute mapped to the Common Name in CI.
Attribute Display Name: The Attribute Name appears in the application's User Interface.
Mapped Attribute: It is the attribute that is mapped to Cross Identity.
Marked for display?: Only if the condition (True or False), in this column is met, will CI identify if the user is part of this entitlement.
View Entitlement Details
Click View.

The following screen appears. Details about the entitlement are displayed on the screen along with the list of accounts assigned to the entitlement. The heading of the information displayed will differ from application to application. The below screen is shown for entitlement in Active Directory.
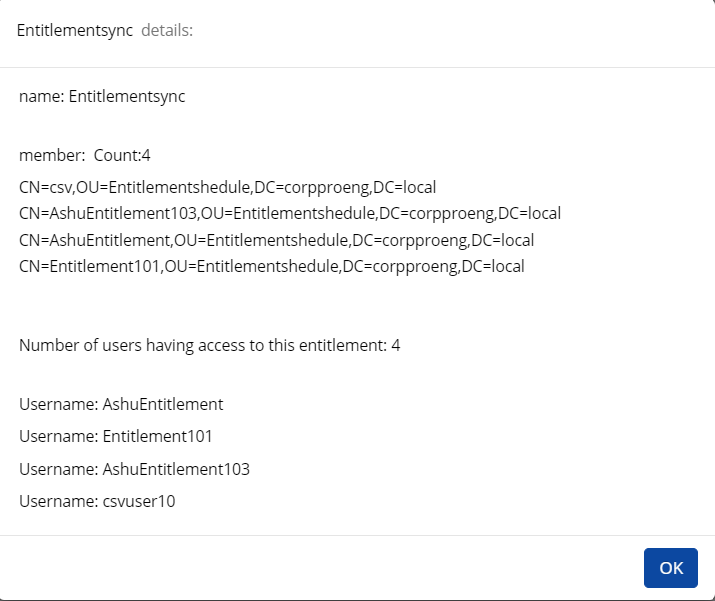


Name: It is the name of the entitlement.
Member: Lists the name of members who belong to this entitlement.
Number of users having access to this entitlement: It’s the number of users who have access to the entitlement in CI.
Application Attributes
After providing a connection with the IGA application, you need to find different attributes of the IGA application that should be mapped to the attributes of the CI application.
Navigate to Application Attributes.
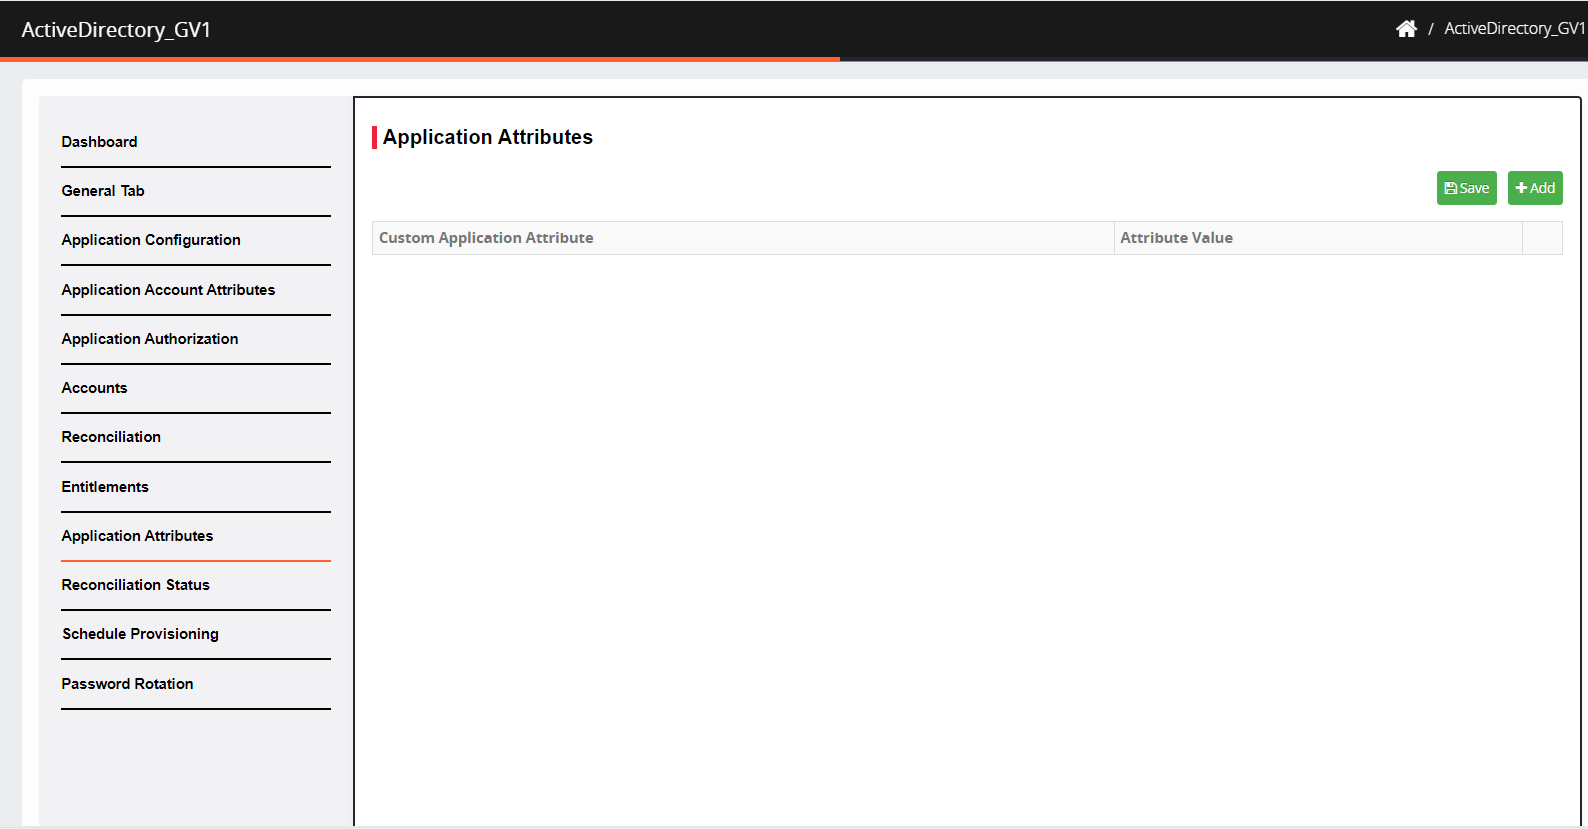
Click Add.
Select the custom attributes you want to map from the Cross Identity application to the target application.
Click Add. A “ Successfully added selected attributes” confirmation message is displayed.
Select an attribute from the drop-down list corresponding to the User Profile Attribute in Cross Identity or enter an Expression.
Select Evaluation Operation as Create, Modify, or Both from the drop-down list to apply the operation on the selected attribute.
Click Save.

Reconciliation Status
Navigate to Reconciliation Status.
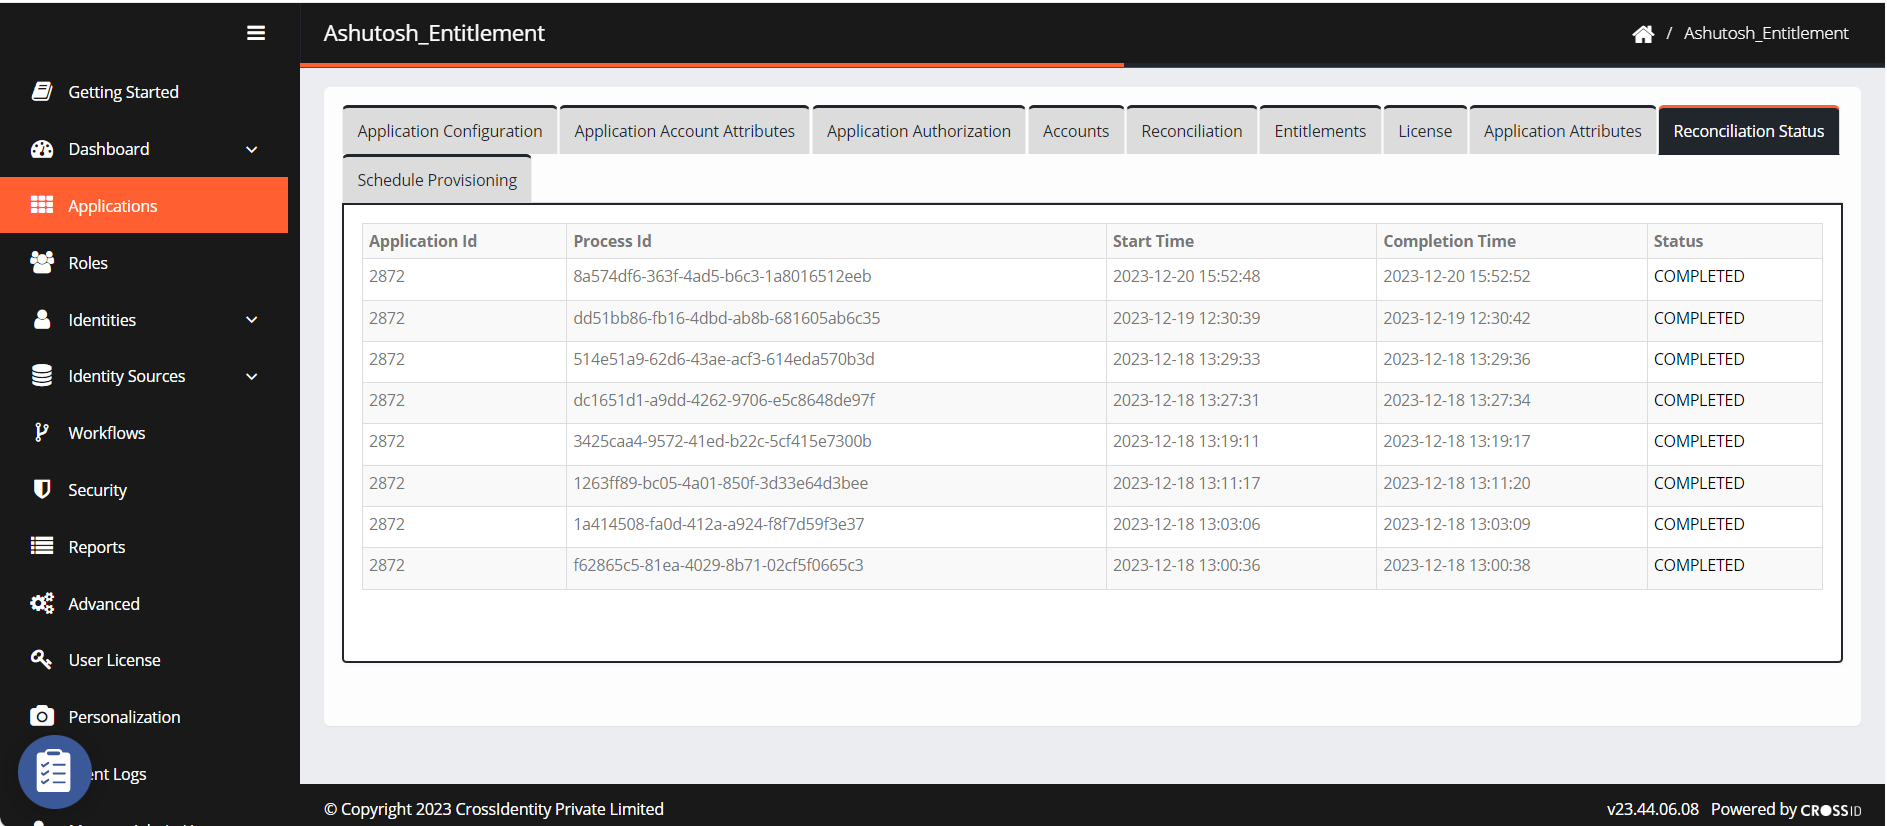
This window shows the reconciliation details like application ID, start and completion end time and the status.

Schedule Provisioning
It is a time-based approach for various operations like creating, modifying, suspending, restoring and deleting accounts, password sync, add entitlement and remove entitlement.
For example: When a user is created in Cross Identity, you can schedule the creation of the corresponding account in the target application.
Click the + button to expand the operation field. In this case, we are scheduling to create accounts.
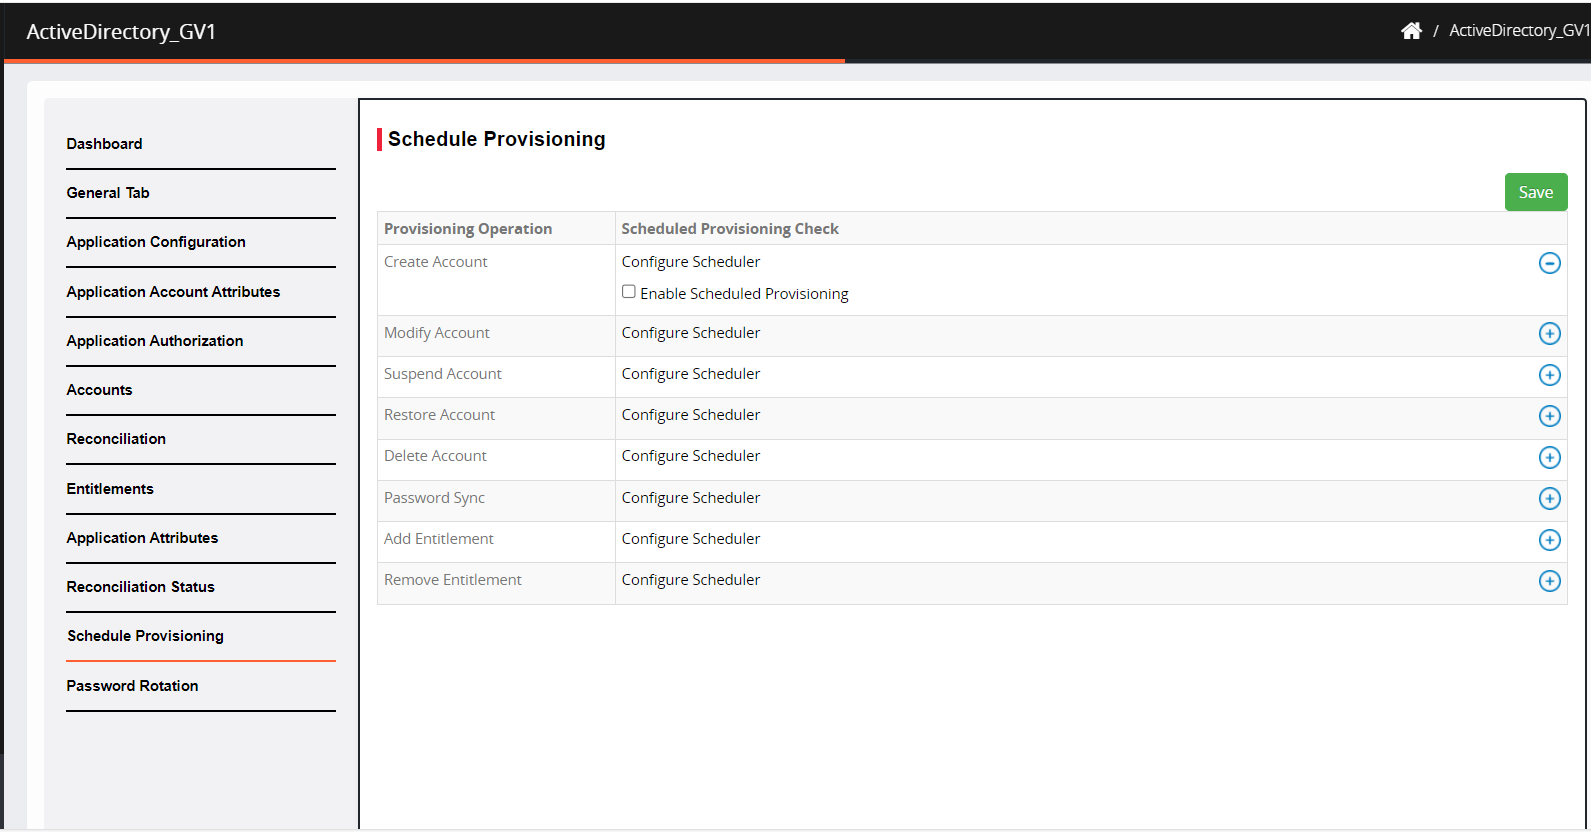
Check the box Enable Scheduled Provisioning. Uncheck means it creates the account instantaneously.
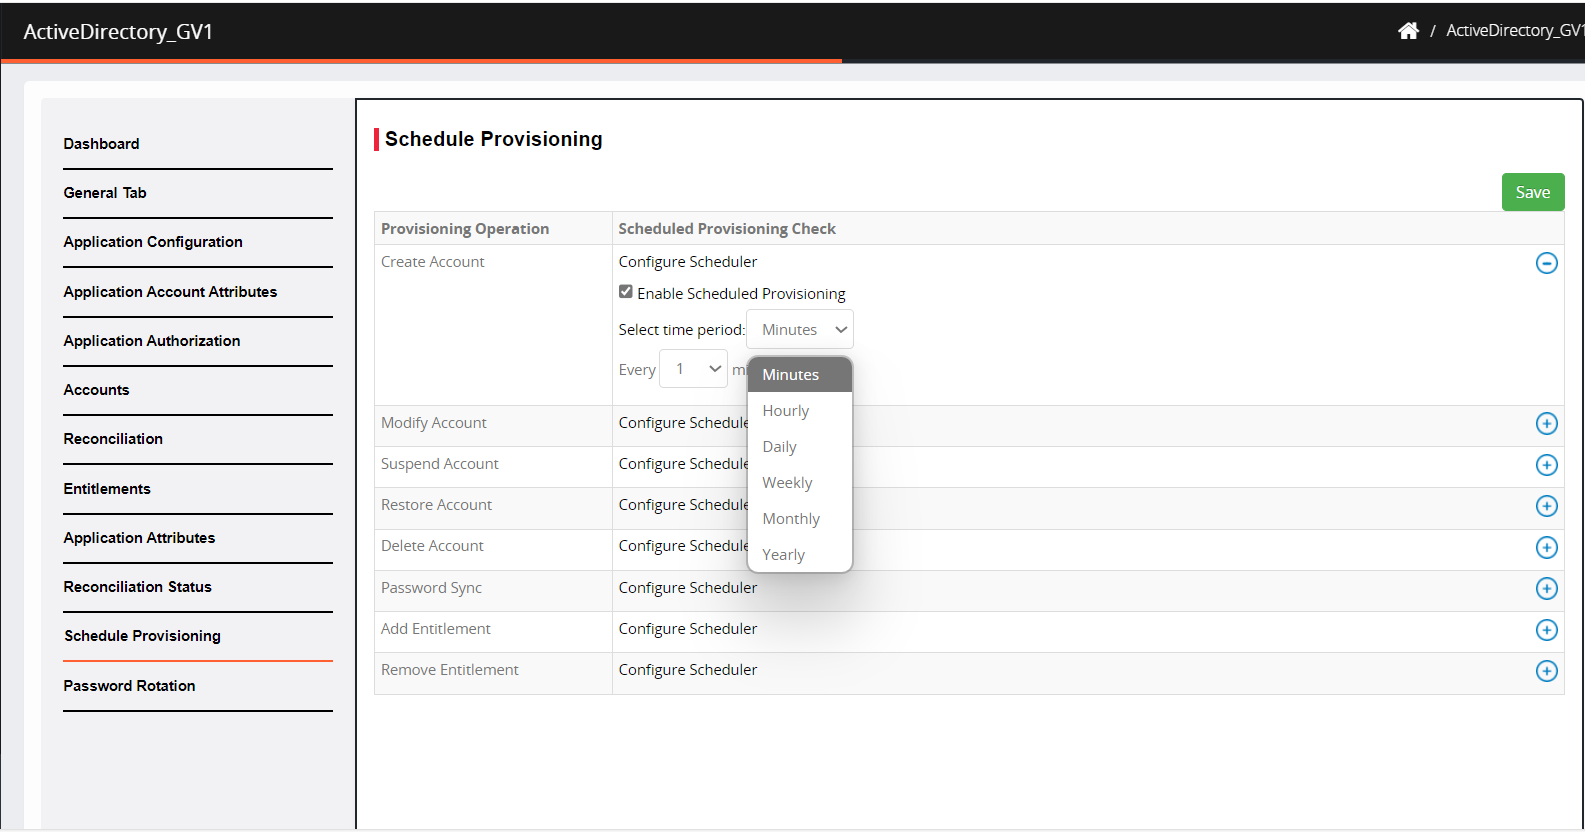
Select the period from the drop-down in minutes, hourly, daily etc. to configure the schedule as per requirement.
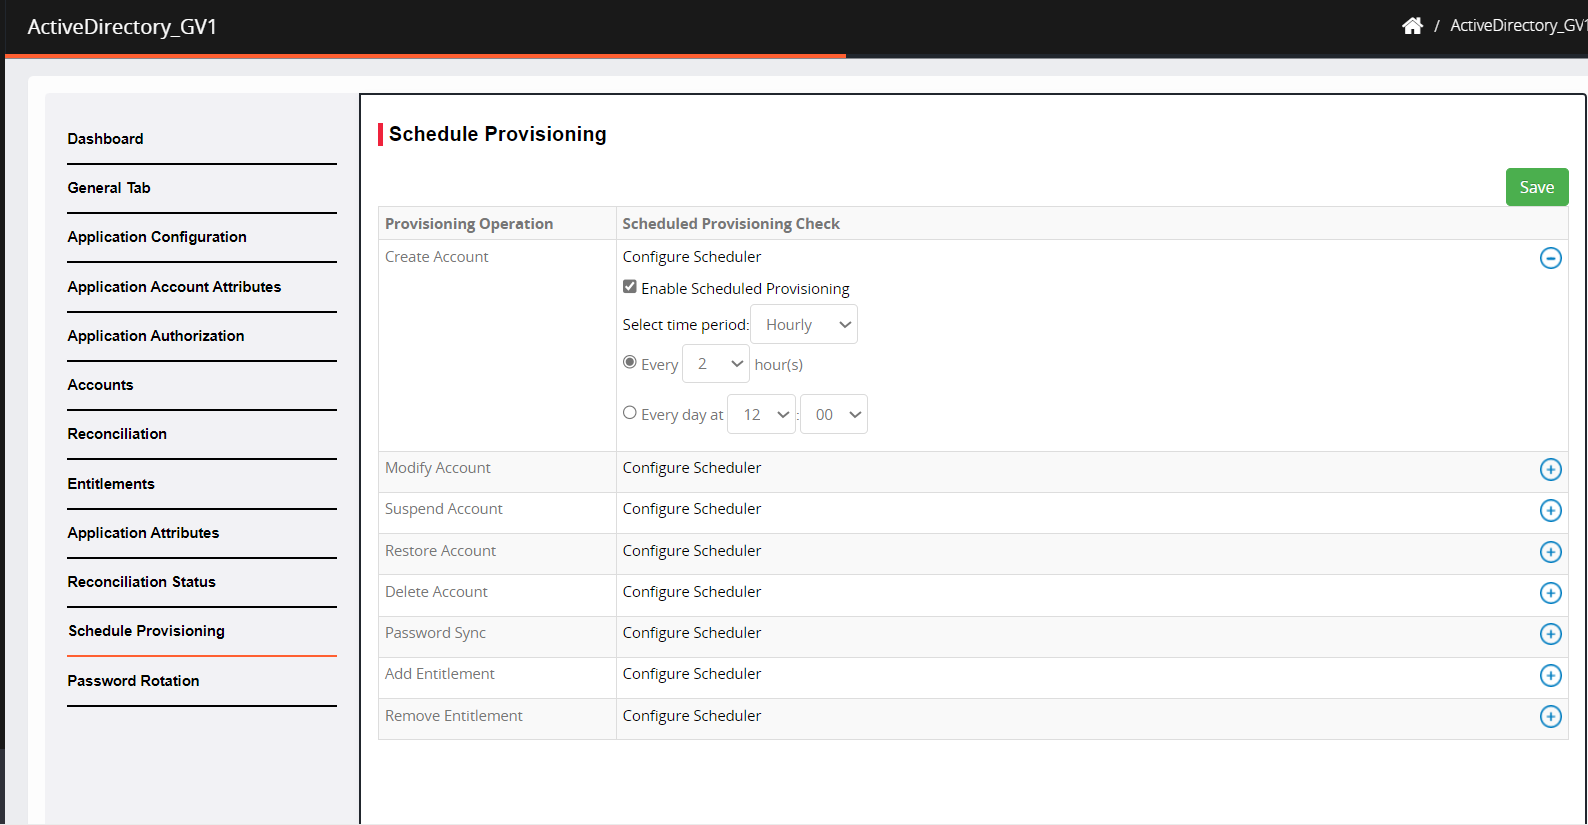
Click Save.


Password Rotation
Password rotation is a security measure that involves regular password updation to safeguard against unauthorized access to personal or business systems.
Click Enable Password Rotation.

Enter the duration in minutes to change the password. When a user accesses the application, they will be automatically logged in.


Was this article helpful?
.png)