- 24 Jun 2024
- 3 Minutes to read
- Print
- DarkLight
- PDF
RabbitMQ Installation - Message Queue
- Updated on 24 Jun 2024
- 3 Minutes to read
- Print
- DarkLight
- PDF
Overview
The outlined process ensures the successful installation and configuration of RabbitMQ on designated servers. Key outcomes include enhanced security through firewall adjustments, seamless connectivity between RabbitMQ, App servers, and databases, and the creation of an administrator user for simplified management via the RabbitMQ Management Web dashboard.
Installation Steps
Instead of the traditional approach in Reconciliation that uses REST API and a File-based System, a new reconciliation technique, Message Queue System (Rabbit MQ) has been introduced.
Note:
As per the architecture finalized, identify the server where the respective component is to be installed and configured.
Pre-requisites:
Server with a sudo non-root user.
If you have a firewall enabled, configure it to allow traffic on the ports used by RabbitMQ.
Ensure connectivity between RabbitMQ and App servers (Tomcat).
Ensure connectivity between RabbitMQ and the database.
Installation
Steps to install the RabbitMQ server on RHEL:
Install Erlang with the below command:
sudo yum install erlang
Install RabbitMQ server:
sudo yum install epel-release
sudo yum install rabbitmq-server
Confirm the version of RabbitMQ installed:
$ rpm -qi rabbitmq-server
Now that you have RabbitMQ installed on your Fedora, start and enable the service to start on system boot:
sudo systemctl start rabbitmq-server
sudo systemctl enable rabbitmq-server
You can enable the RabbitMQ Management Web dashboard for easy management:
sudo rabbitmq-plugins enable rabbitmq_management
The Web service should be listening on TCP port 15672, verify this via the below command:
# ss -tunelp | grep 15672
Note:
If you have an active Firewall service, allow ports 5672 and 15672.
Create an Administrator user for RabbitMQ
Setup an administrator user account for accessing the RabbitMQ server management console via the below commands:
sudo rabbitmqctl add_user mqadmin Admin123*
sudo rabbitmqctl set_user_tags mqadmin administrator
Steps to install the RabbitMQ server on Ubuntu:
Update the package list
sudo apt update
Install Erlang
sudo apt install erlang
Add RabbitMQ APT Repository
sudo apt-key adv --keyserver "keyserver.ubuntu.com" --recv-keys "0x6B73A36E6026DFCA"
sudo tee /etc/apt/sources.list.d/bintray.rabbitmq.list <<EOF
deb https://dl.bintray.com/rabbitmq-erlang/debian bionic erlang
deb https://dl.bintray.com/rabbitmq/debian bionic main
EOF
Update Package List Again
sudo apt update
Install RabbitMQ Server
sudo apt install rabbitmq-server
Start RabbitMQ Service
sudo systemctl start rabbitmq-server
Enable RabbitMQ Service to Start on Boot
sudo systemctl enable rabbitmq-server
Check RabbitMQ Status
sudo rabbitmqctl status
Create a RabbitMQ Admin User (Optional)
You can create an admin user for the RabbitMQ Management Plugin. Replace your_username and your_password with your desired values.
sudo rabbitmqctl add_user your_username your_password
sudo rabbitmqctl set_user_tags your_username administrator
sudo rabbitmqctl set_permissions -p / your_username ".*" ".*" ".*"
Install RabbitMQ Management Plugin (Optional)
This step is optional but recommended for managing RabbitMQ through a web interface.
sudo rabbitmq-plugins enable rabbitmq_management
Configuration Steps
Create Queue from RabbitMQ Management Dashboard.
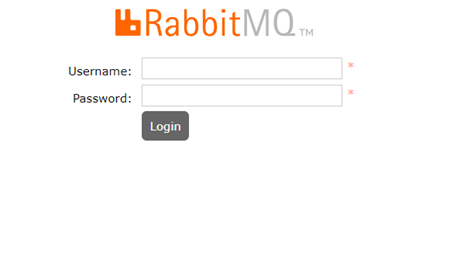
Login with this admin username and the password assigned.
http://RabbitMQserver-IPAddress:15672

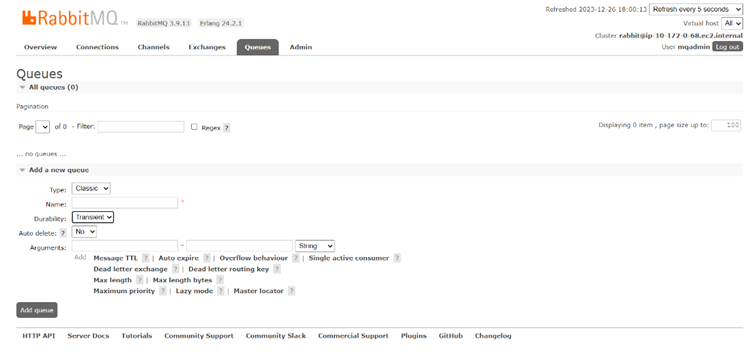
Go to the Queues tab and create a new queue, keep all default values while creating new queue except two fields below.
Name: CIRabbitMQ
Type: Classic
Durability: Transient

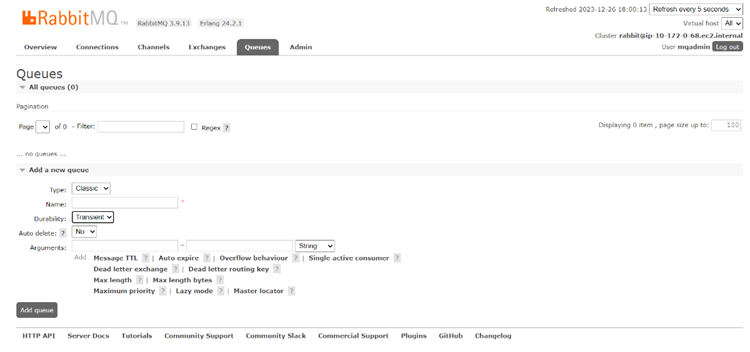
Go to the Admin tab and click on the admin user which was created earlier.
Provide the permission to "can access virtual hosts" as "/".

Setting up the RabbitMQReceiver.jar file:
Get the rabbitMQ receiver .jar file from the CI team.
Open the receiver file using 7-zip (preferably).

BOOT-INF -> classes -> mq -> application.properties
Edit the application.properties as follows:

Note:
Make sure to use the correct DB_URL, username and password for CI DB, as well as Audit DB. (Same as used in hcp.properties)
Create a new folder in the CI server. Example, /opt/MQReceiver and copy the .jar file in the directory.
Create a new directory named logs, /opt/MQReceiver/logs
Run the following command while you’re in the MQReceiver directory:
java -jar CIDAgentRabbitMQReceiver.jar > logs/logs.out 2>&1 &

Outcome
The document ensures a successful RabbitMQ installation with enhanced security and seamless connectivity on designated servers. Key outcomes include the establishment of firewall rules, the creation of an administrator user, and the configuration of RabbitMQ for optimal performance, enabling efficient message queue-based communication between applications.
Operations and Maintenance
These commands are essential for managing RabbitMQ operations, such as starting, stopping, restarting the service, and checking the status.
To start RabbitMQ services:
sudo systemctl start rabbitmq-server
To stop RabbitMQ services:
sudo systemctl stop rabbitmq-server
Check RabbitMQ Status
sudo rabbitmqctl status
To restart RabbitMQ services:
sudo systemctl restart rabbitmq-server
Enable RabbitMQ service to start on boot
sudo systemctl enable rabbitmq-server
Disable RabbitMQ service to start on boot
sudo systemctl disable rabbitmq-server
View RabbitMQ Logs
sudo journalctl -u rabbitmq-server
.png)


.png)