- 24 Jun 2024
- 2 Minutes to read
- Print
- DarkLight
- PDF
CI Cache and Queue Setup
- Updated on 24 Jun 2024
- 2 Minutes to read
- Print
- DarkLight
- PDF
Overview
In this document we will see how to set up the Cross Identity’s Cache system.
Cache Server – Installation
HazelCast is a caching server where you can set up an independent server.
Note:
As per the architecture finalized, identify the server where the respective component is to be installed and configured.
Pre-requisites:
Server with a sudo non-root user.
If you have a firewall enabled, configure it to allow traffic on the ports used by Hazelcast.
Ensure connectivity between Hazelcast servers and App servers (Tomcat).
Ensure connectivity between hazelcast and database.
The following are the steps to install standalone Hazelcast server setup:
Download the hazelcast-3.12.8.zip in the /opt directory:
Information:
This package will be shared with a document.
List the files using 1s command.
Unzipping the file using unzip hazelcast-3.12.8.zip command.
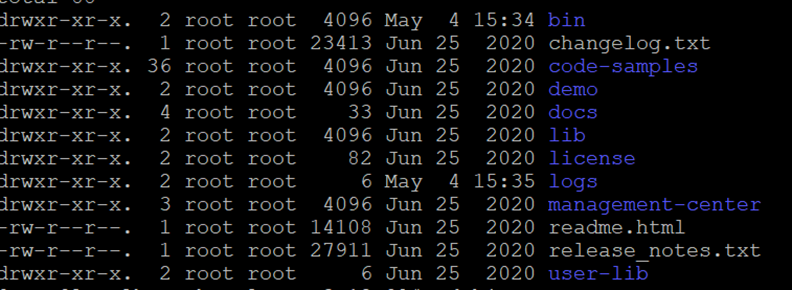
List the unzipped file using 1s command.
Add the classpath using the following command:
export CLASSPATH=${CLASSPATH}:${PWD}:hazelcast-3.12.8/lib/hazelcast- 3.12.8.jar
Go to the bin directory /opt/hazelcast-3.12.8/bin/ and edit hazelcast.xml file, search for word dev and change the group name to your environment name onprem (prod, qa, and so on).
<group>
<name> dev <name> // change dev to onprem;
</group>

Create a log file under /opt directory using the following command:
cd hazelcast-3.12.8
mkdir logs
Type ll to display log folder:

Go inside / bin directory and copy the following command:
bash /opt/hazelcast-3.12.8/bin/start.sh > /opt/hazelcast- 3.12.8/logs/log.txt 2>&1 &
cd ..
cd logs
Type ll to display log file:

Start the Hazelcast server using the below command:
./start.sh > /opt/hazelcast-3.12.8/logs/log.txt 2>&1 &
Cache Server – Configuration
Go to MySQL database and perform the database query as follows:
Information:
5701 port is listening, make sure you open 5701-5800 ports between CI and HazelCast Server. Also, in fluidiam_config_properties table update Hazelcast server IP, Groupname and server count.
hazelcast_public_ip1: enter Hazelcast server ip groupName: enter the groupname (onprem, uat, prod etc)
hazelcast_servers_count: 1 (as we are setting up this as standalone)
use CID_databasename;
select * from fluidiam_config_properties;
update fluidiam_config_properties set config_value = <Hazelcast_serverIP> where config_key= ‘hazelcast_public_ip1’;
insert into fluidiam_config_properties (config_key,config_value) values('groupName','onprem');
insert into fluidiam_config_properties (config_key,config_value) VALUES('hazelcast_servers_count','1');
select * from fluidiam_config_properties;

Optional:
If there are more than one Cache node (Hazelcast node), execute the following commands in the same table:
INSERT INTO fluidiam_config_properties (config_key, config_value)
VALUES ('hazelcast_public_ip2', <hazelcast_node2_IP>);
Update the count of servers based on the number of nodes.
UPDATE fluidiam_config_properties
SET config_value = '2'
WHERE config_key = 'hazelcast_servers_count';
Outcome
The expected outcome would be a configured and running Hazelcast caching server integrated with Cross Identity's Cache system.
Operations and Maintenance
To start the Hazelcast server:
Navigate to Hazelcast installation directory
Start Hazelcast server
./start.sh
To stop the Hazelcast server:
Navigate to Hazelcast installation directory
Start Hazelcast server
./stop.sh
Check Hazelcast cluster status:
Use Hazelcast Management Center or
Connect to Hazelcast instance using a client tool
Alternatively, you can use the hazelcast-client script
Located in the bin directory to connect to the cluster
./hazelcast-client
View Hazelcast logs:
Navigate to the logs directory
View the Hazelcast log file
cat log.txt
.png)


.png)