Deployment of WAM for .Net Based Application
- 29 Jan 2024
- 1 Minute to read
- Print
- DarkLight
- PDF
Deployment of WAM for .Net Based Application
- Updated on 29 Jan 2024
- 1 Minute to read
- Print
- DarkLight
- PDF
Article summary
Did you find this summary helpful?
Thank you for your feedback
The following are the deployment steps of WAM .Net based application:
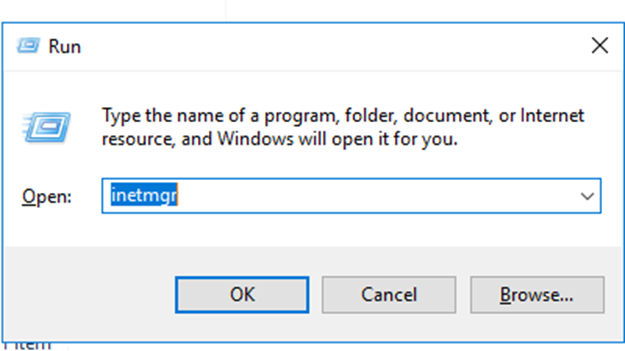
- Run inetmgr command in command prompt and launch IIS Manager.
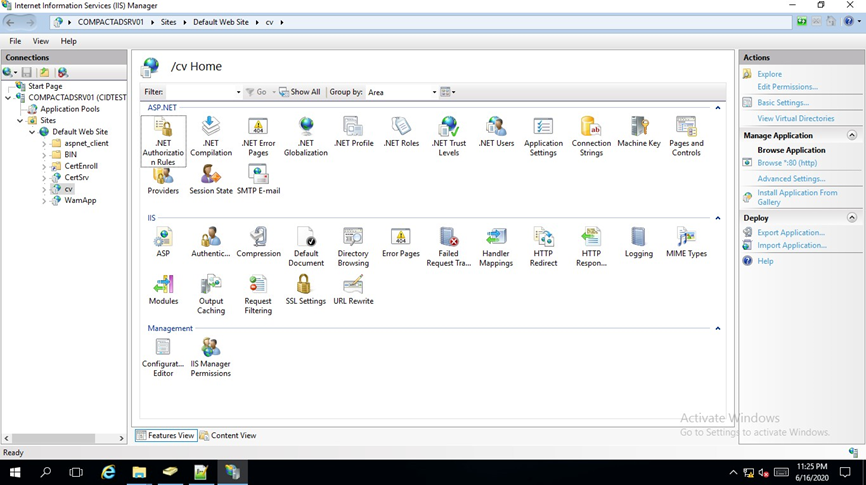
- The IIS Manager console is displayed.
- The .NET application you are modifying is listed under Sites. CV is the application which we are going to protect using WAM. Click on CV to display the menu items. Also, click on Explore link.
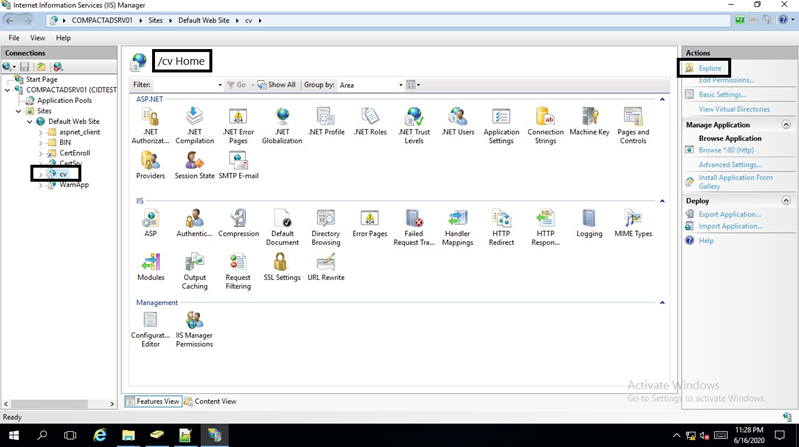
- On clicking on the Explore link, the folder where application specific files are stored will be opened.
- Copy the ILantusWAM.dll file in bin folder.

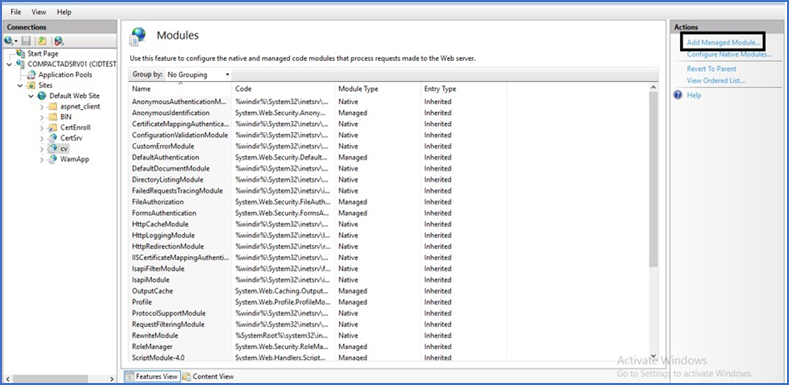
- On the IIS Manager screen, double-click on Modules.
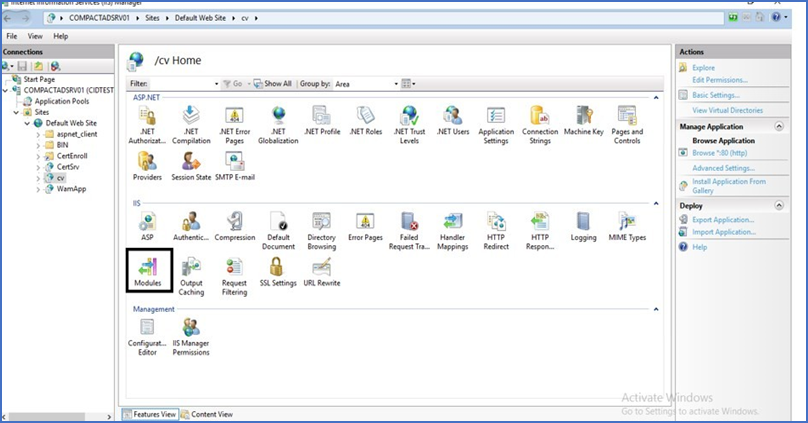
- On the right-pane, click Add Managed Module link.
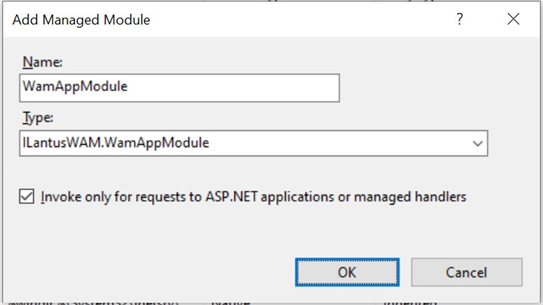
- Enter the following details and click OK.
- Name: WamAppModule
- Type: ILantusWAM.WamAppModule
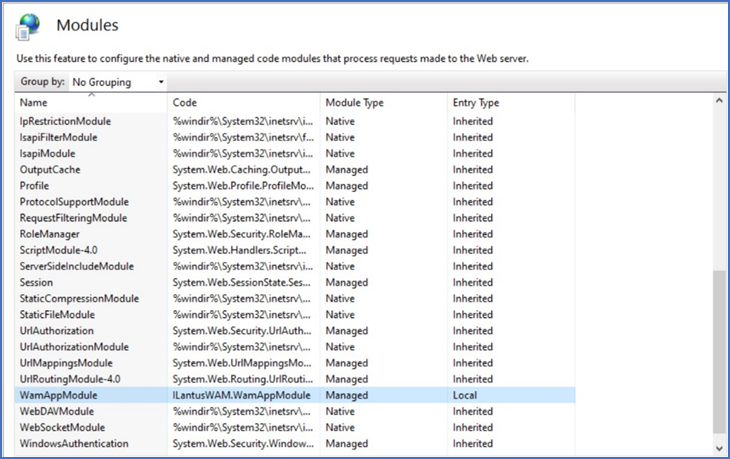
- The newly added Module is added as one of the Modules.
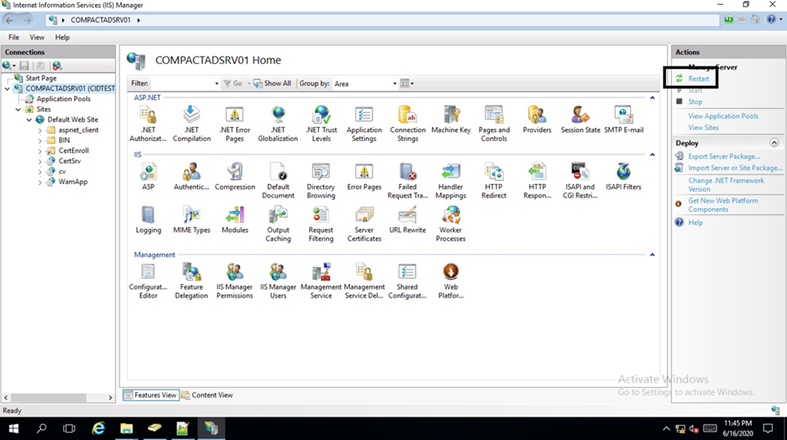
- Click on Restart link to restart the server.
- Create a folder under C:\ilantus and paste ciwam.txt and cilog.txt file in it. Ensure that the file has read and write permissions. Edit ciwam.txt file and provide proper values.
Note: To enable logging, a registry string value name 'wam' needs to be created in the following location:
Computer\HKEY_LOCAL_MACHINE\SOFTWARE\Ilantus\Logging
Set the value as true. To disable the logging, set the value as false.
Information:
ciwam.txt file is equivalent to ciwam.properties file for Java based applications.
Was this article helpful?
.png)


.png)